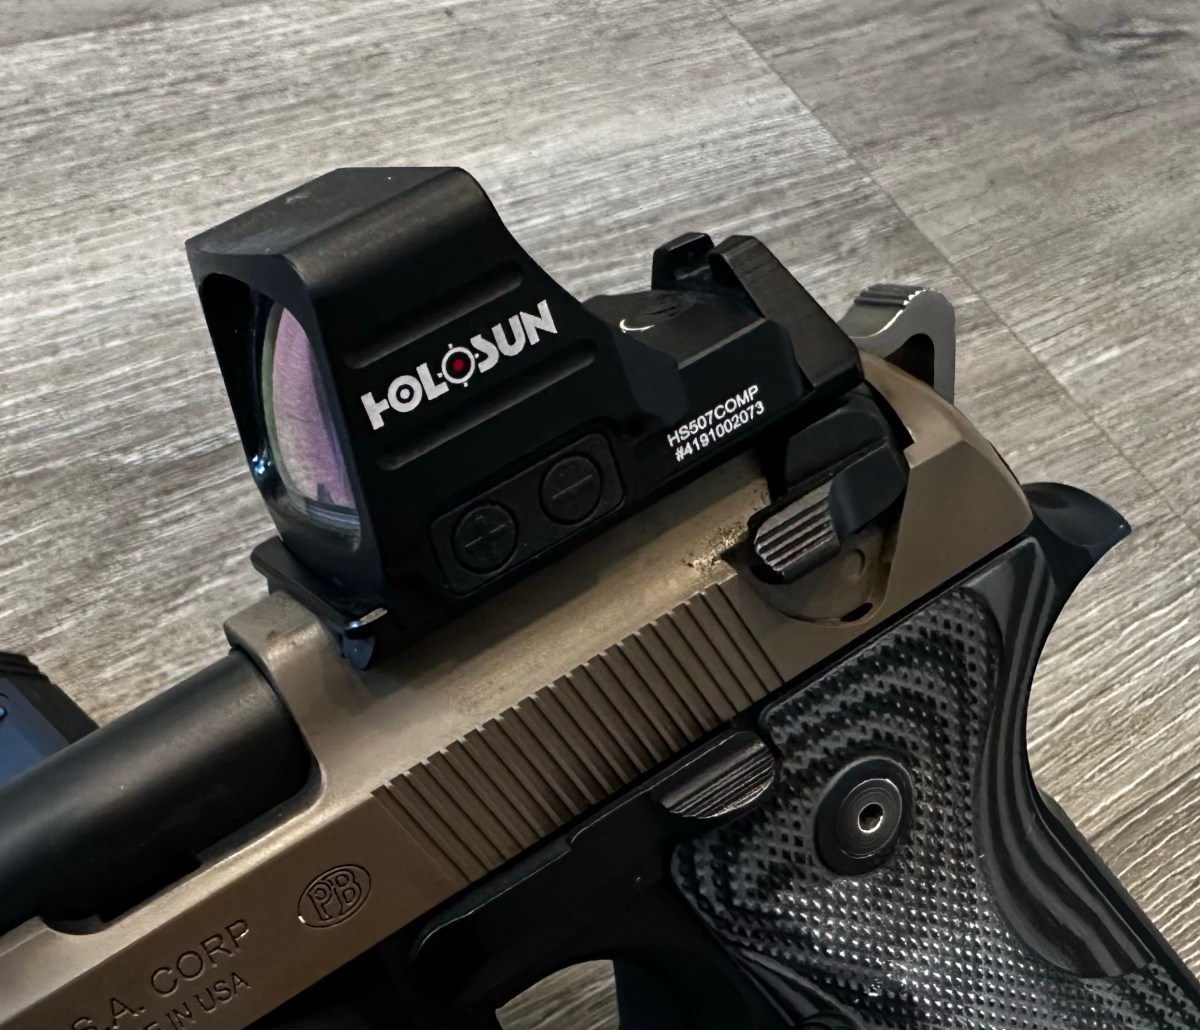
In the world of USPSA, every advantage matters. Competitive shooters constantly seek ways to boost their performance and gain an edge over their opponents, and upgrading their guns is an important part of that process. Personally, I began my USPSA journey with a Glock 34 and a few aftermarket parts to include a 15lb. recoil spring/tungsten guide rod, a Timney Alpha competition trigger, a Holosun 507c optic, and a stippled frame. The G34 shot great during my first matches, and I was content with what I had at the time. I then had a chance to talk to an Master class Carry Optics shooter, which got the gears turning: he mentioned that a lot of A/M/GM shooters shoot metal frame guns for a reason. I thought about what he said, and remembered that I owned a Beretta M9A1 that had been sitting in my safe for the past four years… with less than 400 rounds through it. I decided that instead of buying the new CZ that’s has become very popular with competitors, I was going start shooting my M9 and “save” some money. In order to make it Carry Optics ready, I decided to upgrade some things at the same time; I had no idea that that decision would turn this pistol into the most expensive, flat-shooting, and reliable handgun I own.
Trigger
A high-quality trigger package is a sensible upgrade for a competition gun. Langdon Tactical offers a range of trigger enhancements that significantly improve the M9A1’s trigger pull. I opted to buy the “Trigger in a Bag” with the NP3 coating; the options I chose for this kit included the following:
– Beretta Elite II Hammer – LTT optimized Performance Trigger Bar – 12lb. hammer spring
These parts are meant to reduce pre-travel and over-travel, with ~3lb. SA and ~5.5lb. DA trigger pulls, and provide a crisper reset. I also added a Volker Precision Flat Faced Trigger, which offers a substantial improvement in trigger control compared to the stock Beretta part. The wider and flatter surface area of this design ensures consistent finger placement shot after shot. With these two upgrades combined, I’ve experienced a more intuitive and precise trigger pull, resulting in improved accuracy and less flinching; all of this creates a smoother and more predictable trigger that ensures more precise shots, quicker follow-ups, and ultimately, faster stages. Compared to the Timney trigger in my G34, the Langdon trigger has a better reset, virtually zero take up in SA, and no over travel. Essentially the SA feels like a nice 1911 trigger.
Ergonomics
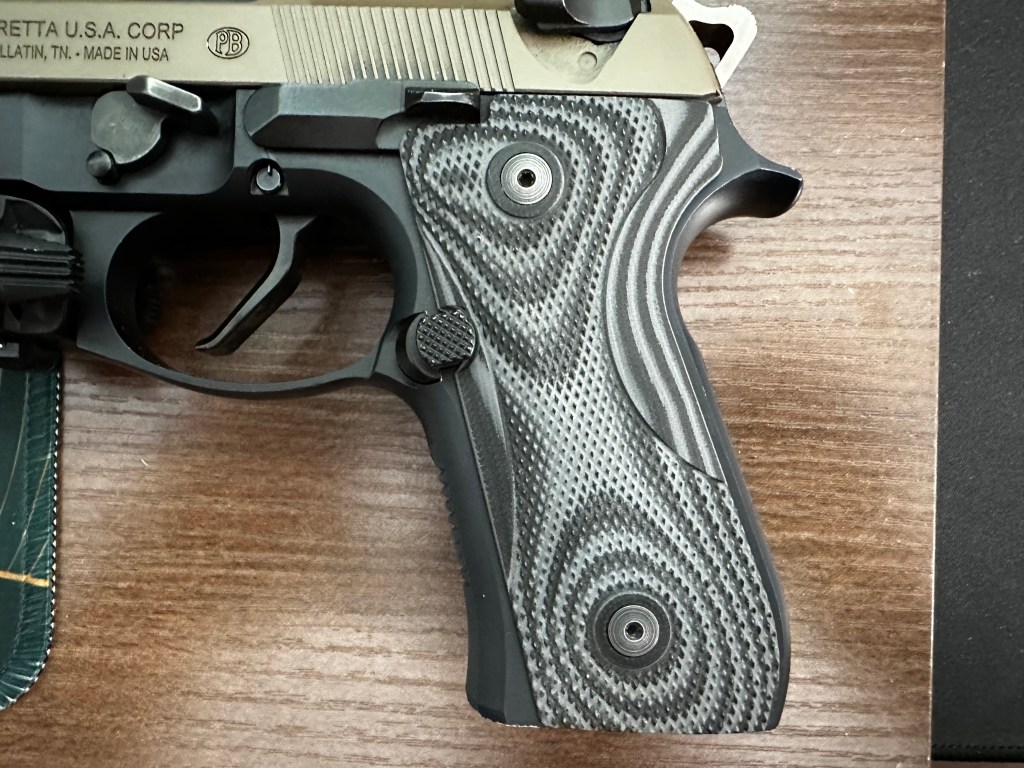
In a fast-paced match environment, it’s essential to have a firearm that fits the shooter’s hand comfortably and allows for quick target acquisition. I have smaller hands, so I decided to go with the thin checkered grips from LOK Grips. I also installed the Beretta Competition Self-Locking Disassembly Lever for my support hand thumb, and a Wilson Combat Steel guide rod with a 12.5-pound recoil spring. By reducing grip size, having a place to allow my support thumb to provide extra support, and a lighter recoil spring, I have experienced better control and improved overall handling. This is the one area I think my G34 is slightly better. Having an all plastic frame allows me to have it fully stippled so I have grip pretty much everywhere my skin touches the frame, on the Beretta I only have grip on the Lok grips and the disassemblely lever. With that being said I have be training more with the Beretta and it has become less of an issue the more I shoot with the Beretta.
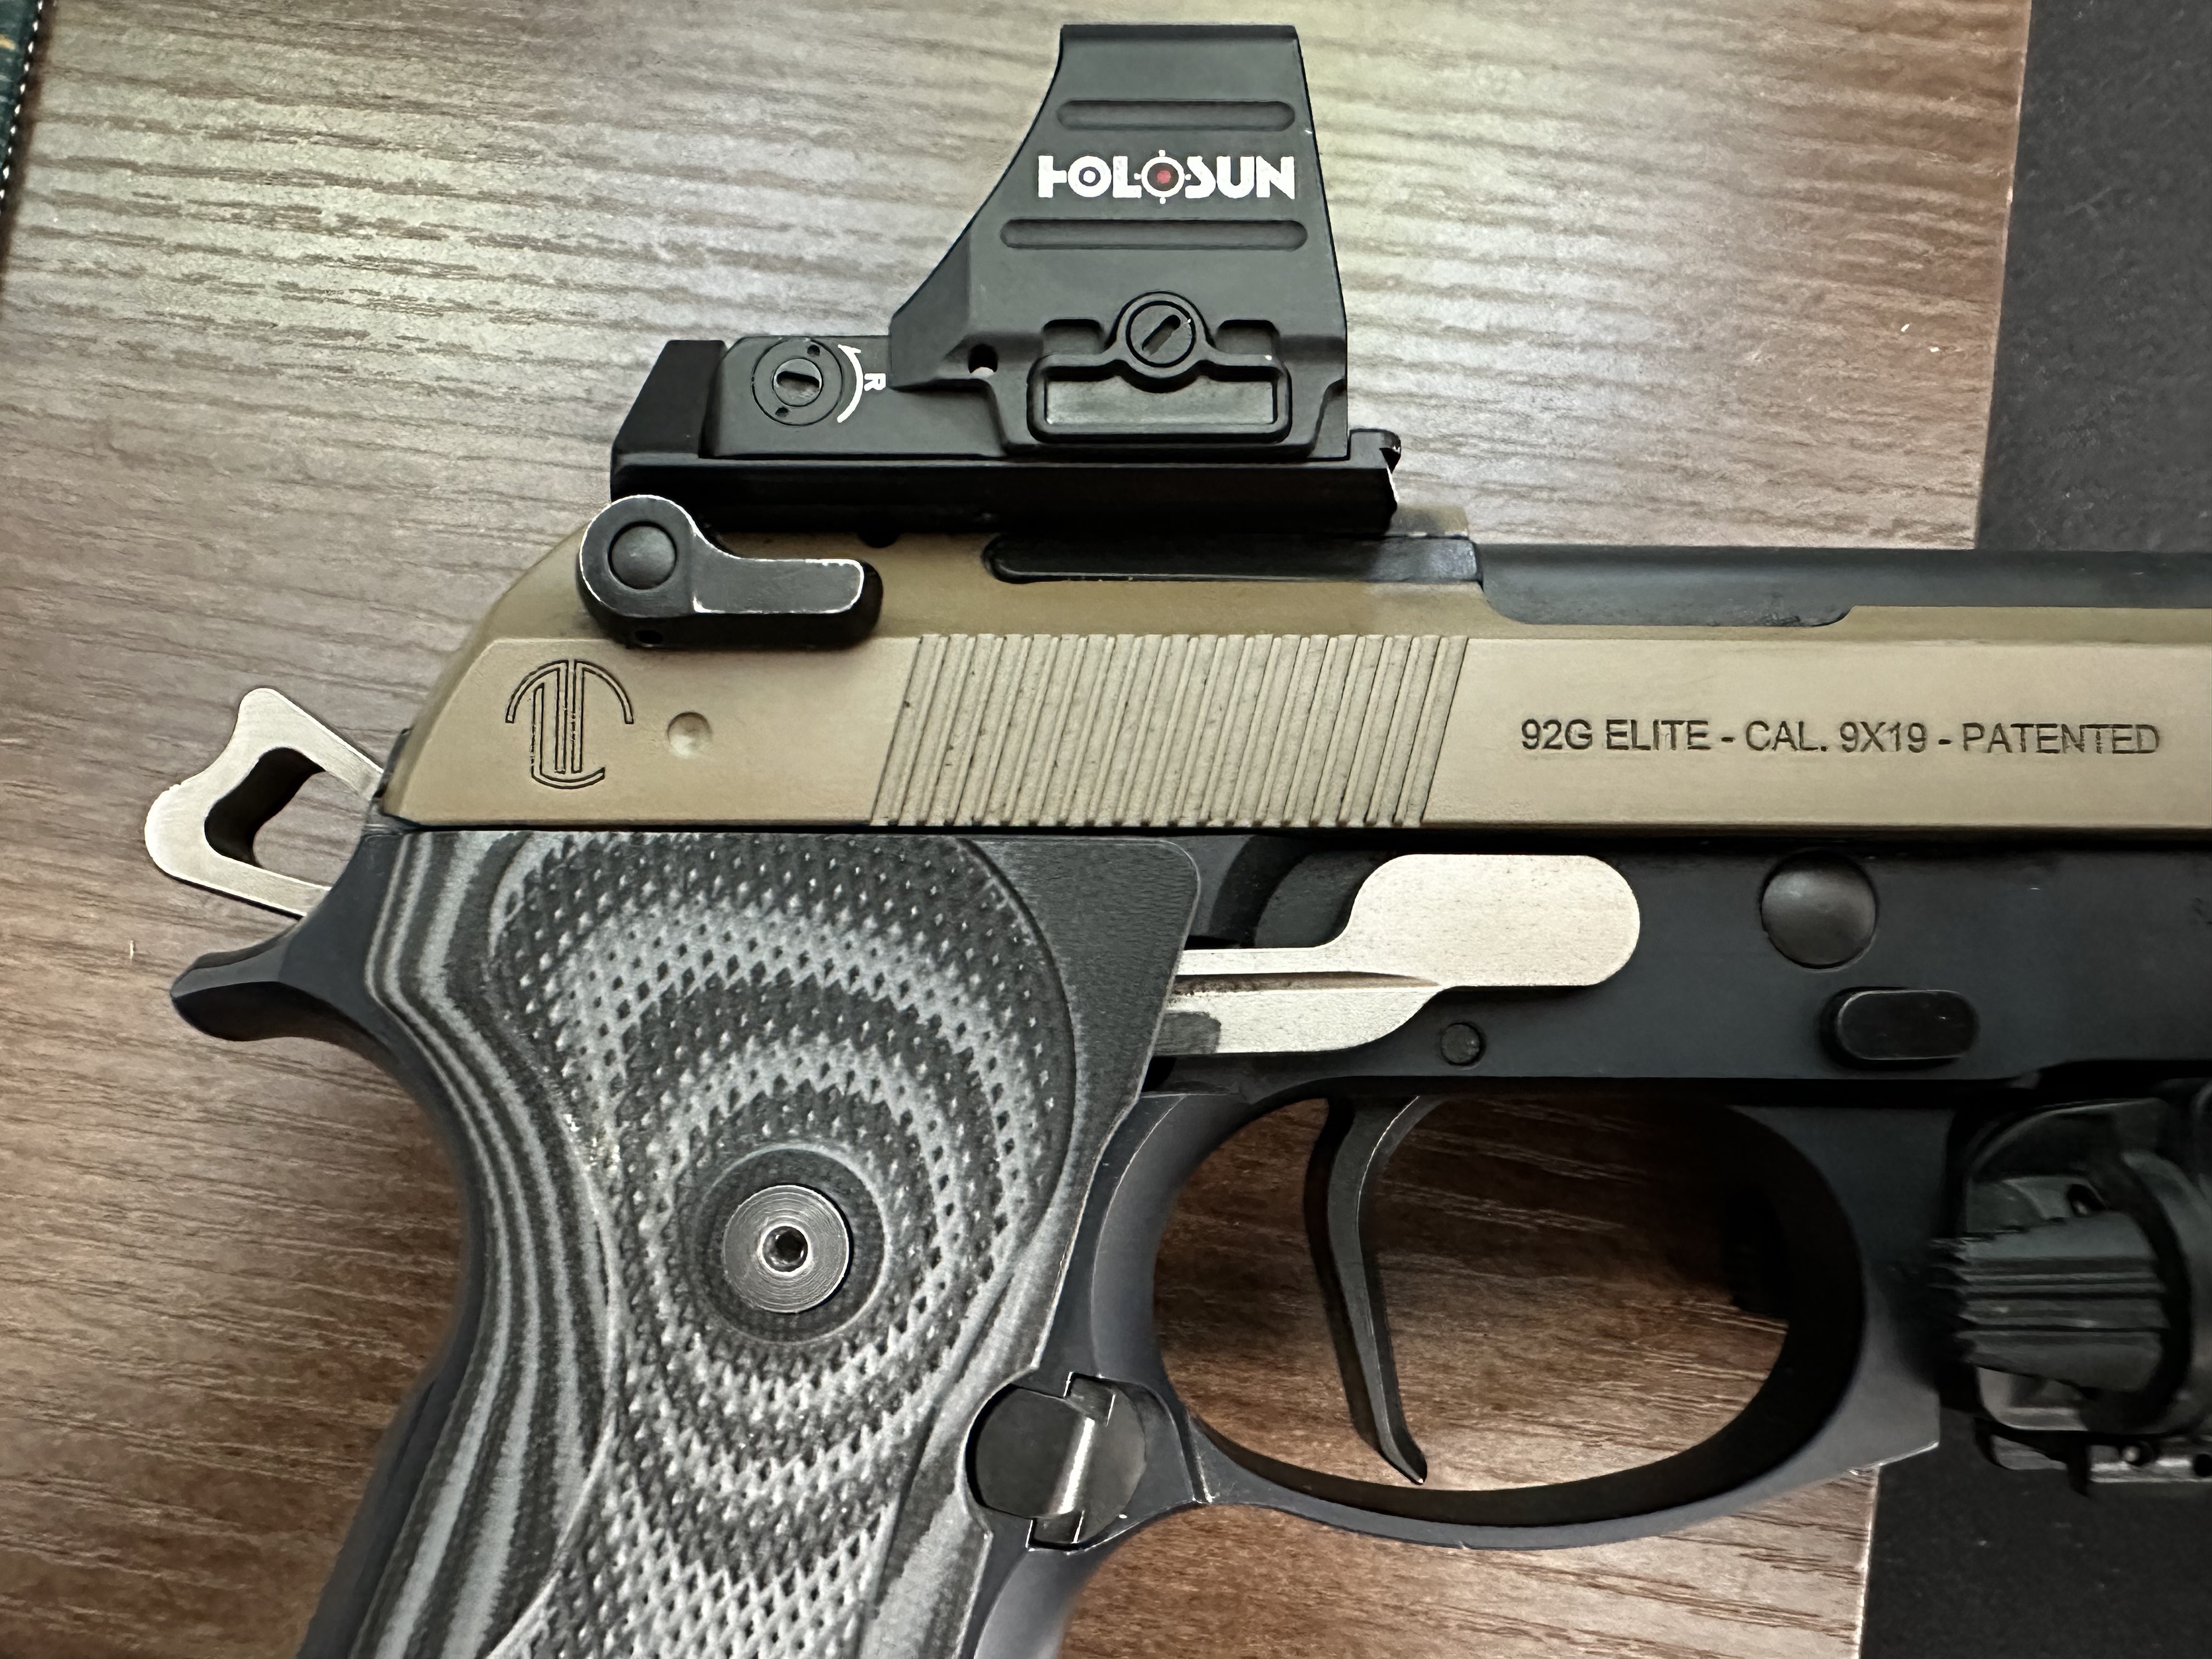
Sights
USPSA stages often feature multiple targets at varying distances and lighting conditions, making it essential to have clear and visible sights. Upgrading to a Langdon Tactical’s 92 Elite Red Dot Ready Slide enhances target acquisition by allowing me the option to mount any red dot that I want, while keeping the optic as low as possible with their patented Optic cut on the M9 series. Currently I have the new Holosun 507COMP, which has been a pretty substantial improvement over the optics I’ve used recently. My initial thoughts on the 507COMP can be found HERE. One thing I will say that I had a big issue with the Beretta is the higher bore axis and the higher optic position on the slide compared to my G34. When I first started competing with my Beretta, I couldn’t find the dot on my draw due to the differences of optic heights between the two platforms. And again, since I have been getting more range time behind the Beretta the less it becomes an issue for me.
Carry Optics Stage Win
There are a lot of other companies that make great parts for the Beretta, but a big reason behind choosing these parts was that 90% of them could be found on one website, Langdon’s; I hate having to buy different parts from different stores, along with the shipping and tax for each one. These parts were also reasonably priced (Langdon also offers a Mil/LE discount) Other than the grips and the competition disassembly lever, everything was purchased from LTT.
The enhanced trigger system, improved ergonomics, and increased sight visibility have all contributed to a huge boost in my performance on the range. I have noticed that I am more confident taking longer shots at speed, and having faster split times up close with tighter hits then I did with my Glock 34. Upgrading my Beretta M9A1 has proven to be a wise choice.
In short, any of these listed rifles would cost you near if not more than a premium factory AR such as a KAC SR-15, Noveske Gen 4, or a Geissele Super Duty. It’s important to remember that the rifle we are about to build is inherently a rack-grade milspec M4, with the exception of the upper receiver profile. I just cannot find any way to justify these prices aside from “hype.” I’d hate to see people turned away from a fun, historic rifle like this due to hypebeast gatekeeping.
Quick disclaimer: I have literally no relationship with any of the companies or manufacturers I am going to mention in this article. Nobody knows who the fuck I am, I’m just a random shittalker on the computer.
The main reason I wanted to make this article is because in the past 5 years or so, the retro AR scene has exploded. Several notable influencers (you know the ones) in the online gun sphere have released content regarding rifles like this, which is awesome, but it also drives a certain not-so-cool element. I assembled my first “retro” in about 2016, while I was still a somewhat poor gun store employee and student. My rifle was based on the Model 727, but did not feature a mounted optic or weapon light. This rifle maybe cost me 5 or 600 dollars to make, if I recall correctly.
Recently I have noticed a trend of certain businesses marketing for retro AR parts or outright to-order builds. Let’s take a look at a couple listings.
Type-A Rifles. This listing includes the Aimpoint PRO, but not the suppressor or WML.Of note is that this particular upper is a hybrid of an A2 and Noveske Gen 4 profile, which is unique, but wasted seeing as there is no NSR handguard to mate to it.
To make matters worse, the next screenshot is from a video about doing a CAR-15 home build.
I literally don’t know how you can make this build cost over $4k. Perhaps the Aimpoint 3000 was most of this cost.
In short, any of these listed rifles would cost younear if not more than a premium factory AR such as a KAC SR-15, Noveske Gen 4, or a Geissele Super Duty. It’s important to remember that the rifle we are about to build is inherently a rack-grade milspec M4, with the exception of the upper receiver profile. There is no reason you should think you need to pay this much for this build, and I hate the idea that these companies are making people think this is what they cost. I hold no ill will to anyone at these companies. I’m sure the dudes at Type-A make a great rifle. I have met several of the dudes at Noveske, I appreciate them greatly, and they also make a great rifle. I just cannot find any way to justify these prices aside from “hype.” I’d hate to see people turned away from a fun, historic rifle like this due to hypebeast gatekeeping.
Let’s go over my particular impression build, and I’ll break down the costs and include sources for components as best as I can. I’ll include some substitutions as applicable. Don’t forget – have fun with your build!
Not Clone Correct Bro!
CAR-15 a la Duke
My particular CAR-15 build is based mostly on the rifle as seen in the Black Hawk Down film, with some exceptions. This is because fitting optics such as the Aimpoint Comp M2, PRO and ACO are widely available and are not too expensive. I’d rather leave true vintage optics to people who will care for them appropriately. I will also be using an alternate WML solution since I hate duct tape and janky tape switches. I feel that this setup still captures the “soul” and look of the real McCoy, while keeping it mostly in line with modern standards. Also, fuck it, it looked sweet in the movie – Call it a cope, I don’t care.
UPPER My upper receiver was purchased assembled with no barrel from Tony’s Customs a little over a year ago. My barrel is a BCM 14.5″ 1:7 SOCOM profile that I cannibalized from a SOPMOD build. Mine features an “F” marked FSB, the most accurate one is the Non-“F” marked one. The main difference is the height of the front sight housing. This could potentially cause issues with zeroing for elevation if you can’t get the front sight on the “F” marked item low enough. If this is an issue, for you, you can replace it with a shorter front sight blade. This barrel has a pinned and welded BCM A2X flash hider to reach non-NFA length. Any 14.5″ Gov profile barrel will have the right look, with a phosphate finish being the most authentic. You could also go for the skinny profile variant if you want.
Handguards are the “skinny” plastic carbine handguards, not the more common “fat” M4 handguards. My BCG is a Noveske-marked Rubber City Armory black nitride BCG. I just like black nitride BCGs, I use them in all my rifles. Use whatever good-quality BCG you prefer here. Again, phosphate finish is the most authentic. A standard charging handle is most appropriate, use something else if you like. A PRI or VLTOR would probably look pretty dope. I’m currently using a BCM Gunfighter. Mounted in the carry handle is an A.R.M.S. # 2 carry handle mount. On that mount is an Aimpoint PRO in a Vortex Tactical 30mm Low Mount. The WML solution is an Impact Weapons Components TMC Scout Light Mount with ring for 1″ lights, bearing a SureFire G2x 600 lumen LED light. For my purposes, this is better in every way than a janky duct tape and barrel band setup for a 60 lumen light, but you may disagree. With the optic and WML mounts, go ahead and get some blue Loctite on all that shit.
LOWER The lower is extremely simple. Any milspec lower will fit the bill, the only slightly odd part is the Colt FiberLite stock. My build features a reproduction version produced by B5, I promise nobody will notice the difference. Keep the stock A2 pistol grip. Trigger is fair game, I know people get very particular about them. I tend to use enhanced milspec triggers, such as the ALG QMS. My particular lower is from a Colt LE6920 and has the “M4 CARBINE” rollmarks. It’s not accurate, but it says “Colt” on it. For fun, you could use one of the PSA M16A2 marked lowers.
LIST FORM + APPROXIMATE COST Some of these options may be hard to find our out of stock at the date of publish. We all know how the supply chain for AR parts has been for the past few years. I’ve subbed out some of my specific components for some more convenient ones that achieve the same result. These options are for the least amount of fiddling around with individual small parts.
(Be sure to select “F” Marked FSB, Handguard Cap, and Delta Ring. There’s contention about the “F” marked FSB vs the unmarked one, long stories short, the “F” will work just fine in most cases, and if there are truly issues zeroing for elevation, you can purchase a shorter sight post. If you want to avoid this altogether, purchase a non-“F” marked FSB. If you want the whole thing to look a bit more authentic, go for a phosphated barrel such as from BCM or a Noveske CHF if you’re really boujee. )
Tony’s Customs C7 Upper Receiver – $190 (This will likely be the hardest part to get. This is a very small business, but they are responsive to communication. Send them an email if you have questions concerning availability.)
Aero Precision M4 “Clone” Complete Lower Receiver – $255 (This lower omits the Aero logo on the right side of the magwell, and has faux Government Property markings. It says “M4 Carbine” on the left side.)
You could do this cheaper if you really needed to, I only listed parts I have experience with. If you’re comfortable sourcing all your stuff from PSA, go ahead.
If you’re averse to assembling your own rifle, or simply would rather trust it to a manufacturer, PSA now offers a 723 style carbine through their H&R line, fully assembled, for $1100. This one does feature a pencil-profile barrel.
“Hey, who’s hungry?”
Everybody knows the jambo
Alright, now that all the technical bullshit is done, and you have a CAR-15 of your own, it’s about time we talk about shooting the fucking thing! Come back soon, in part 3 Mark and I will give you some insight on how this certified hood classic worked out at LMS Defense’s Practical Carbine course, where we took the good ol’ CAR-15 from muzzle shots out to 600yds and everywhere in between.
When I heard about Holosun’s new optic built specifically for competitive shooting, I was super interested since I was just starting to get back into USPSA – and not only am I a cheap motherfucker, I also happen to be a sucker for Holosun optics! Originally, I was going to shell out $500 for a Trijicon SRO, but decided against it and waited many months until I was able to put an order in for a 507COMP.
Upon receiving the optic and mounting it on my Langdon Beretta, my first impression was how massive the window is compared to the SRO. Having used a standard 507C optic a bunch, the COMP model was even better for the activities I was planning to use it for.
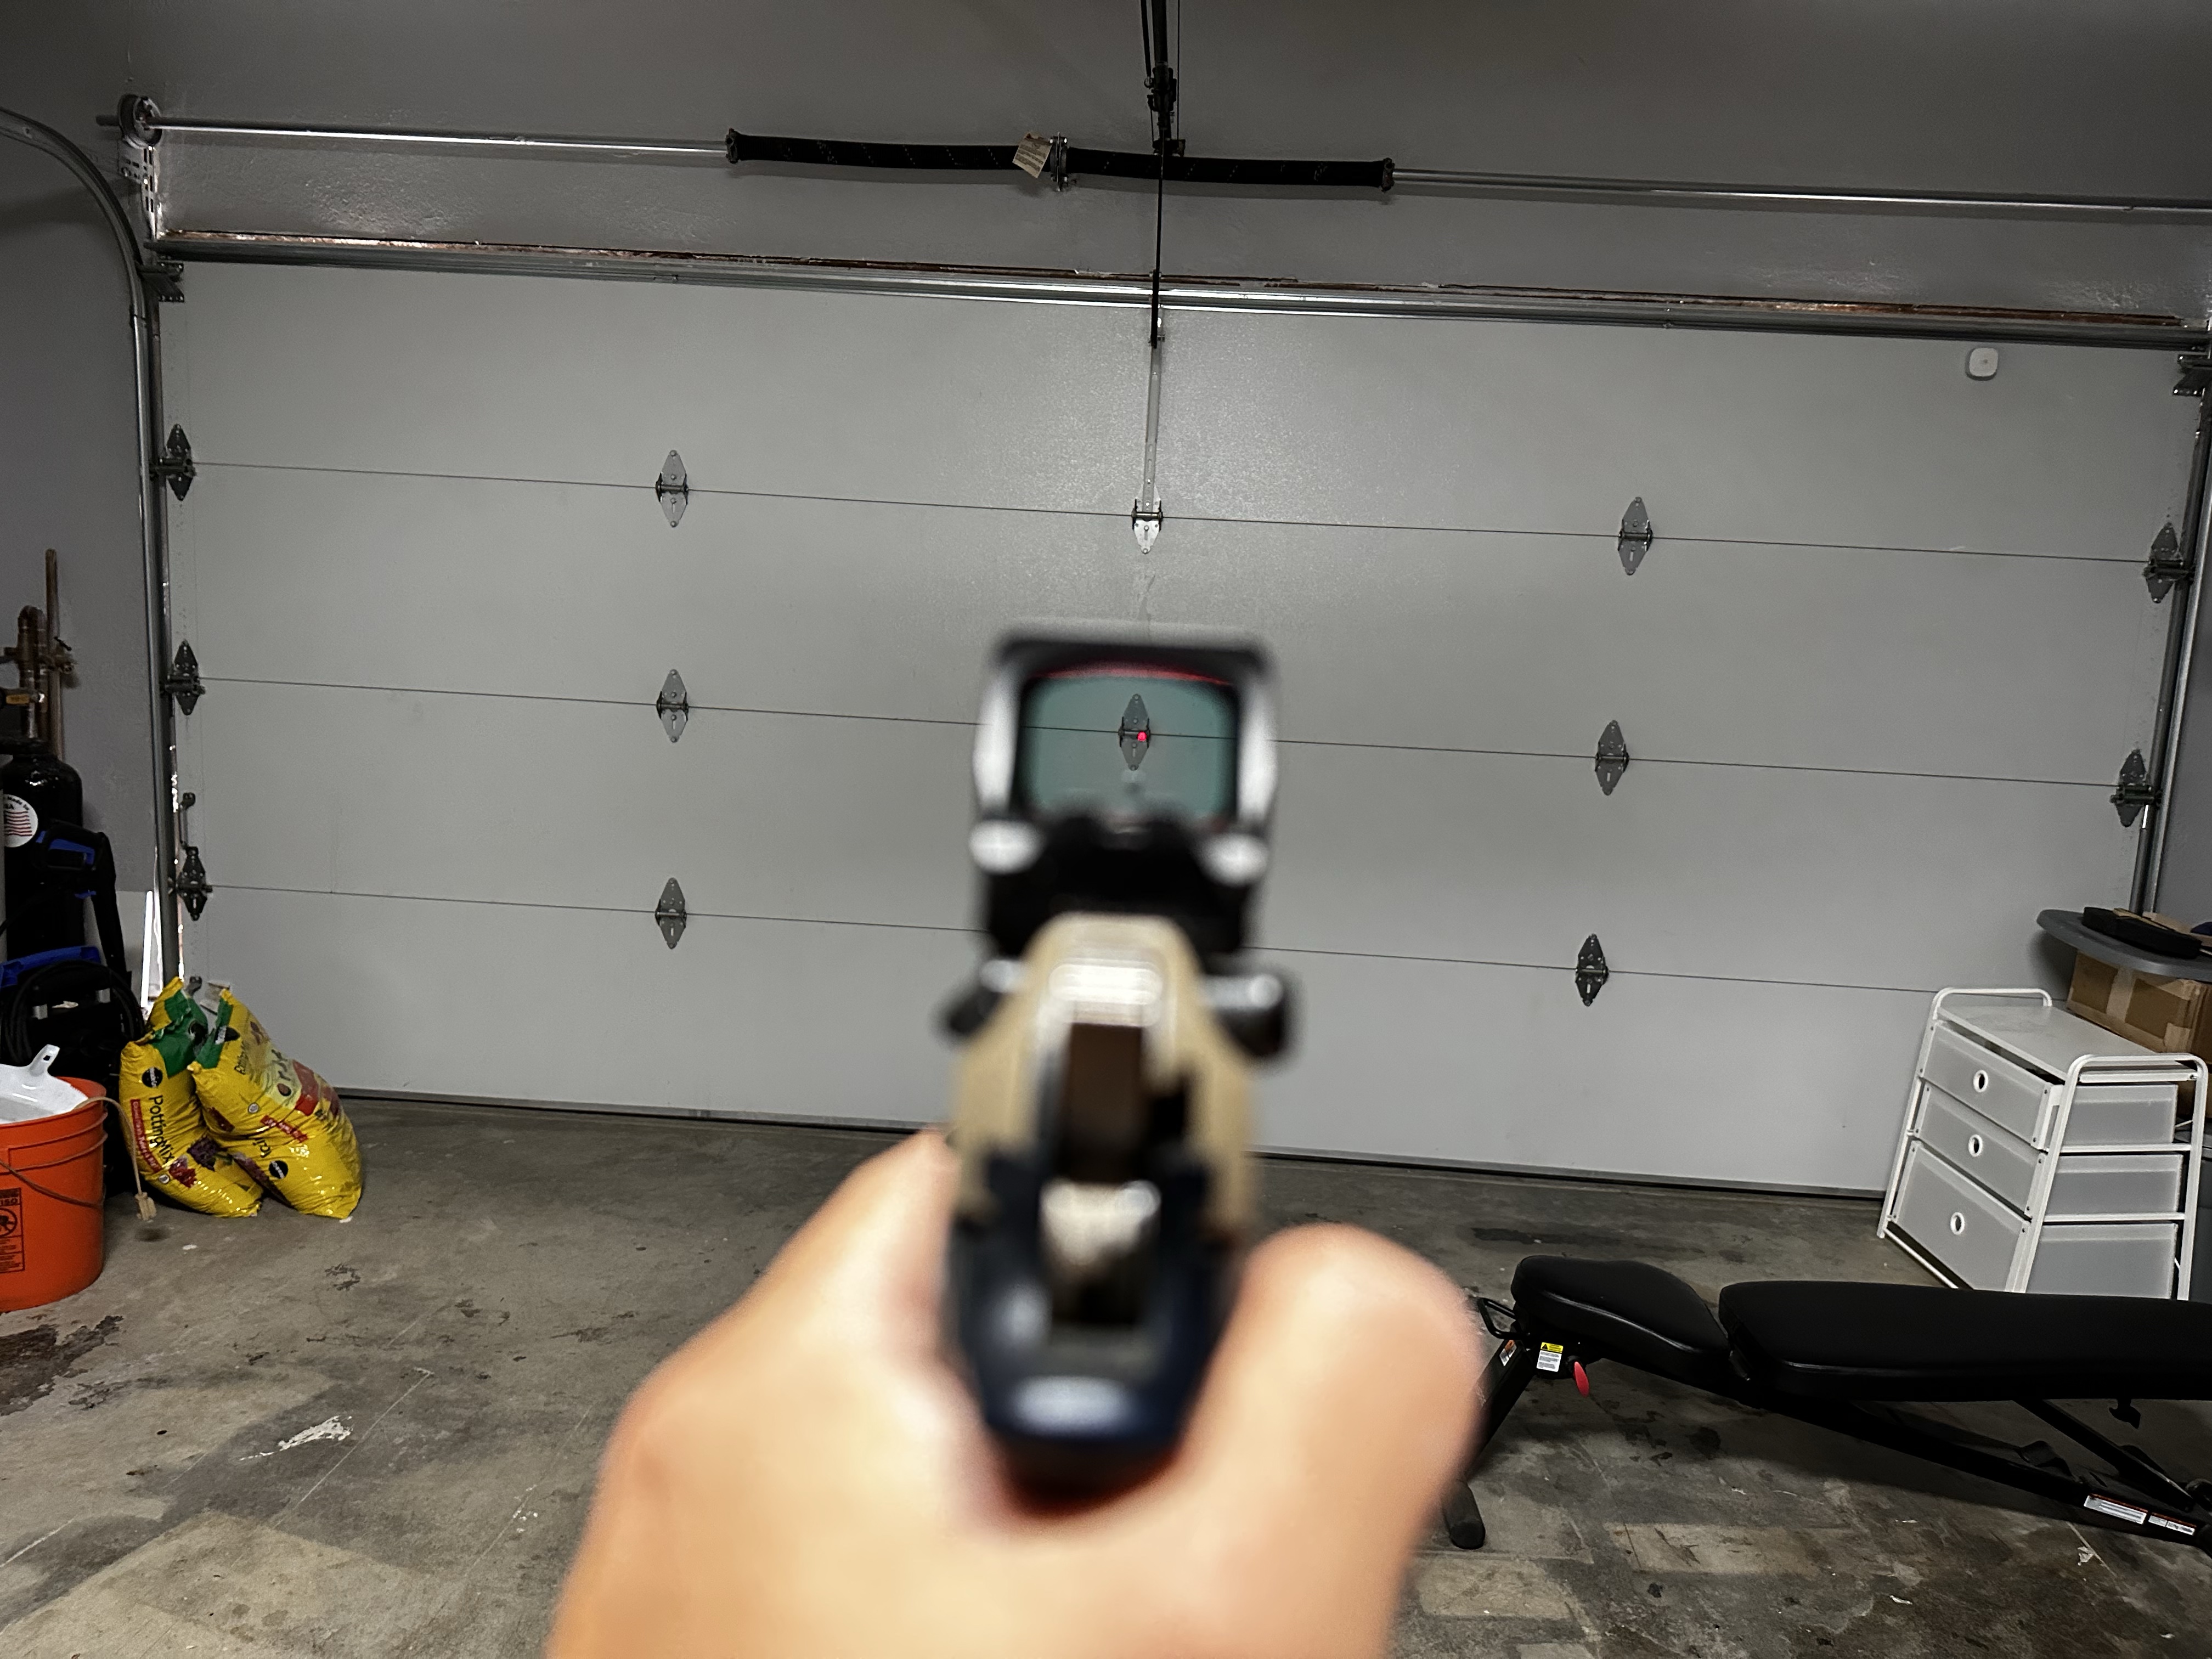
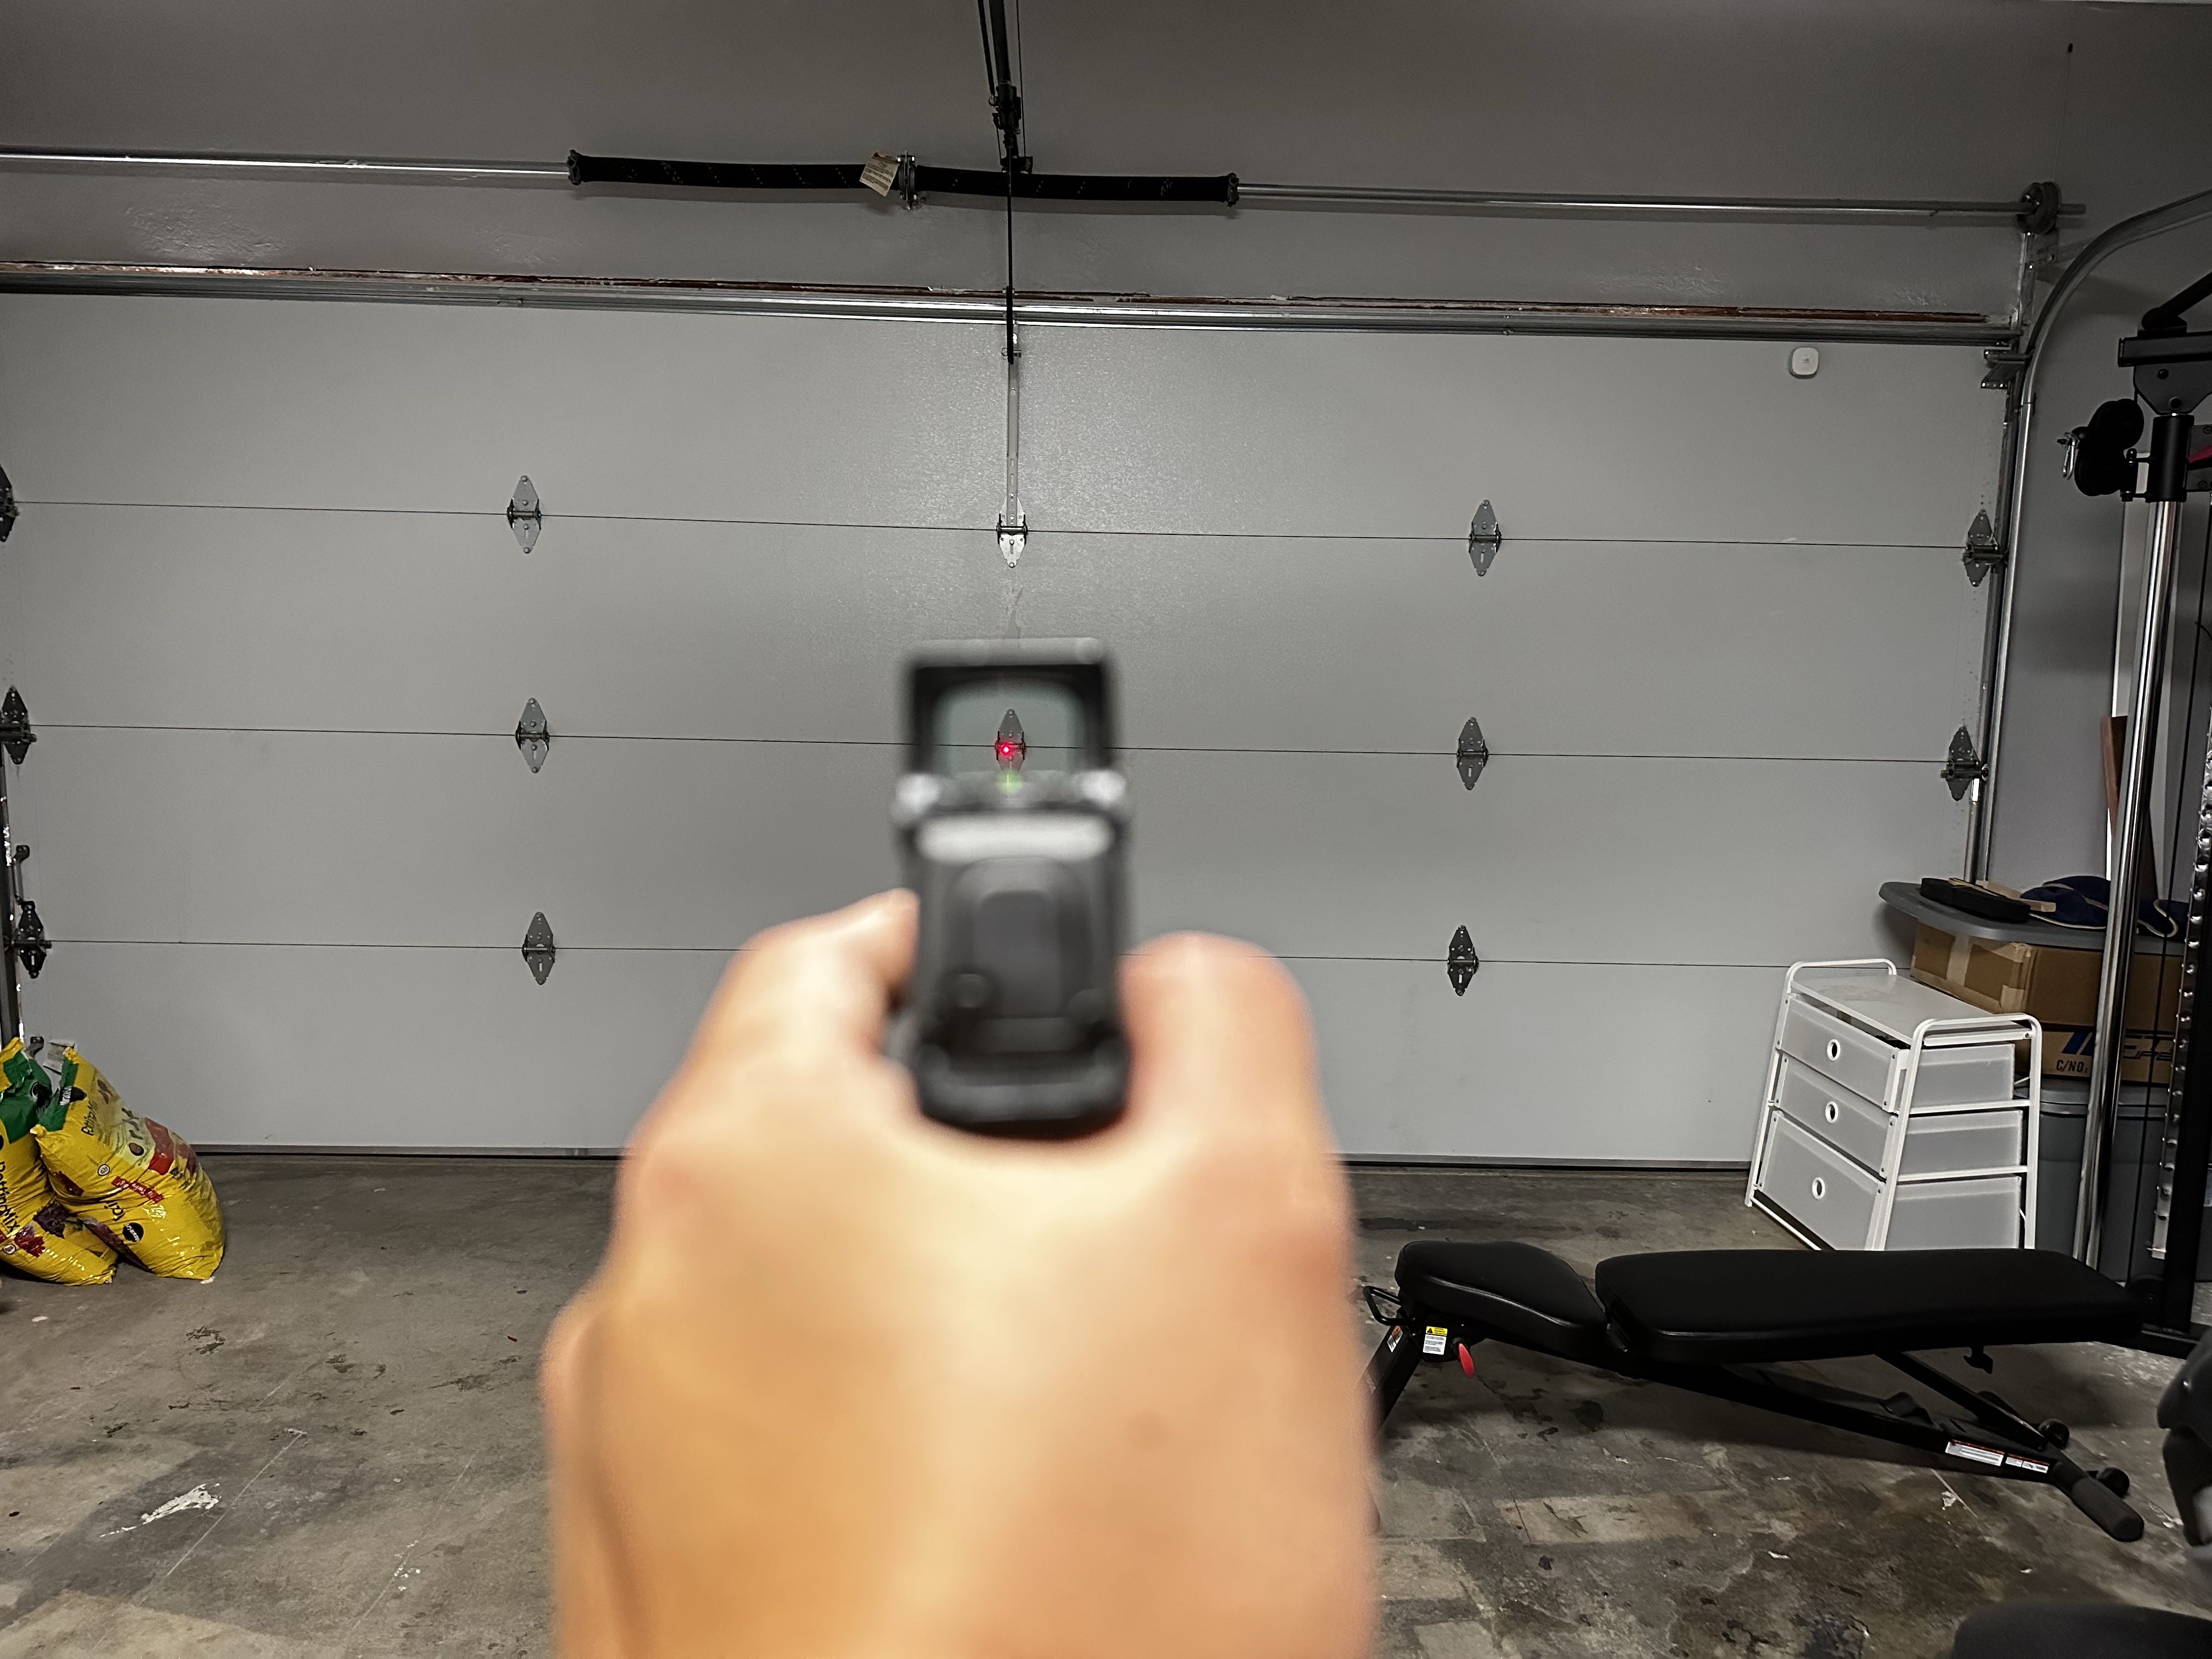
I have about 1,000 rounds through this optic so far, to include 3 USPSA matches. After playing around with the different reticles that the 507COMP comes standard with, I’m now a big fan of the 2MOA dot with the 8MOA circle. I noticed was how easy it is to track the reticle during rapid firing. The window is so big that the dot never leaves the window, especially with one-handed shooting. The large window also makes it much easier to find the dot on the draw, and helps to keep it on-screen when doing quick transitions between targets.
Brand New Holosun 507COMP with a 2 MOA dot and a 8 MOA circle. Other pistol-mounted RDS are shown below for comparisonFirst gen 507c with a 2 MOA dotSteiner MPS with a 3.3 MOA dot Holosun EPS Carry with a 2 MOA dot
So far I haven’t noticed anything I don’t like yet. There is a tiny bit of that “false dot” sight picture when the sun is shining directly at the optic, but because I use the 2MOA dot with the 8MOA circle it is very easy for me to differentiate between the false dot and the actual dot. The 507COMP has held its zero since I’ve started using it, which isn’t a surprise to me since I’ve always had reliable performance from Holosun products.
Holosun 507c Competition in action at JCSA Action Pistol. The features of the optic were helpful in taking the Overall stage win on this bay
I’m looking forward to future matches with the 507COMP, and I feel that this optic will become a serious contender in the pistol-mounted red dot world – especially for competitors like myself. The price, size of the window, and options for fine tuning the reticle make the 507COMP perfectly at home on any pistol.
I bought my 507COMP direct from Holosun for $340 shipped via a MIL/LEO discount. They can be found from most places that sell optics in the $360-$400 range.
So what’s the big deal? A 14.5″ with a red dot and a light? I have three of those in my safe right now, and a 13.7″, and a Recce Rifle with the latest peepeepoopoo LPVO. This rifle doesn’t even have an ambi controls or a BAD Lever!
PART ONE – A historical primer on the “CAR-15”
Hey gang.
Today, I want to talk to you guys about a particular military M16 variant with an understated, yet pivotal role in the development of the modern infantry carbine as we know it today, over 30 years later. Hitting the scene in the late 1980’s was the Colt Model 723, otherwise known simply as the CAR-15 by the men who wielded them.
The Colt Model 723 is known today by several names. Commando, 723, SCUD Hunter, Delta Carbine, the list goes on. For consistency in today’s conversation, and attention to various idiosyncrasies, I will be referring to the 723 and related rifles as the “CAR-15”. I’ll probably use “rifle” and “carbine” interchangeably because the distinction is pedantic at best, fuck you.
I’ll do my best to keep this informative and concise but please bear with me, as I am not Mr. McCollum, nor anywhere near his caliber in matters such as these.
If you’re around my age or older, and you are reading this article, you’ve probably seen the films Black Hawk Down and Blood Diamond, or played Half Life, all of which introduced me to this particular family of carbines back in the day. This carbine can be mostly boiled down to three major features:
Fixed carry handle
Aimpoint optic
Weapon light
So what’s the big deal? A 14.5″ with a red dot and a light? I have three of those in my safe right now, and a 13.7″, and a Recce Rifle with the latest peepeepoopoo LPVO. This rifle doesn’t even have an ambi controls or a BAD Lever!
Yeah, I get it, just bear with me. The end result is incredibly similar to what we’d now consider a bog-standard M4, but that’s kinda the point.
Dr. Freeman fruitlessly blasting at a Gargantua with a Colt 727 he “re-approriated” from HECU.
Modelo Time
In the 1980’s, the most modern service rifle issued to the fighting men of the US military was the Colt and/or FN M16A2 rifle. This rifle featured a 20″ barrel, fixed carry handle rear with updated rear sight, featured semi and burst fire modes, and weighed a little over 8 lbs. The only accessory of note would be the basic two-point sling issued with the rifle.
In 1988, a 25-year old Larry Vickers checked in to the Operator Training Course, one of the newest members of 1st SFOD-D, or “Delta Force”. Vickers was issued a brand new Colt rifle, fresh in the cardboard box , with a cardboard dowel still in the barrel. It, too, had “M16A2″ rollmarked on the lower receiver, but it was… different. This model had a 14.5” barrel with an M203 cut, a two-position collapsing stock, and the old-style M16A1 carry handle. It also featured a safe-semi-auto selector, instead of the A2’s derided burst fire mode. The Colt catalogue referred to this configuration as the “Model 723”; the D-Boys called it “CAR-15”.
This compact M16 sibling was able to bring the majority of the M16’s firepower and accuracy into a smaller footprint, while still maintaining its reliability, something earlier M16-based carbines were not well-known for. The majority of US SOF at the time were using the H&K MP5 submachine gun for CQB/assaulter duties. While the MP5 has been a highly-effective and respected weapon since it was introduced, it is chambered in the 9×19 Parabellum handgun cartridge. This inherently limits its effective range and lethality in a modern conflict zone, where most of the bad guys are likely rolling with AKM variants, H&K G3s, FN FALs, and so on. The CAR-15 bridged the gap between the “musket” and the 9-mil subgun, and Delta was quick to embrace it.
As far as I am aware, the earliest high-profile use of the CAR-15 by Delta Operators was in 1989 during Operation Acid Gambit, in Panama. This mission resulted in the rescue of American intelligence asset Kurt Muse from the Cárcel Modelo prison in Panama City. Shortly after this, in the Desert Shield/Storm days, Delta would find themselves hunting Iraqi SCUD missiles behind enemy lines while carrying these same carbines.
Oddly enough, however the most iconic portrayal of this rifle doesn’t come from the Gulf War, Iraq, WMD hunting or counter-terrorist action.
The Five-Yard Line
On October 3rd, 1993, a humanitarian mission in Somalia punctuated with low-intensity conflict between Coalition forces and local militia members erupted into what is now known as “The Battle Of Mogadishu” to westerners, and “The Day Of The Rangers” to others. As part of the still-ongoing Somali Civil War, this battle featured the most intense close-quarters fighting seen by US Forces since the Vietnam War. The main US troops involved in the fight were the men of the 75th Ranger Regiment, 1st SFOD-D, and the 160th SOAR.
A one-hour snatch and grab turned into an extremely bloody day-long gunfight in the streets of Mogadishu. By the end of the day, 100 Americans had been wounded, 16 were killed in action, and one was taken as a prisoner. The violent firefight and heroic deeds of of the Rangers, Delta, and UN personnel were later documented in the novel Black Hawk Down by journalist Mark Bowden, which was famously adapted into a film of the same name in 2001 by director Ridley Scott.
Reality vs Film
The CAR-15 in actual Delta service at this time was less of a set-in-stone spec, and more of a proof of concept that grew over time. Minor differences have been seen from one issued CAR-15 to another. A good example is the fact that many of them came with standard Government-Profile barrels (with M203 cut) and some came with “pencil” profile barrels. Either of these configurations could be considered to be the same catalogue item, the Model 723. The 723 was considered an “M16A2 Carbine”, but it featured a transitional upper receiver setup between the A1 and A2 we now colloquially refer to as the “C7” upper, first made by Diemaco/Colt Canada. It’s basically an A1 upper with a brass deflector and forward assist.
The optics at the time would usually be either the Aimpoint models 2000 and 3000 which were, at the time, mainly considered “sporting” optics with 1″ tubes and 4 MOA dots. You’ll see a few different weapon light setups from the time. Of most note would be the conversion of the Underwater Kinetics model QXL Scuba Flashlight. These would be modified in-house by Delta armorers and commo dudes to be painted black, covered in black inner tubing, set up with remote switches and affixed to the plastic handguard by hose clamps.
On the other hand, the film armorers used components that were easier to acquire at the time to assemble several screen-ready rifles, but still captured the idea of the CAR-15 authentically. There are, however, a few major differences of note. The film rifles feature A2 uppers, as opposed to the period-correct C7; technically, they would be considered the Colt Model 727. Attached to the upper’s were carry handle Weaver mounts (I’m not sure the make) with Aimpoint Comp M2s. These rifles also featured barrel clamp-mounted Surefire 6P or 660 flashlights, which was the preferred white light after the time of the Modelo-style QXL Scuba Flashlight.
You may have also noticed that the rifles seen on-camera were slightly tweaked and re-used for the film Blood Diamond starring Leonardo DiCaprio. A byproduct of both films sharing the same prop/armorer company, Bapty & Co, these rifles were wielded by the mercenaries seen in film, and for a brief scene at the films climax by Danny Archer. Does it ultimately make that much sense that a bunch of South African mercs in 1999 are rolling the same primary as literally Delta Force? Probably not, but it illustrates that they are well equipped and trained, and for characterization of the group, it fits well enough. It’s still a cool rifle, and it’s got a different paint scheme this time. It kinda makes me wish we got a rifle like this in Far Cry 2 instead of the fucked up not-quite-an-AR we did get.
Cyclical, Like The Terminator
On the initial glance, and even after some use, your impression of this rifle is probably going to be something like “it’s dated”, and “the red dot is really high up there” and you’d be right. However, consider the concepts that drive this build.
The M4 SOPMOD program in the 90’s and 2000’s was a direct evolution of this rifle due to its versatility and overall performance, but with a recognized need for more extensive accessory solutions. The most basic SOPMOD Block I rifles had flat top uppers with Aimpoints mounted lower to the gun to allow co-witnessing iron sights. They also featured the KAC RAS quad-railed handguard for easy accessory management for lights, lasers, and foregrips. The Block II rifles refined this package somewhat with updated optics, improved quad-rail, and other accessories, but the concept was still the same.
This M4 bears typical SOPMOD Block I accessories. Of note is the Aimpoint Comp M2.
Fast forward to now. Micro red dots on 1.93″ mounts with MLOK handguards are among the most popular setups in CQB-oriented rifles. The high mounted red dot allows for a more “heads-up” shooting stance, improving situational awareness and comfort. The slick MLOK handguards replacing quad-rails cut unneeded weight on the front end.
Wait… tall red dot, slick front ends? Haven’t we done this before?
Really makes you think. Turns out we had it mostly figured out 30 years ago. Not to say improvements haven’t been made in the past few decades (this setup would not be quite so nice under NODs as modern solutions) but it is extremely interesting to see these old setups be completely justifiable in the modern age, after going through so many iterations. If I was told right now I had to give up my currently issued patrol rifle, I would not feel any worse off with my CAR-15. It is extremely rare for a “historic” design to also qualify as a practical one.
If you aren’t used to this “heads up” style, it’s gonna feel a little alien learning it on the CAR-15. The FiberLite style stock is very thin, so your cheek/chin weld is gonna have less engagement than say, an LMT SOPMOD stock. Rep it through a bit, and you’ll be back to blastin’ in no time. While you’re rolling this build, I think you’re gonna be surprised at the lightweight nature of this gun. Turns out the AR can be really fuckin’ light, we just need to stop throwing so much shit on them. Or do more pushups, whatever.
To be clear, I’m not advocating that you drop whatever your current primary is and commit to the bit of the CAR-15. I simply suggest that you might be surprised how much a “dated” build like this can hold its own in the current year. At the end of the day, fun things are fun. LARP your heart out.
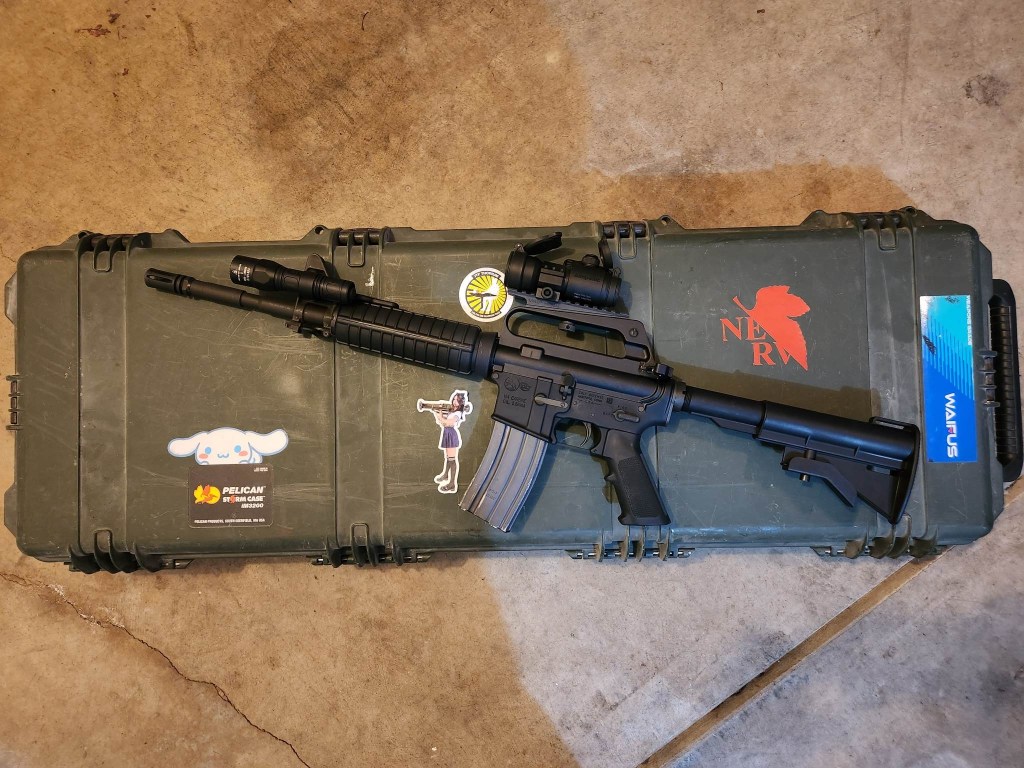
My CAR-15. Build guide coming very soon.
There are many reasons I decided to do this build, and eventually this article. It’s a cool rifle. It’s an effective and simple rifle. It’s a peek into “how dad did it”. With all that being said, it’s important to remember the men responsible for getting this wheel rolling to begin with.
In the words of Larry Vickers:
SOF in general has been a catalyst for improving and reinventing things that were set in stone. SOF legend Major Richard Meadows, the man I consider to be the first Delta Operator, was involved with not only MACV SOG but was a team leader on the Son Tay Prison Raid, arguably one of the most influential SOF missions in history. Delta Force grew from that kind of outside-the-box thinking.
It was the Son Tay Raiders who first fielded a red dot sighted weapon system, and it was Delta who picked up the ball with Aimpoint sighted CAR-15s. Every Soldier, Sailor, Marine and Citizen who uses a tricked out M4 style carbine today owes a debt of gratitude to individuals like Major Meadows, the Son Tay raiders and the Operators of the Delta Force for pushing the limits of the AR style carbine into one the most successful fighting weapons in the history of the US Military.
Larry Vickers, 2013
The CAR-15 is ultimately a product of its time, driven and further developed by the men who wielded it, and the world they operated in. This rifle exemplifies the “get shit done” attitude of the guys who have been there and done that and wanted to do it even better. The knowledge today we take for granted when we build out any AR was gained only through experience, and often paid in blood.
Gothic Serpent was just one footnote on the military history of the United States, and the lessons learned in Somalia, Panama, and earlier in Grenada, Iran, and Vietnam, defined the dawn and growth of what’s now considered standard in special forces operations, and the use of the fighting rifle in general across the globe.
Take a moment to reflect on that knowledge, and know that at the end of the day, the ingenuity and experiences of a few hundred real people is what brought us here. I feel that this rifle is a fitting tribute to those men.
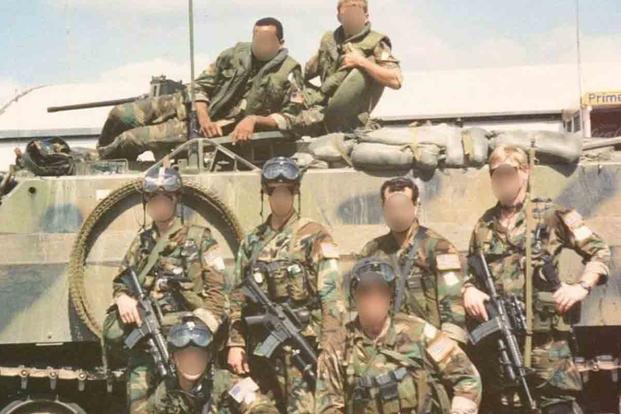
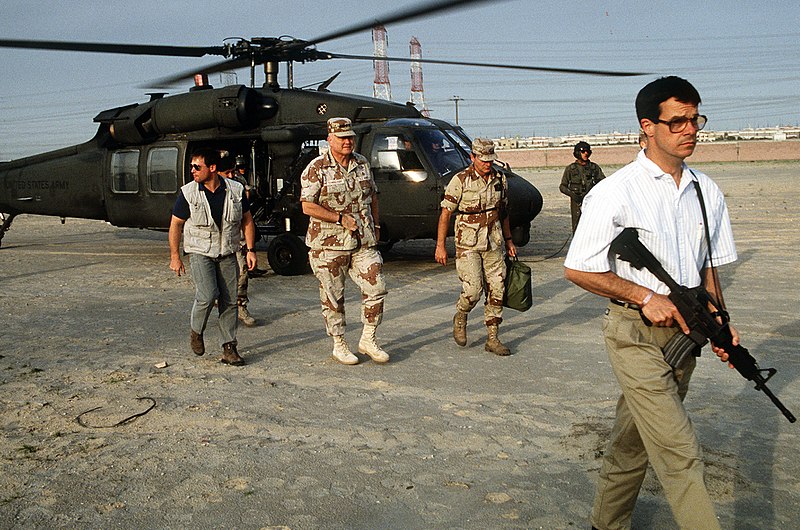
Delta Operator escorting General Norman Schwarzkopf as part of his PSD Team.
This article grew into something far larger than I initially intended, but it’s gonna be a good thing when it’s all shaken out. You can look forward to my build guide coming soon in Part 2.
Thank you all very much for reading, stay safe, and listen to Calliope Mori’s new album Sinderella on Spotify.
This kind of class is something that everyone should take part in, regardless of intended application. James, our instructor, reiterated that being able to shoot fast and accurately was a net positive for both competition and defensive purposes, and brought a performance-focused mindset to his shooting methodology.
Date: 26 JUNE 2020 Location: Richmond, CA Instructor: James Yeom, lead instructor at T3 – USPSA Master-class and former SWAT officer. Round Count: ~300 pistol Pre-Requisites: Pistol Principles 1, passed MIL/LE qual within last 12 months, certificate of training for PP1 equivalent, or USPSA C Class/IDPA SS or higher classification
Objectives: Most of my handgun coursework in the past couple years has been repeat Pistol 1/Fundamentals (LMS Defense Pistol 1) or accuracy-focused (Presscheck No-Fail Pistol). For Pistol Principles 2, I wanted to focus on pushing my speed both in terms of manipulations (draw, driving the gun) and shooting (faster splits with acceptable hits) – this objective was definitely met throughout the course.
Class Details: 12 students, most shooting striker-fired handguns with a couple 1911s thrown in. Most were graduates of T3 Pros PP1 or equivalent shooting courses. Targets consisted of USPSA Metric targets, with B8 repair centers, 1-inch circles, and 6-inch circles used for certain drills. 8-inch steel targets were utilized for movement portions. Shooting took place from as close as 3 yards to as far as 25 yards.
Close up and farther away – targetry was scaled appropriately for distance and for the POI at hand.
Summary: I was invited to this class by a friend of mine who wanted to get some training in after taking some time off from shooting. Having been cold myself for a couple of months, I was a little hesitant to show up – especially since the course description seemed a little daunting in terms of pre-reqs and recommended skill level for students – but I decided to take the class to break the rust and see where I stood with my current level of handgun maintenance. PP2 was definitely challenging in all the right ways, with our instructor James providing easy-to-digest lecture and relevant courses of fire to validate what we had learned.
TD1: As every firearms class should, we started off with the safety brief/medical & evac plan then hopped into student and shooter introductions, with James providing a handy cheat sheet for us to answer. I really appreciated the fact that he took notes on all of our responses, and further continued those notes throughout the day by recording the students’ times and scores.
The live-fire portion began with a simple walk-back course of fire, with students shooting three rounds each from 5, 10, 15, 20, and 25 yards at the upper A-zone with no time limit. If a student missed all shots outside of the scoring zone at any yard line, they were asked to step off and this was recorded as a baseline for student ability.
The next course of fire was similar, but in reverse: from the 25 back to the 5, students were to fire two rounds from each distance with the goal being A-zone hits. James assessed the hits at each distance, and let our impacts tell us what we needed to do: namely, both hits stacked too close together meant that our marksmanship fundamentals were good and we should be pushing our speed instead. I learned that I could get away with being fast at farther distances than I originally thought.
After this initial assessment we hit the ground running, mostly working from 15 yards and in, on different paper targets meant to isolate specific shooting mechanics. These included target transitions, quicker follow up shots, acceptable sight picture at varying distances, etc. After letting students get used to the concepts via live fire warmups, James had us run a variety of drills to test those concepts.
Throughout each string of fire, James would spend time with each student in order to provide personal guidance and remind us of some of the key concepts learned during class – namely, to push ourselves out of our comfort zone and to break our preconceived notion of what “good hits” were in the name of balancing speed and accuracy. As a final validation before lunch, we all shot the Advanced Super Test for score. This course of fire required proper application of the mechanics we had worked on in the morning in order to get a passing score.
The last part of the day dealt with a small classroom block on the proper techniques for shooting on the move, followed by live fire while advancing on, and while moving laterally, to the targets. The final course of fire was a single-elimination competition involving lateral movement and multiple-target engagement on steel targets.
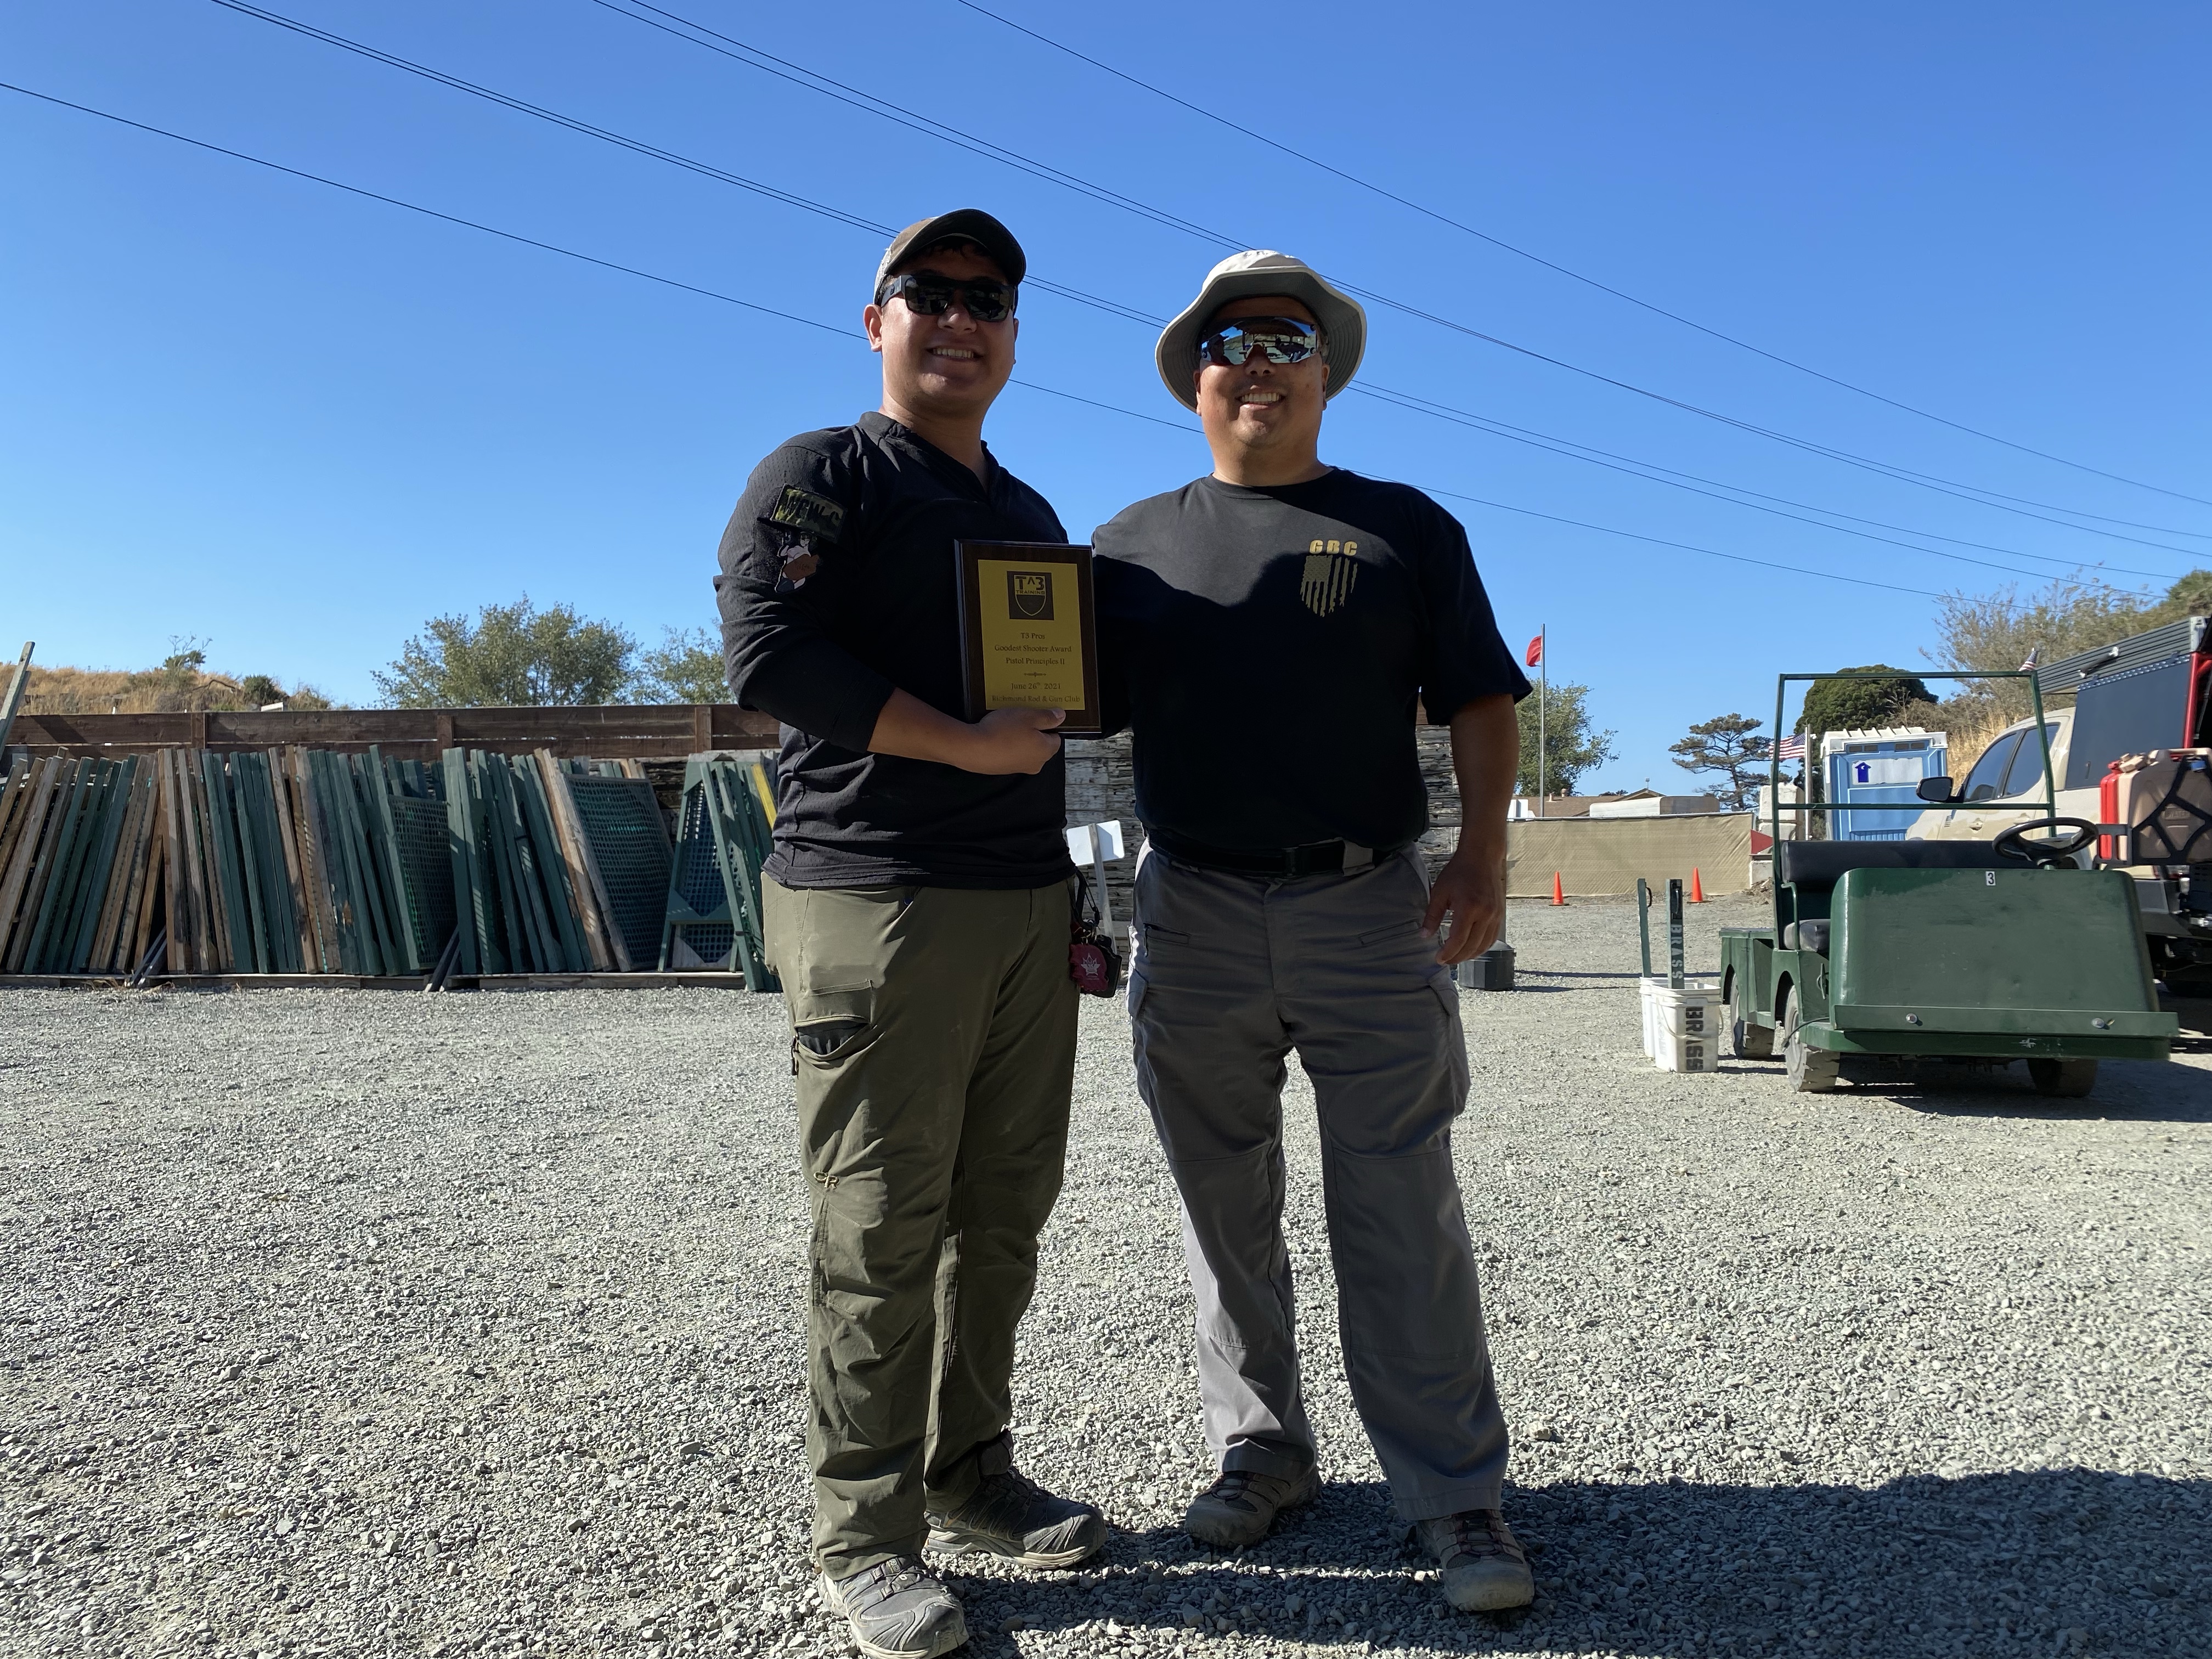
After that, we brassed the range, broke down targets, and got together for a short AAR and James handed out certs, along with a “goodest shooter award” that came with a stocked IFAK as a prize.
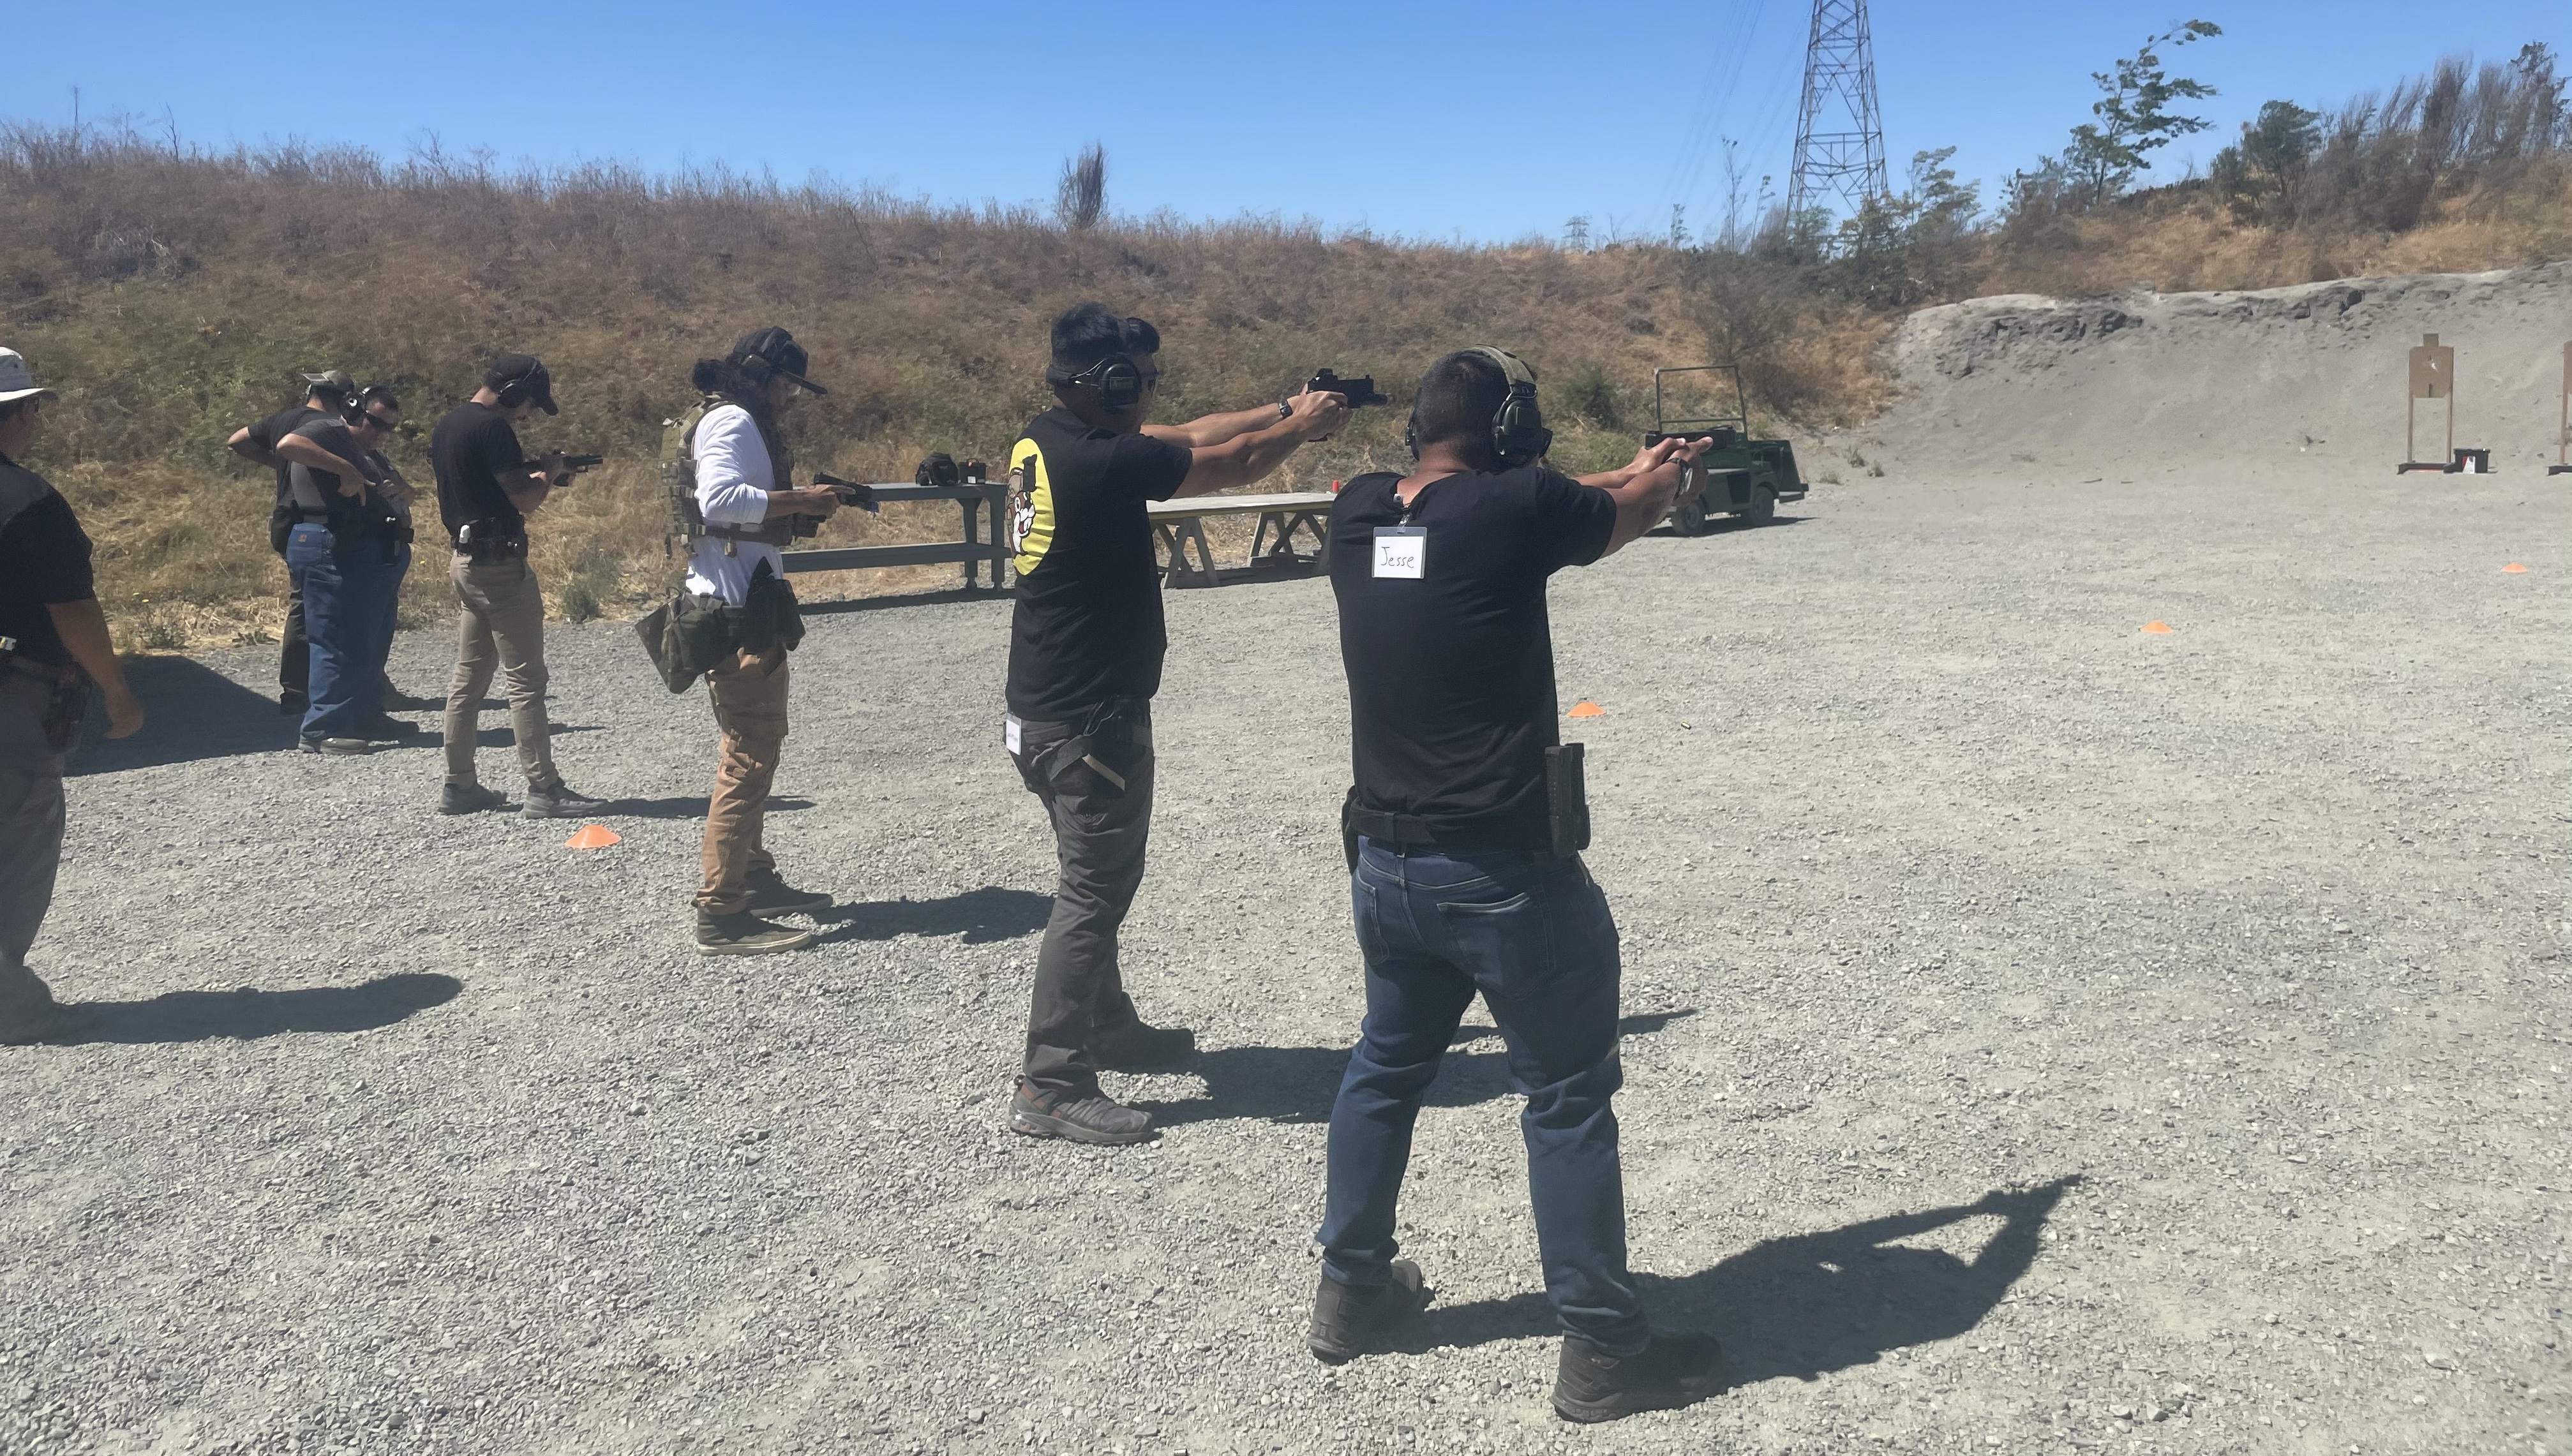
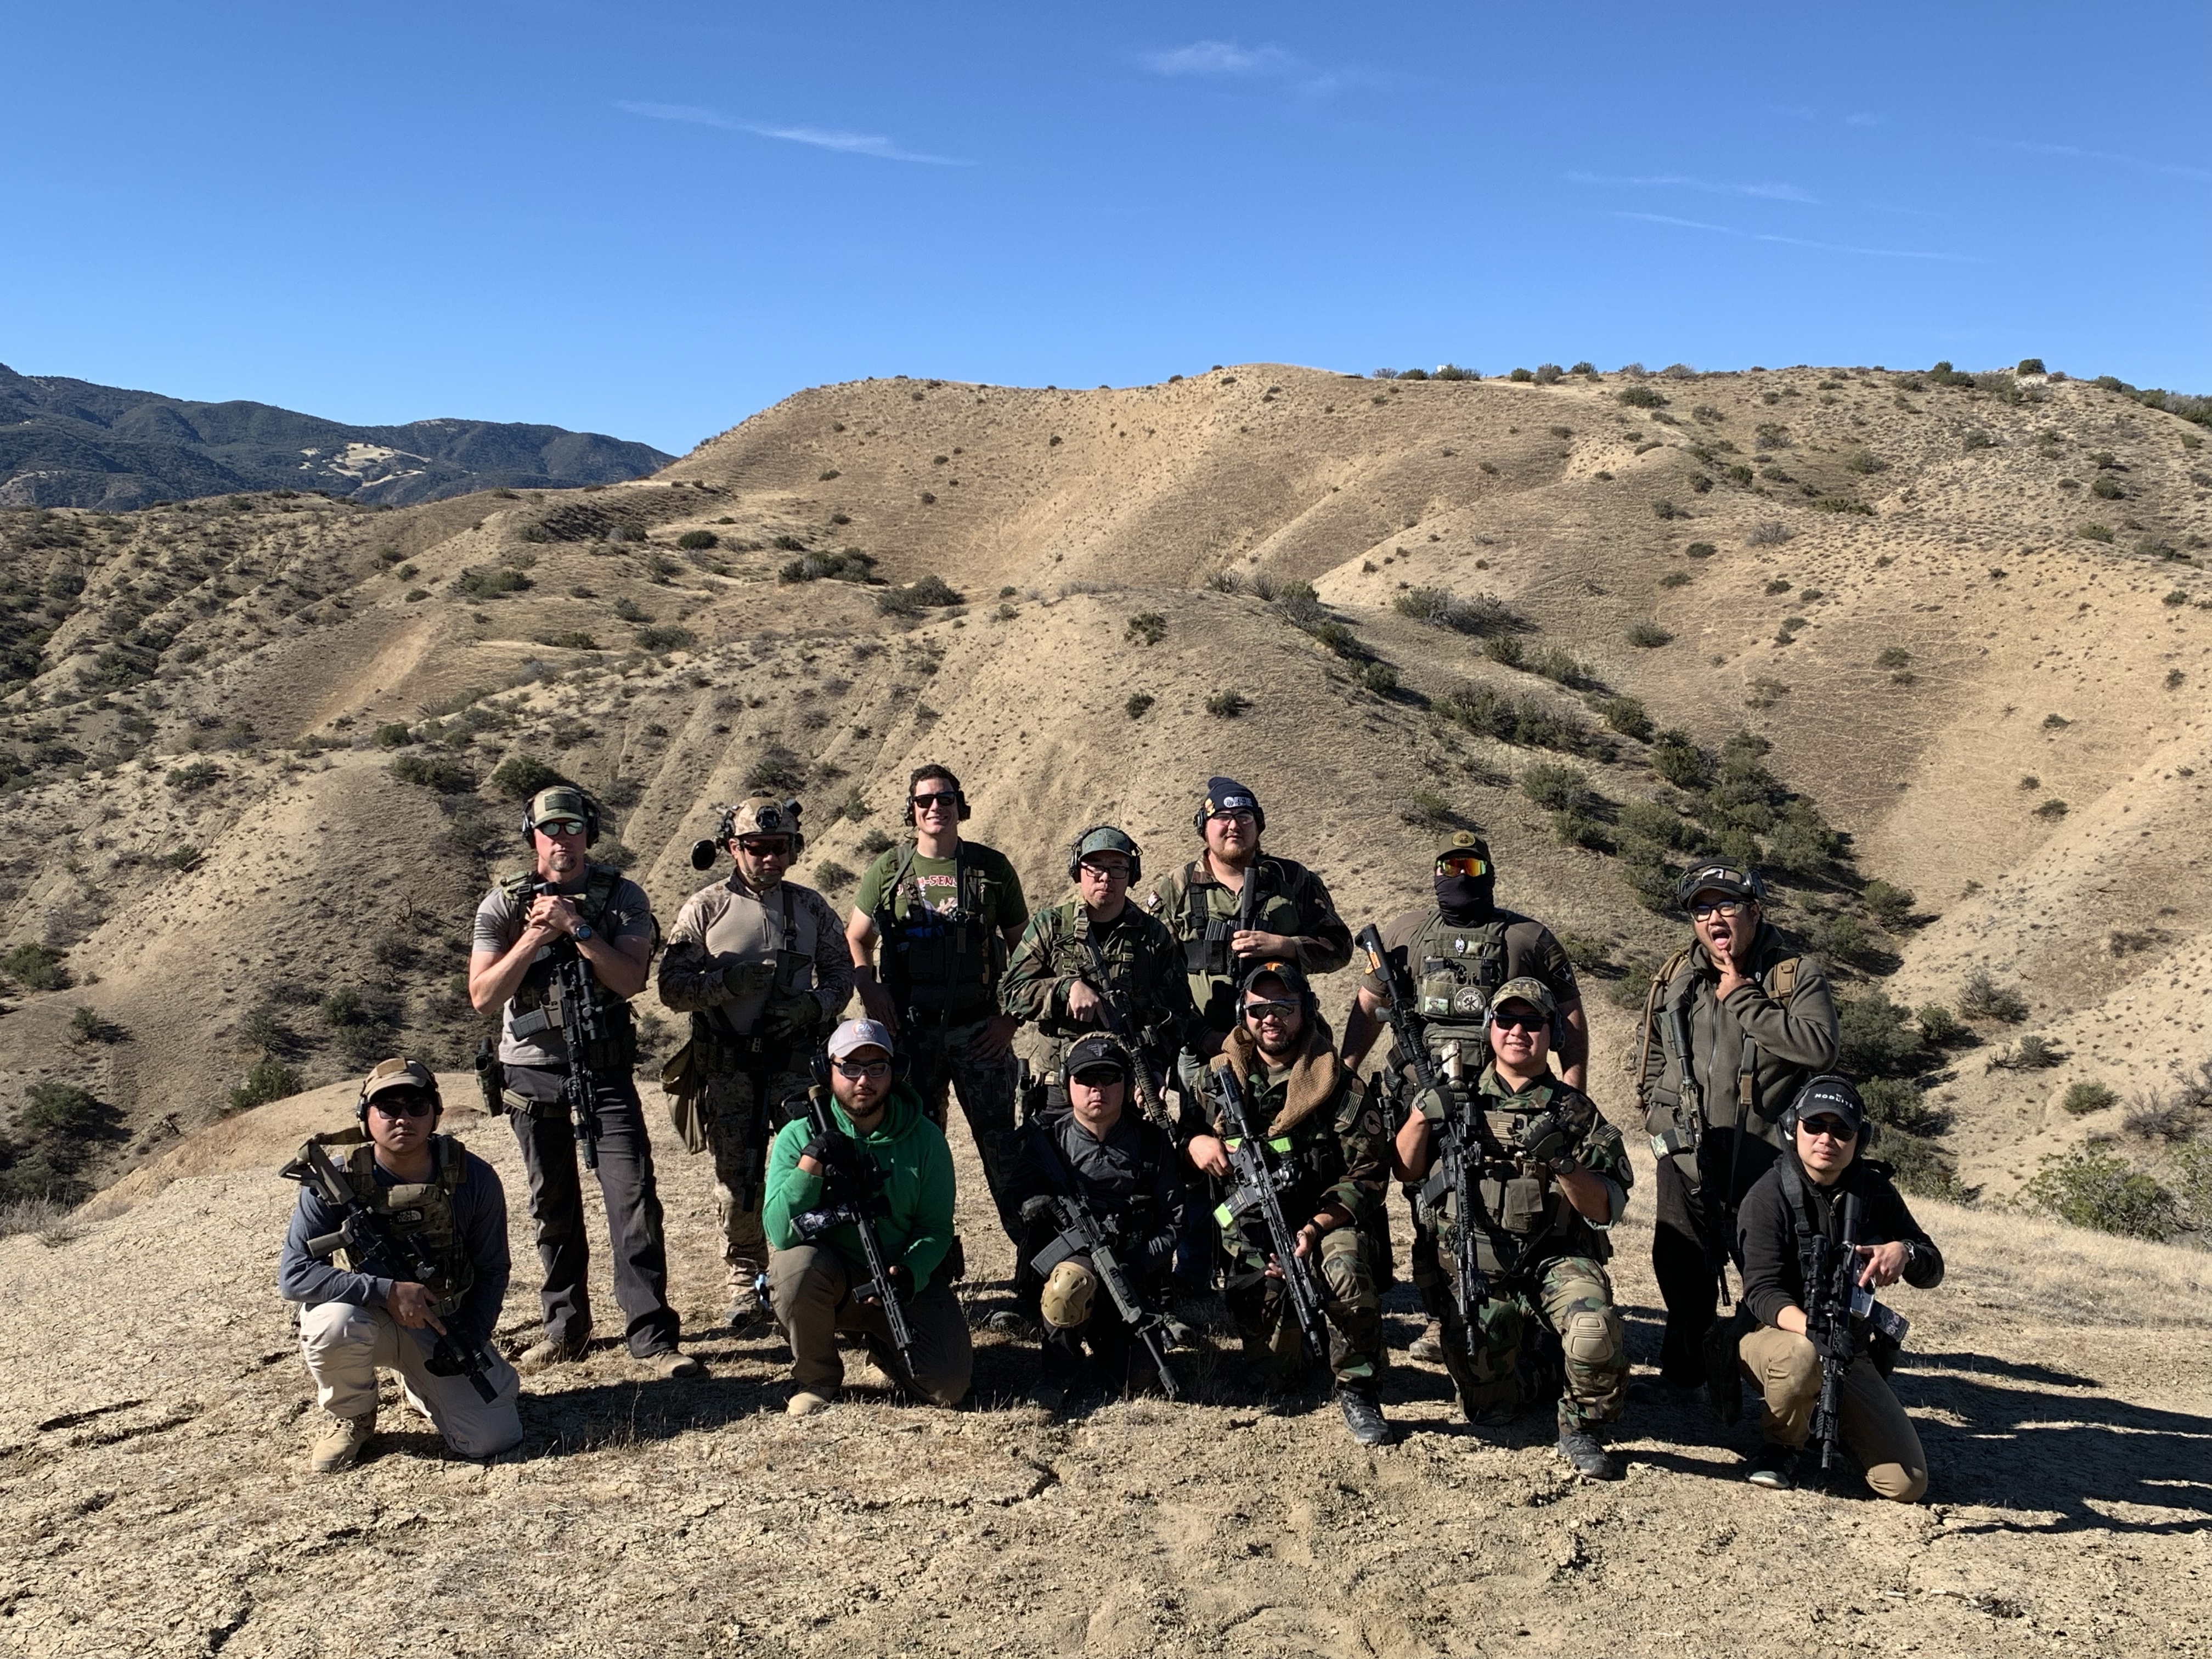
Final Round of the shooting competition – Frank is a long time shooter and Modern Samurai Project alum, shit wasn’t easy!
Key Takeaways: My biggest takeaway from this class was “throttle control” and its proper application dependent on the distance to – and difficulty of – the target. Getting too sucked into “tactical” marksmanship has led to some less-than-stellar times at matches, and a lot of the tips and tricks that James passed on has definitely led to a lightbulb moment for me.
Equipment wise, the Glock 34/RMR combo continues to allow me to be an absolute asshole about dry practice (aka, not do it). This is not an endorsement of skipping out on your dry fire, but more of a testament to how the equipment you choose can definitely be a factor in your shooting performance. I was able to pull off a 280/300 on the Advanced Super Test and win the final competition, both without having touched a handgun in months – I attribute this to both the shootability of the G34 and the ease of use of the RMR.
Goodest Shooter award 😂
Closing Thoughts: I got a ton of Frank Proctor-style vibes from T3 Pro’s coursework/James’ teaching style, and it was a great change of pace from the pistol instruction I’ve had recently. This kind of class is something that everyone should take part in, regardless of intended application. James reiterated that being able to shoot fast and accurately was a net positive for both competition and defensive purposes, and brought a performance-focused mindset to his shooting methodology. While I’m still a fan of taking a shitload of Pistol 1s and refining through practice, competition and more accuracy-based coursework, I’ve been sorely lacking in the “let it do” side of the house and it was cool to see what I could pull off in that sweet gray zone between no-fail accuracy and letting the wheels fall off.
The tuition spent was well worth it, and I have since taken PP1 multiple times in the past year – James is a great instructor and you can expect an AAR for that course as well.
Have you ever seen a twig or blade of grass deflect a 5.56 round enough to miss a reduced C-zone at 50 yards? If not, you probably will at Practical Carbine. From having to go into rollover prone to shoot through a gap created by crisscrossing fallen trees, to breaking shots while in defilade, stretching up in order to see above the tall grass – students can expect to problem solve constantly.
An Exploration of LMS Defense’s Practical Carbine Course
DISCLAIMER: I consider the folks at LMS Defense to be good friends of mine. While I have been compensated on several occasions with course credit in exchange for gathering and organizing students as the class host, they have never offered me range time in exchange for positive reviews. Of the (5) class iterations mentioned in this article, I have paid for (3) of them and been comp’d a seat for organizing (2).
Many shooting schools, both at the local and national level, typically have a variety of “speciality” classes in addition to basic weapons manipulation curriculum. Depending on the experience and qualifications of the instructors, these courses can range from CQB, to working around vehicles, to force-on-force and night vision employment.
FUDDs and the uninitiated will typically brush this training off as “mall ninja” or “fantasy camp,” but what they’re not getting is that many of these classes help to break the square range programming while introducing and reinforcing valuable skills. These apply to common environments – for example, regular civilians live in structures and drive cars every day, which is where CQB- and vehicle-oriented classes come into play.
Welcome to the Ranch
In 2014, LMS Defense debuted a specialty course of their own titled “Practical Carbine,” held at their “Ranch” location in the hills of Central California. It was billed as a rural experience involving a lot of foot movement and distance shooting – a little fantasy camp-ish to me at the time, since austere foot patrols were (and still are) a little outside of my wheelhouse, but I was new to the AR game with a couple of flat-range classes under my belt. I was excited to see what Practical Carbine could offer.
Since then, I’ve been to Practical Carbine on five separate occasions. While initially intended to be structured roughly the same, each iteration has played out with small differences based on the skill level and desired focus of the students present. Since no Practical Carbine has been exactly the same, this will be a little different than a typical AAR you’ll find on this blog: I’ll be exploring the common curriculum that drives each Practical Carbine to give an idea of what the course hopes to accomplish.
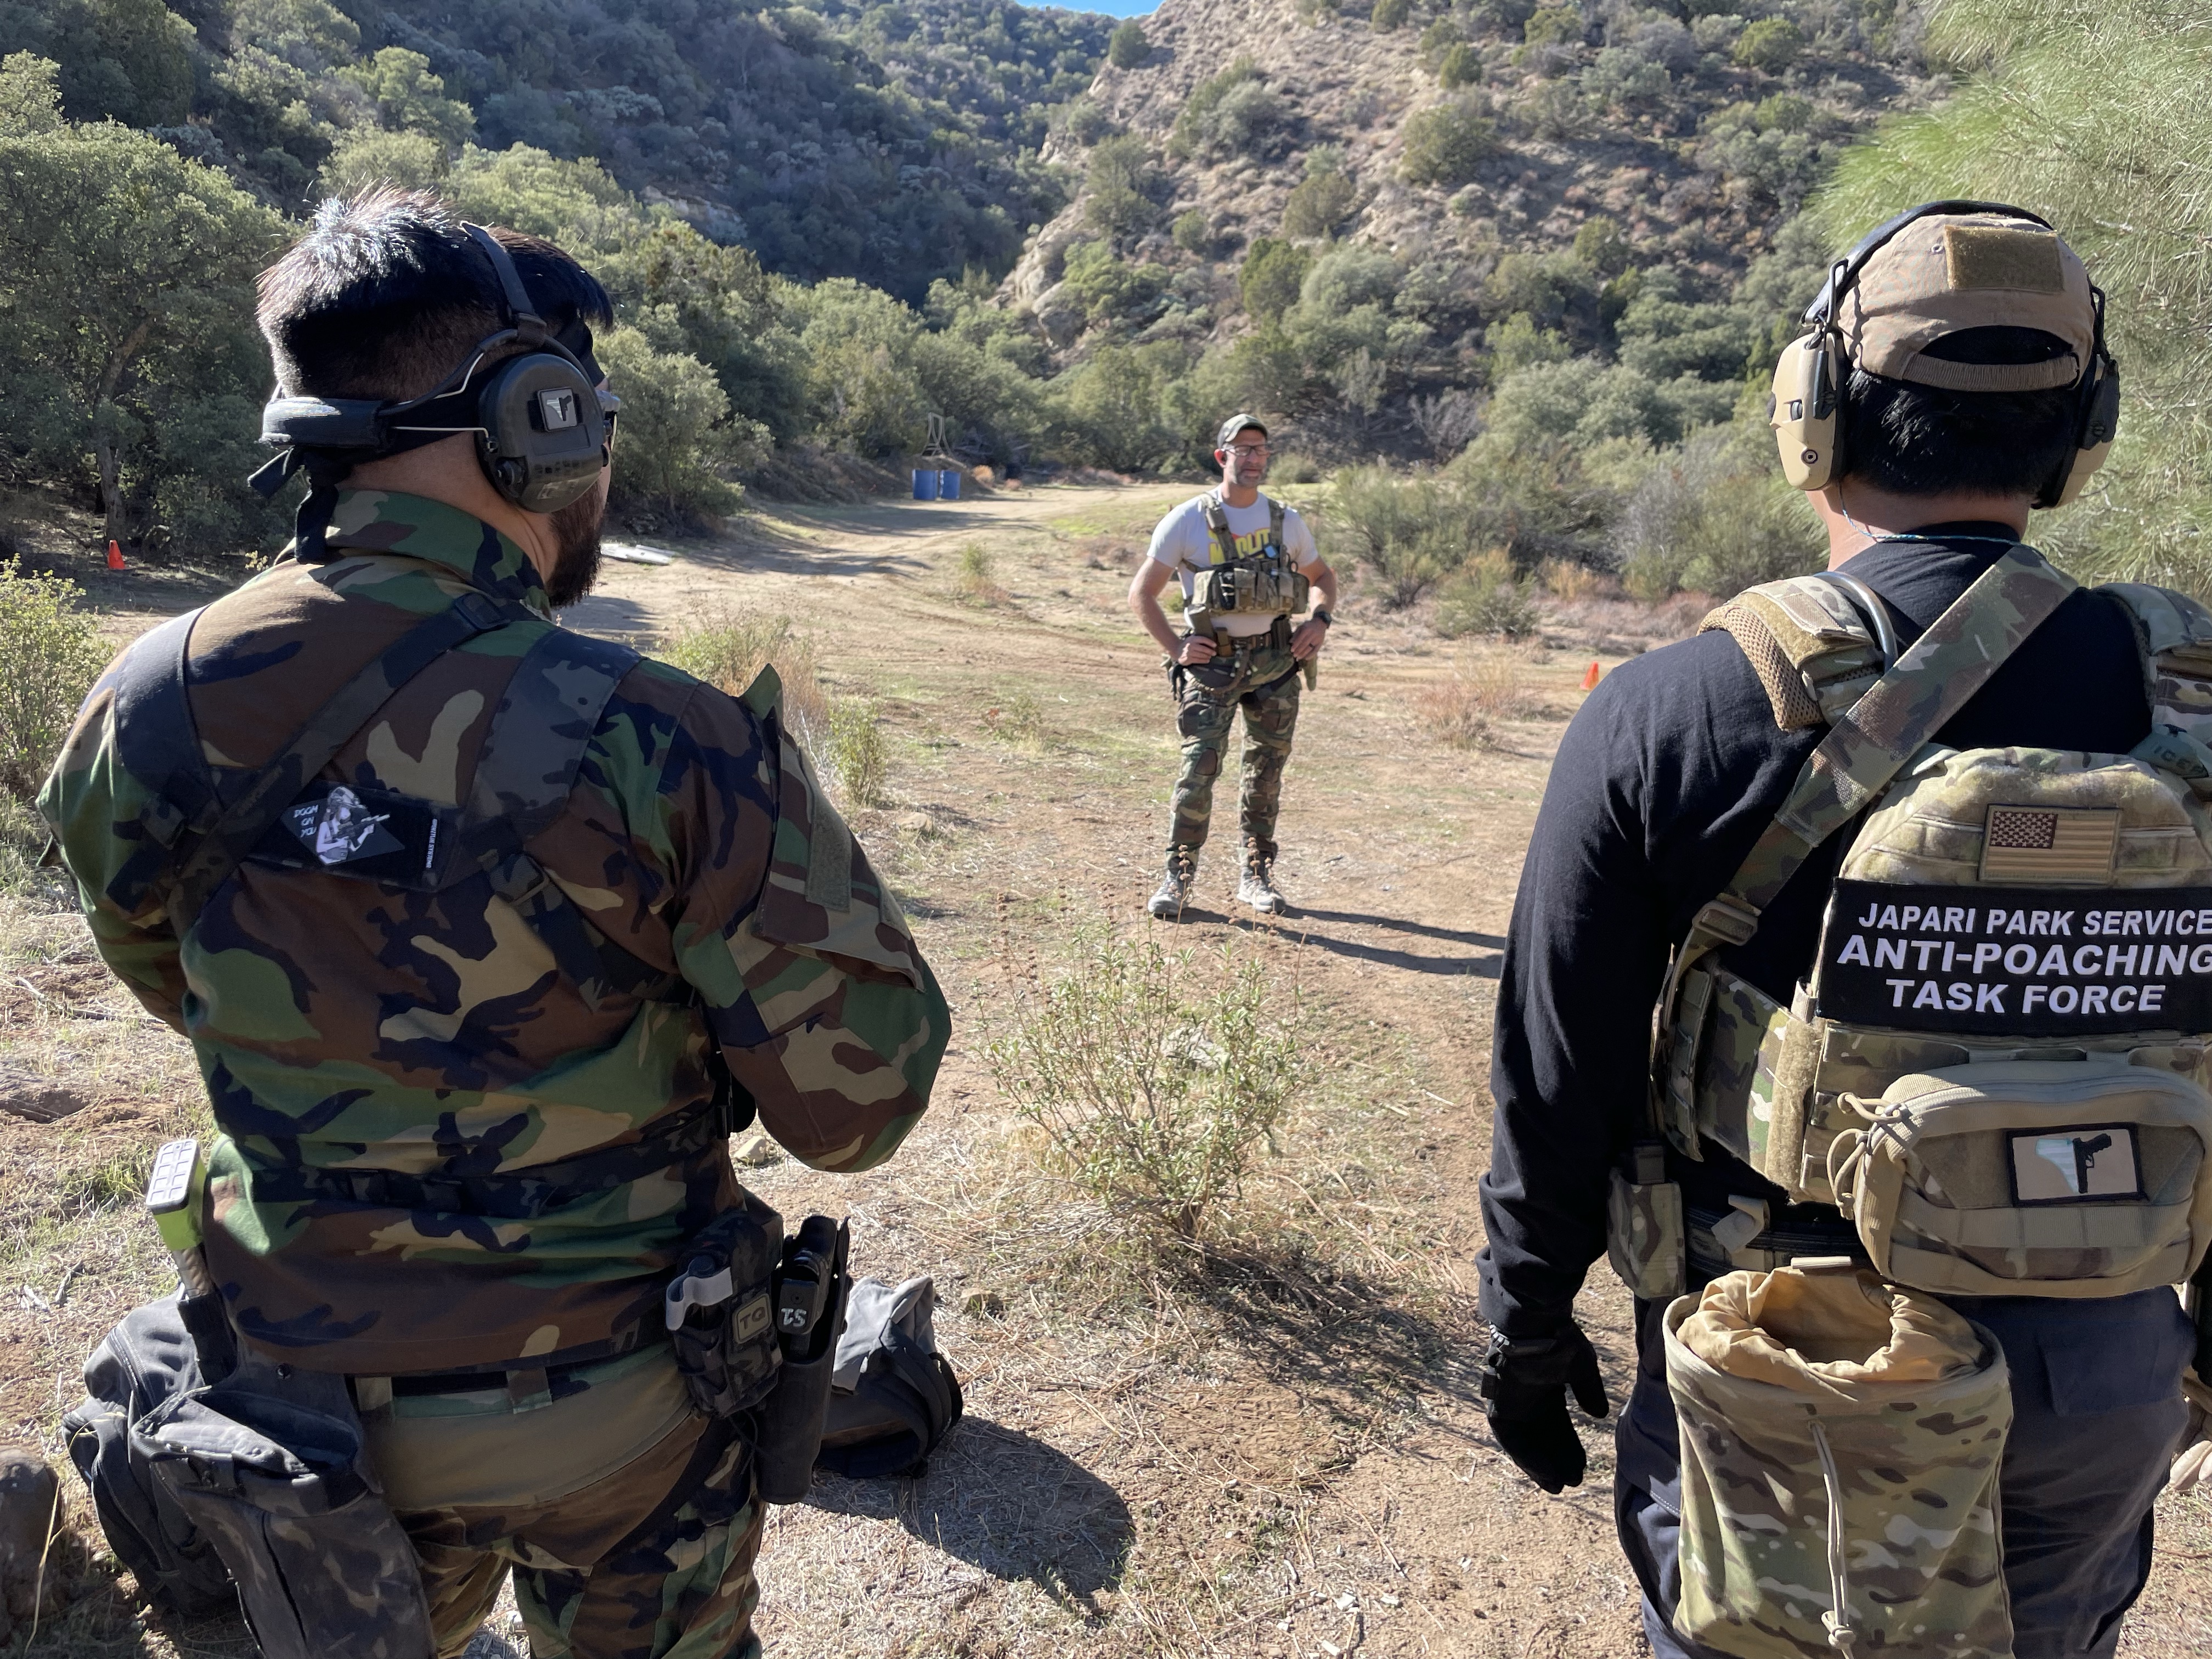
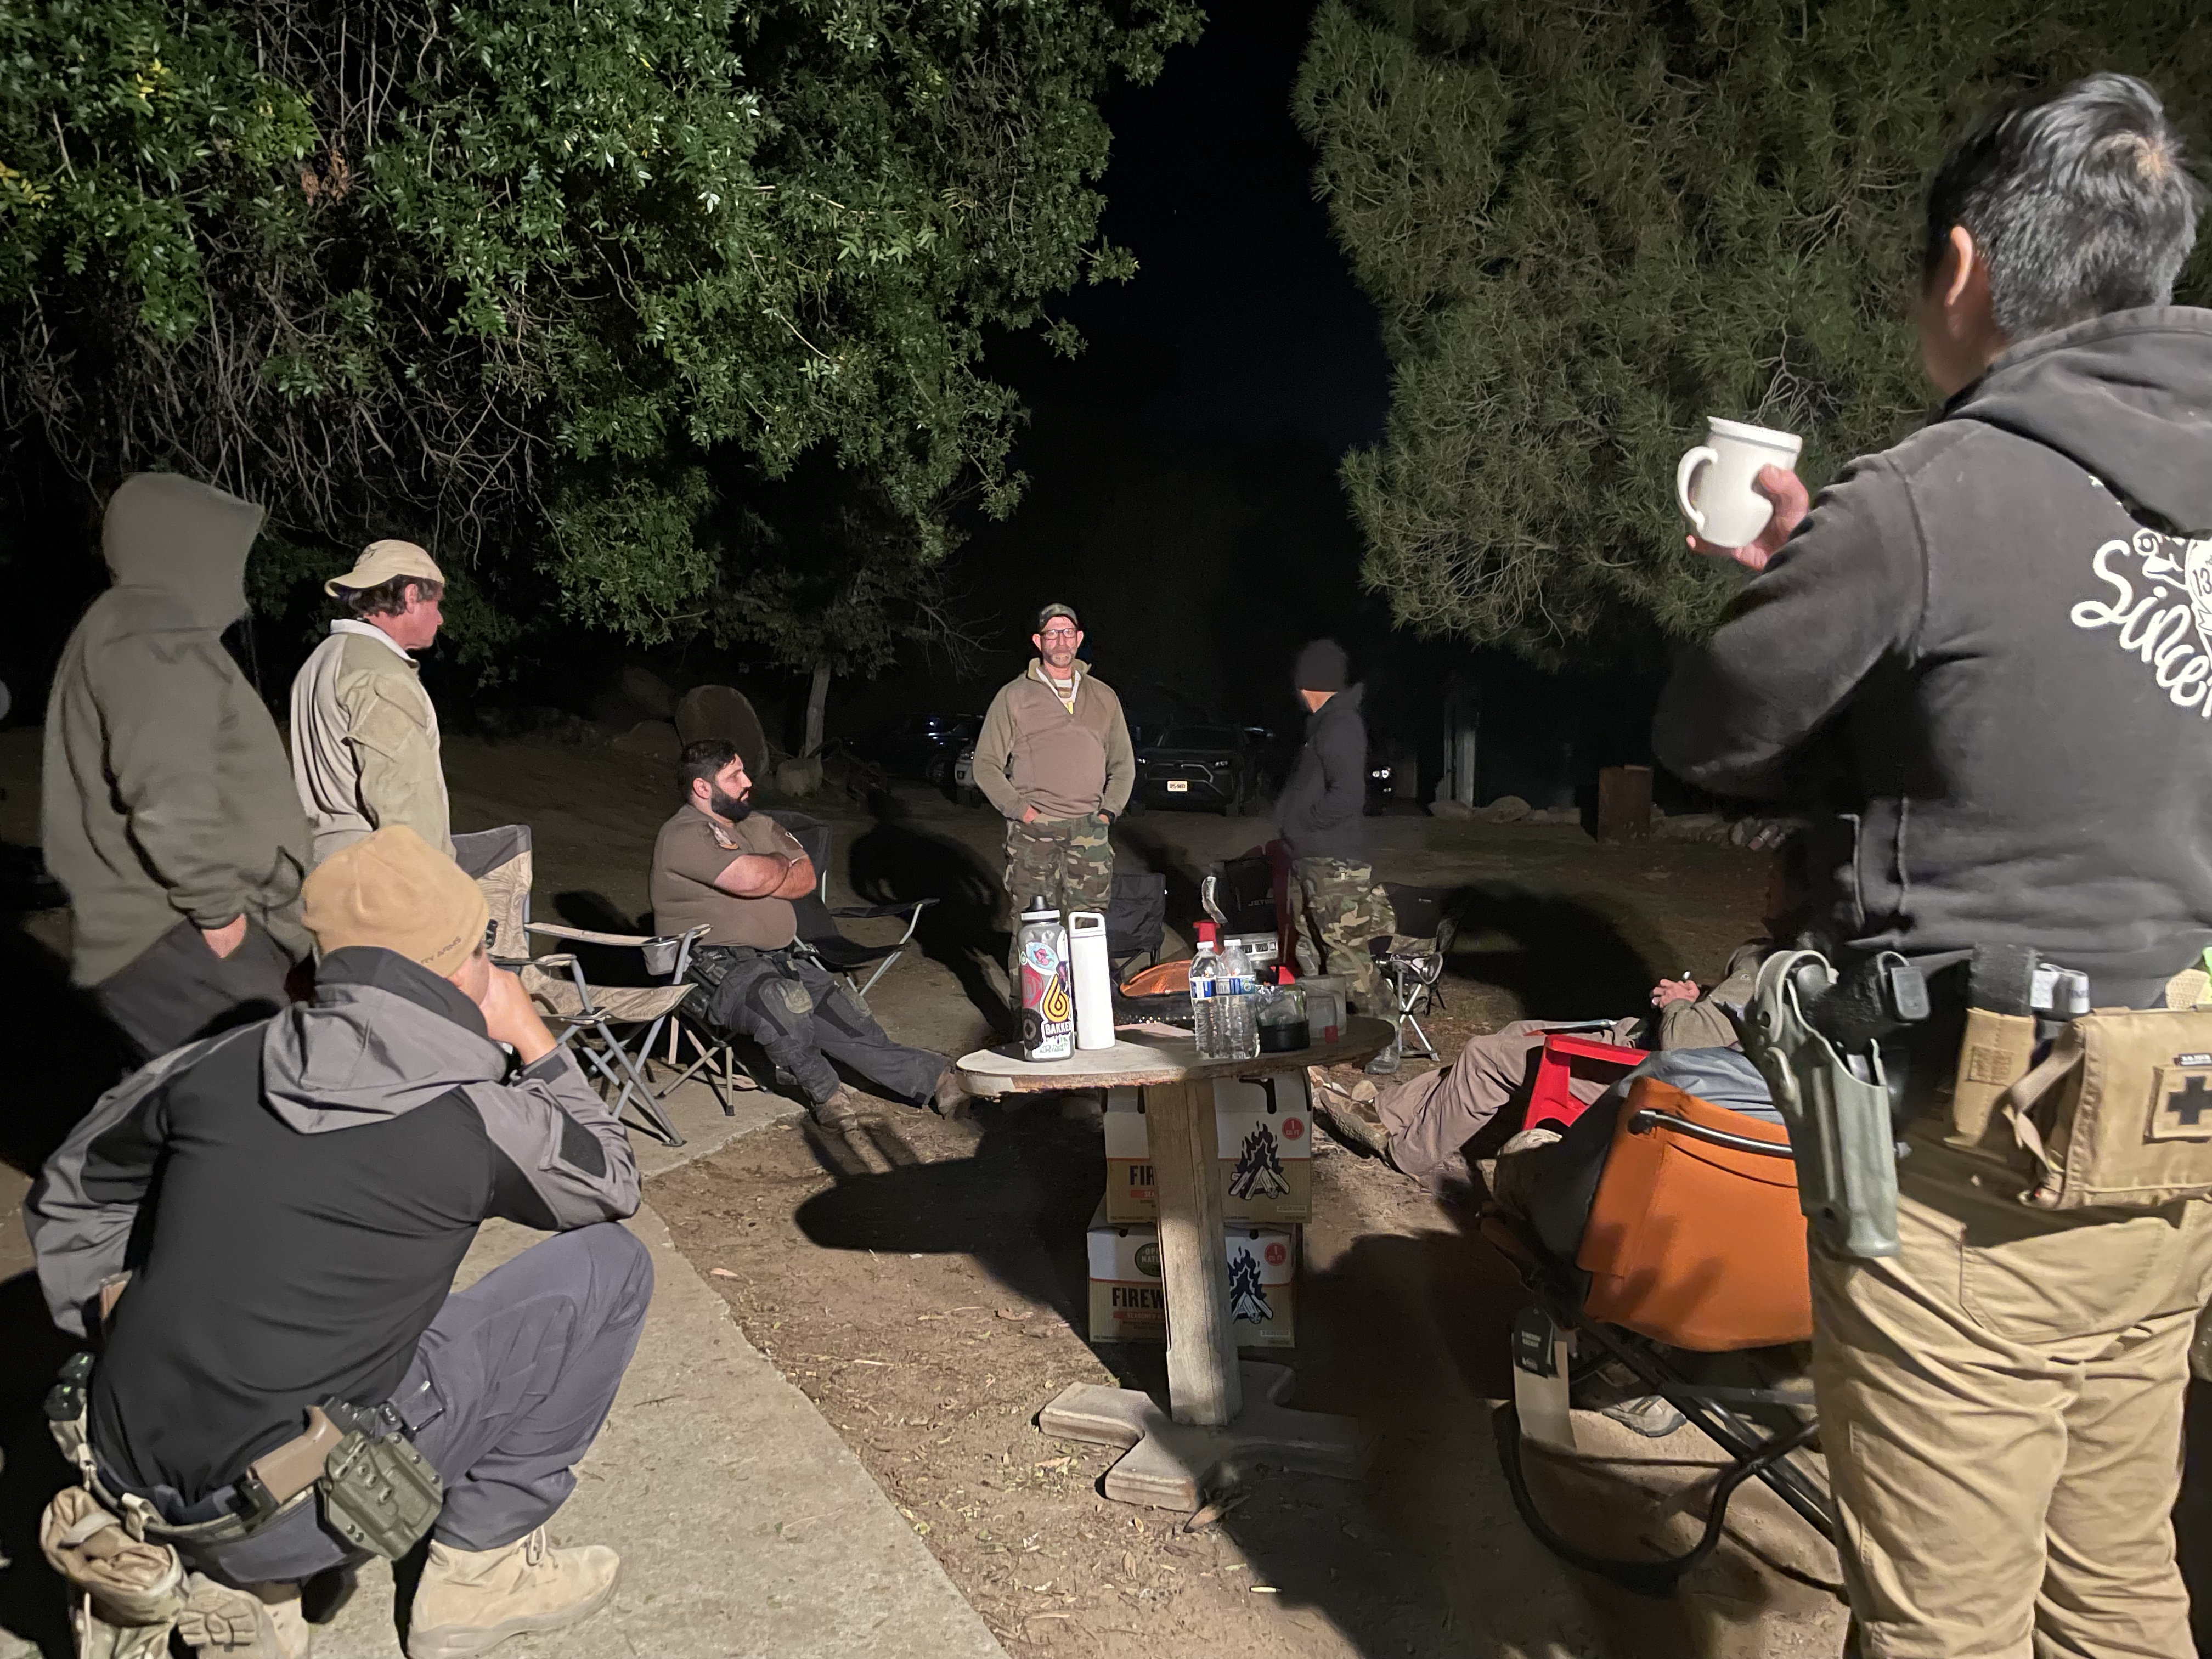
Josh briefs students on the upcoming weekend
Right off the bat, lead instructor Josh Jackson usually makes clear during each introductory brief: this is not a learning course in the traditional sense. Sure, you might learn what holds to use at a certain distance with your chosen optic and ammo, or that maybe walking around for a couple miles with Level IV plates isn’t really as cool as you thought it would be …but if you’re expecting somebody to tell you how to solve each problem presented to you? Yeah, that ain’t happening.
Thinking of Practical Carbine as more of a skills lab than a “class” would be accurate – it’s an opportunity to apply skills you already have in situations that aren’t possible on the flat range. The instructor-to-student knowledge transfer comes through courses-of-fire that are carefully designed to teach specific concepts, along with real-time advice from a cadre with actual experience in austere environments.
Students are advised to run the class with the same guns, and in the same gear, that they would use “for real.” Through this experiential approach, students gain a more complete understanding of their current, on-demand capabilities in a safe and structured environment.
Ballistic Problem Solving
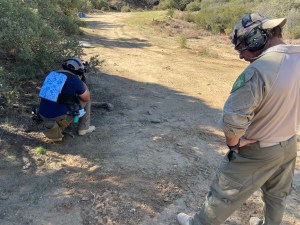
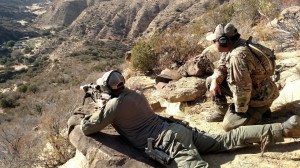
Mark and Jon of WGW running a 2-man positional shooting exercise
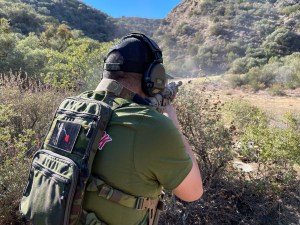
I believe the the biggest focus of Practical Carbine is non-standard shooting. The prescribed round count is low – somewhere in the ballpark of 300-400 rounds – but each course of fire is set up to make you work for each hit. With the exception of a small flat-range skill check at the beginning of the weekend, most shots are taken against the natural backdrop of the Ranch’s many hills, valleys, creeks and plateaus… and the considerations that come with them.
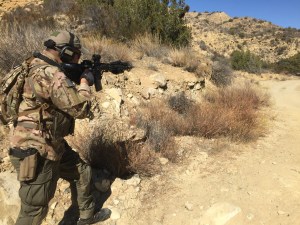
Shooting around, through and over terrain features
Have you ever seen a twig or blade of grass deflect a 5.56 round enough to miss a reduced C-zone at 50 yards? If not, you probably will at Practical Carbine. From having to go into rollover prone to shoot through a gap created by crisscrossing fallen trees, to breaking shots while in defilade, stretching up in order to see above the tall grass – students can expect to problem solve constantly. High-angle and low-angle shots are also not uncommon, and supported shooting is encouraged. In many cases, it’s necessary, forcing students to use whatever terrain they can – I’ve had to dump my hydration pack to use as a rest for my rifle, just to hit the targets we were shooting at.
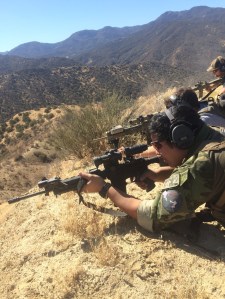
Intermediate distance shooting in the back areas of the Ranch
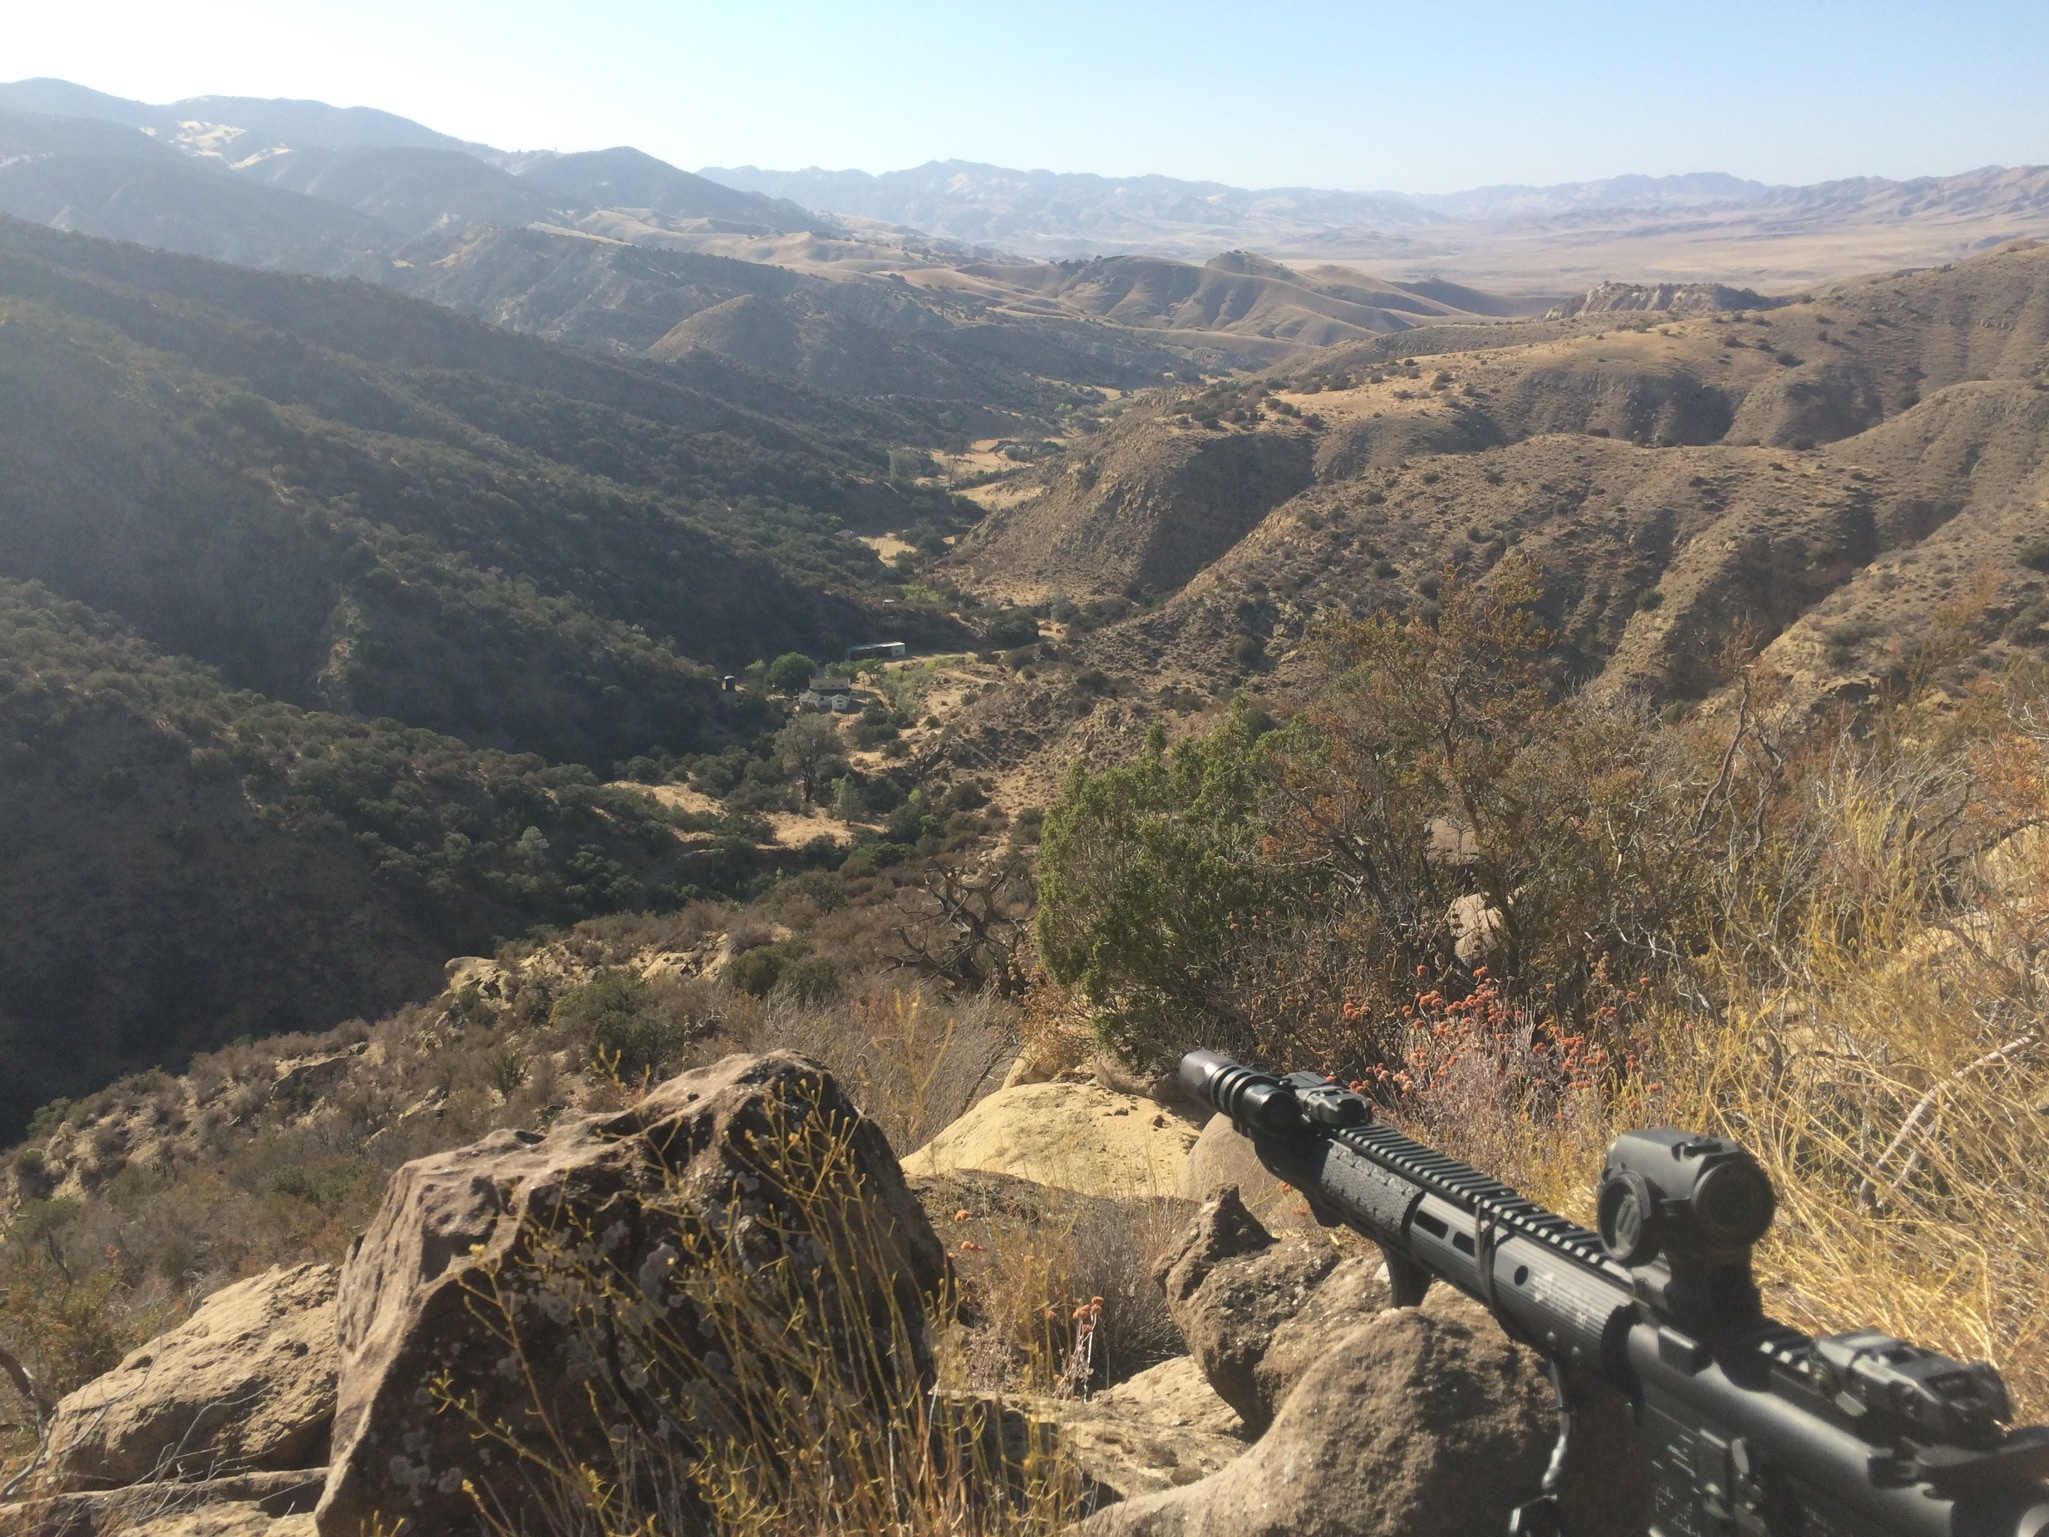
Targets are positioned anywhere from muzzle distance out to 500 yards, with the majority of most shots being in the 100-150 yard envelope… if you can identify them. Visual processing and target discrimination at all distances are required for the class – is that a gun in the target’s hand? Is that even a target? You can’t shoot what you can’t see, and during Practical Carbine seeing is half the battle. LPVO’s and magnified optics are easy money for longer range ID and engagement, but I recommend taking the course with a red dot to really see where you’re at. Being able to tag targets at 550+ yards with an Aimpoint was an eye-opening experience for me.
Throughout all of this, the only instructions are to “Make your hits!” Josh and the other cadre won’t say how, though – that’s on you to figure out, which is a huge part of the curriculum. Problem solving and “making it work” are the primary focuses of the class: Do whatever you need to do to get the desired results.
Night Time is the Right Time, or Something
Staging up for the night shoot
Additionally, Practical Carbine always has a dedicated night time block held on the evening of TD1. Shooting at night is a rarity for most ranges, and especially so in California – the opportunity to run low-/no-light gear is always good to have. When the sun goes down at the Ranch, weapon lights and NODs come out to play. Students are given the choice to run the courses of fire in either the visible or IR spectrum and, like the day time, these consist of both longer engagements and ones closer than you’ll expect.
At the Ranch, the vastness of the property and the totality of the darkness work together to make even a 1,000 lumen weapon light feel underpowered. Beneath heavy tree cover, NODs become useless without a supplemental IR illuminator; the thick shrubbery closer to the ground teaches lessons in candela, mockingly refracting lights with less ass and obscuring targets positioned only a few yards behind. While it may be an interesting experimental process for us city-dwellers, putting low-/no-light equipment to the test is an absolute must for those living or working out in the sticks.
You Can Shoot, but Can You Get There?
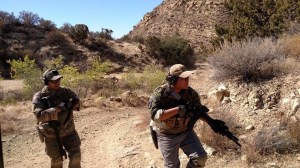
Jungle lanes both close up and at distance
Every shooter has to get into position to make the shot, and I don’t mean dropping to the kneeling or prone – I mean physically being in the right place at the right time in order to put rounds on target. The network of roads, walking paths and game trails on The Ranch provides a unique opportunity to include extended movement both during and before shooting.
Jungle lanes have been an integral part of Practical Carbine since the first time I took the class – they involve moving along a set path while scanning for and engaging targets. This kind of exercise introduces discomfort regardless of experience, forcing students to balance safe weapons handling and target identification while negotiating unfamiliar – and at times treacherous – terrain. Practical Carbine alumni are well acquainted with the slippery rocks and thick brush of The Creek, which is an obstacle that is presented both during the day and when the sun has gone down.
Night time walk, 1/4 mile left to go
While jungle lanes are relatively short in most cases, the size of the property also allows for more extended movements to reach firing points. One of the more memorable moments from my first Practical Carbine was a mile-long hike to reach a 440 yard high angle shot – at the most recent iteration, we covered the same distance in complete darkness before a multi-position no-light shooting lane, with a simulated casualty treatment and extraction at the end. The physical exertion is an equalizer – students unfamiliar with applying the fundamentals under physical activity will find it much more difficult to hit the target than those with better fitness, better shooting ability, or both.
Physical ability and gear setup become important thinking points both during and after a weekend of Practical Carbine. What sounds good on paper – or looks good on Instagram – suddenly becomes much less sexy after some hard movement, forcing students to reevaluate their load and their physical training regimen.
Make Holes, Plug Holes
LMS Defense draws from a cadre pool of varying military, law enforcement, and first responder backgrounds. Depending on the assistant instructor (AI) that Josh has with him, different bonus instruction blocks are offered with each Practical Carbine class that aren’t necessarily shooting-focused; from a former 18D sharing hard-earned medical knowledge to a Recon Marine teaching how to move in and visually process your environment, these are valuable tools for the box no matter the application.
LMS instructor Brian teaching a medical block
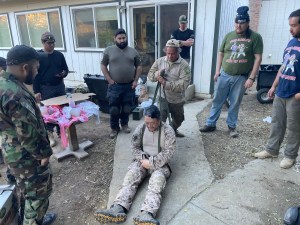
Most of the Practical Carbine courses that I’ve been to have allotted a few hours to a small block of basic trauma care instruction. Baseline topics included the MARCH-E algorithm, wound packing and proper tourniquet staging and application, with more sensitive subjects like improvised medical touched on for the more experienced groups. Both self and buddy aid were covered, and students were expected to be able to apply a tourniquet within seconds.
After the initial medical block was given, the instructors would “TQ check” us at random throughout the rest of the weekend, where a notionally-injured limb was specified during a course of fire. We had to treat it as a real-world wound as best we could – specifically, seek proper cover or concealment, apply a tourniquet to their “wounded” limb, and finish the drill without the use of that limb. This circles right back around to the shooting aspect of the course: 100-200 yard shots are easy money on the flat range, but with one arm down and shooting from the side of a small creek, you are forced out of your comfort zone in order to make your hits.
In Conclusion…
Hanging out by the fire after class (DISCLAIMER: WGW does not condone purchasing or using “Chinese-quality dumbass weeb vaporware jackets because you saw it in a drawing once,” even if our friends might. We recommend outerwear from reputed brands like Arc’Teryx, Patagonia, Beyond, etc.)
It’s a little hard to really convey just how much you can get out of this class. On the surface Practical Carbine seems like only a “fun” experience – the kind that shooters who are too poor to afford tuition or ammo will say is “not needed for an ordinary citizen,” or LARPing. While the environment and courses of fire may have an immediate benefit for a more specific set of professional applications, the concepts relayed and lessons-learned can be brought back to all walks of life – civilian, military or law enforcement. It has become one of my favorite course offerings from LMS Defense not only for its challenging and insightful curriculum, but also simply because it’s a damn good time and an opportunity to connect with like-minded shooters.