Footwear is usually something people don’t talk about when it comes to shooting. Generally speaking, a comfortable pair of sneakers can absolutely get the job done; I even used to run classes and matches in a pair of Chucks, which was a very bold move depending on the ground surface of the range I was at. Most of the outdoor ones had dirt, gravel, or some combination of the two. Thus, after slipping and sliding my way through Area 4, I figured it was probably time to get dedicated “range shoes”.
I took note of what everyone else was wearing: Altama, On, Salomons, Merrells. Trail running shoes are the norm in my locale. After asking some friends for their input, and a couple who were actually willing to let me test out a pair of their shoes, I finally settled on the Salomon SpeedAssault 2s.
Features
There are a few features of the SpeedAssault 2s I wanted to highlight very quickly. I did not own the previous generation of SpeedAssaults so I can’t speak for any changes between the two. Rather, I am only speaking on the few that I noticed from this pair.
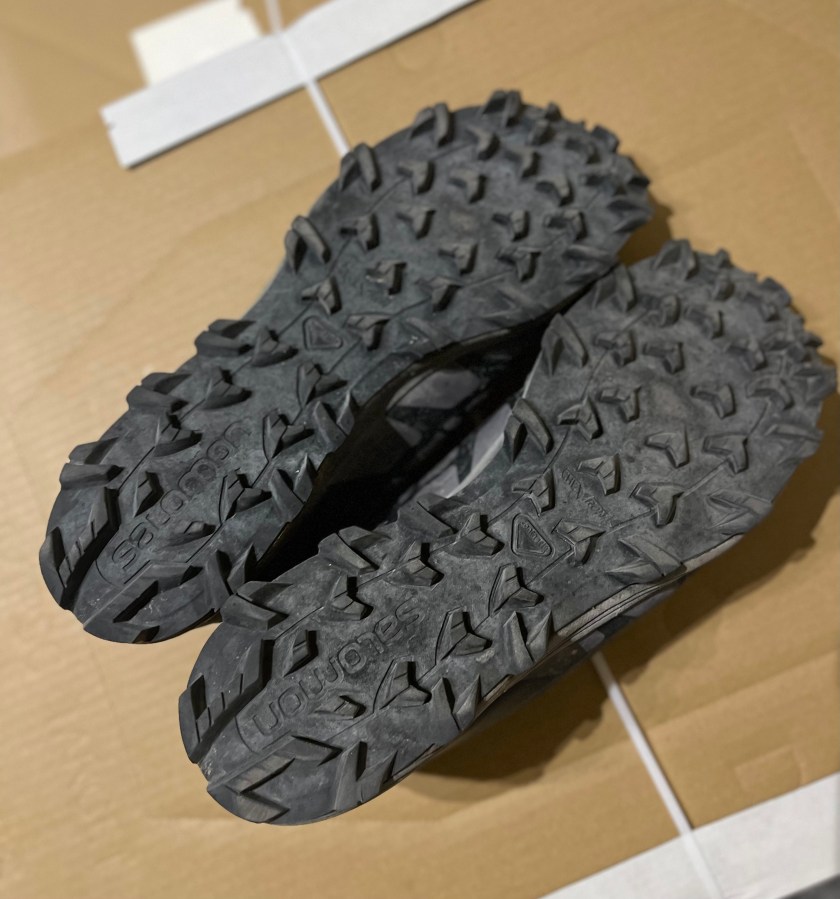
The tread is very grippy on soft dirt and gravel surfaces. While I am not necessarily the quickest shooter, the tread did give me enough confidence to being able to move and explode from position to position. I have not had an instance where I felt like I was gonna slip or fall as I was decelerating.
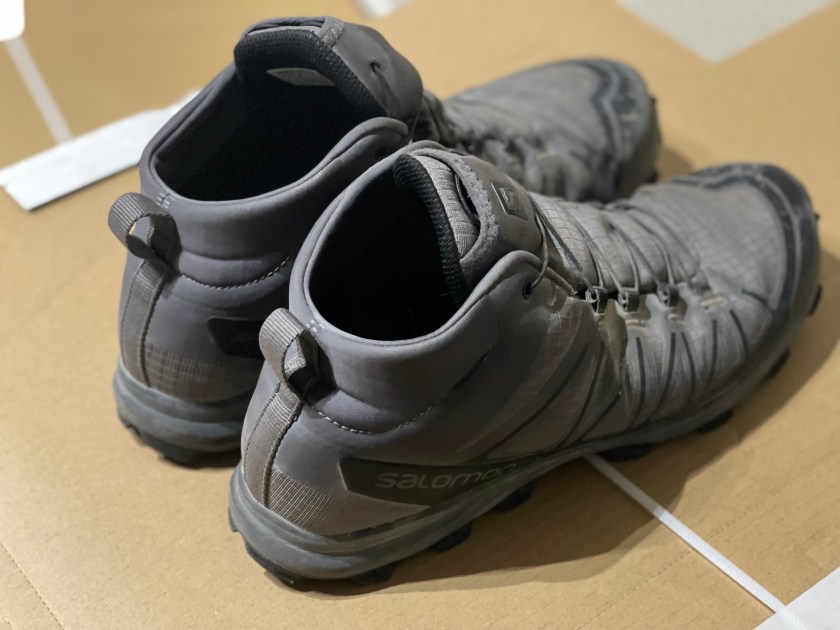
For laces, Salomon used their Quicklace system. This was the biggest draw to me over other trail shoes that have the traditional shoe lace system – as a match goes on, regular laces can be undone, and retying them to ensure security can get troublesome. The Quicklace allows for hassle-free adjustments on the fly.
Finally, the stretch heel just makes putting on and taking off the shoe so much easier. It doesn’t feel like I need to sit down or brace myself to wear these. After a long day, the last thing you want to worry about is falling and tripping over yourself off the range.
Fit and Finish
The SpeedAssault family of shoes are the military counterpart of Salomon’s SpeedCrosses, which have become a mainstay amongst trail shoes. The shoe’s design is a lot more muted, absent of the large “SpeedCross” branding and contrasting colors normally seen. Instead, it comes in three colorways: Black, Dark Brown, and Wolf Gray. I decided to purchase the Wolf Gray one because it not only looks very good clean or dirty, but also because within a friend group of five, four of us have dark brown SpeedAssault 2s. It helps during parties and gatherings when everyone is trying to figure out whose shoes are whose.
The fit was probably the biggest concern I had personally. Salomons are known to run on the smaller side. As a wide-flat footed American, that type of fit is the bane of my existence. Breaking them in was irritating to say the least. Depending on what socks are worn, it can affect how differently the midfoot feels. My Nike DriFit socks were much more generous versus my Darn Toughs at the beginning. The stretch heel does dig at the back of my heel at times. I have not gotten blisters, but the hotspots were hard to ignore.
The break-in period overall took approximately 4-5 weeks of constant everyday wear. After that point, the gripes I mentioned above quitely disappeared and the shoes became a mainstay with how quick, comfortable, and convenient they are.
Long-Term Review
I would like to write a follow up article to this after a few months, following the rest of my shooting season, to give a true impression. My only experience so far comes from breaking them in, going on a hike, shooting one match, and having a couple of range sessions. Ideally, I would like to give a picture of how these shoes fare in the competitive shooting environment in the long run. While they are reasonably priced in comparison to other mid-high end running shoes, I would like to hope that the durability matches price tag.
See everyone at the range! And stand by for part 2!
In the world of USPSA, every advantage matters. Competitive shooters constantly seek ways to boost their performance and gain an edge over their opponents, and upgrading their guns is an important part of that process. Personally, I began my USPSA journey with a Glock 34 and a few aftermarket parts to include a 15lb. recoil spring/tungsten guide rod, a Timney Alpha competition trigger, a Holosun 507c optic, and a stippled frame. The G34 shot great during my first matches, and I was content with what I had at the time. I then had a chance to talk to an Master class Carry Optics shooter, which got the gears turning: he mentioned that a lot of A/M/GM shooters shoot metal frame guns for a reason. I thought about what he said, and remembered that I owned a Beretta M9A1 that had been sitting in my safe for the past four years… with less than 400 rounds through it. I decided that instead of buying the new CZ that’s has become very popular with competitors, I was going start shooting my M9 and “save” some money. In order to make it Carry Optics ready, I decided to upgrade some things at the same time; I had no idea that that decision would turn this pistol into the most expensive, flat-shooting, and reliable handgun I own.
Trigger
A high-quality trigger package is a sensible upgrade for a competition gun. Langdon Tactical offers a range of trigger enhancements that significantly improve the M9A1’s trigger pull. I opted to buy the “Trigger in a Bag” with the NP3 coating; the options I chose for this kit included the following:
– Beretta Elite II Hammer – LTT optimized Performance Trigger Bar – 12lb. hammer spring
These parts are meant to reduce pre-travel and over-travel, with ~3lb. SA and ~5.5lb. DA trigger pulls, and provide a crisper reset. I also added a Volker Precision Flat Faced Trigger, which offers a substantial improvement in trigger control compared to the stock Beretta part. The wider and flatter surface area of this design ensures consistent finger placement shot after shot. With these two upgrades combined, I’ve experienced a more intuitive and precise trigger pull, resulting in improved accuracy and less flinching; all of this creates a smoother and more predictable trigger that ensures more precise shots, quicker follow-ups, and ultimately, faster stages. Compared to the Timney trigger in my G34, the Langdon trigger has a better reset, virtually zero take up in SA, and no over travel. Essentially the SA feels like a nice 1911 trigger.
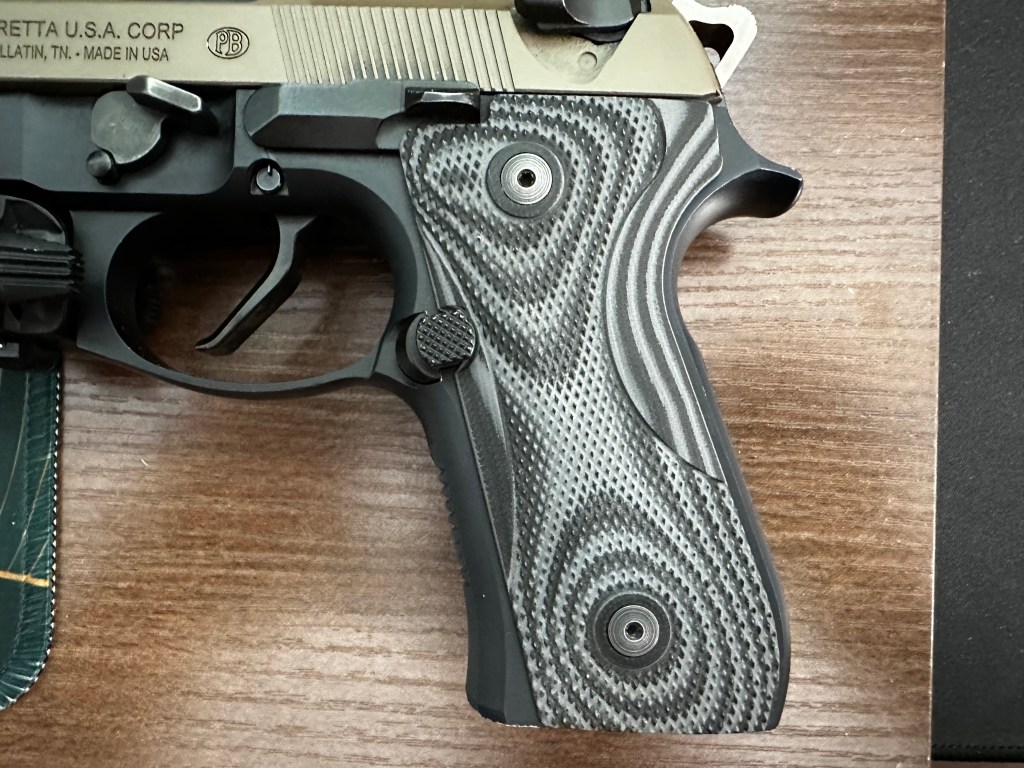
Ergonomics
In a fast-paced match environment, it’s essential to have a firearm that fits the shooter’s hand comfortably and allows for quick target acquisition. I have smaller hands, so I decided to go with the thin checkered grips from LOK Grips. I also installed the Beretta Competition Self-Locking Disassembly Lever for my support hand thumb, and a Wilson Combat Steel guide rod with a 12.5-pound recoil spring. By reducing grip size, having a place to allow my support thumb to provide extra support, and a lighter recoil spring, I have experienced better control and improved overall handling. This is the one area I think my G34 is slightly better. Having an all plastic frame allows me to have it fully stippled so I have grip pretty much everywhere my skin touches the frame, on the Beretta I only have grip on the Lok grips and the disassemblely lever. With that being said I have be training more with the Beretta and it has become less of an issue the more I shoot with the Beretta.
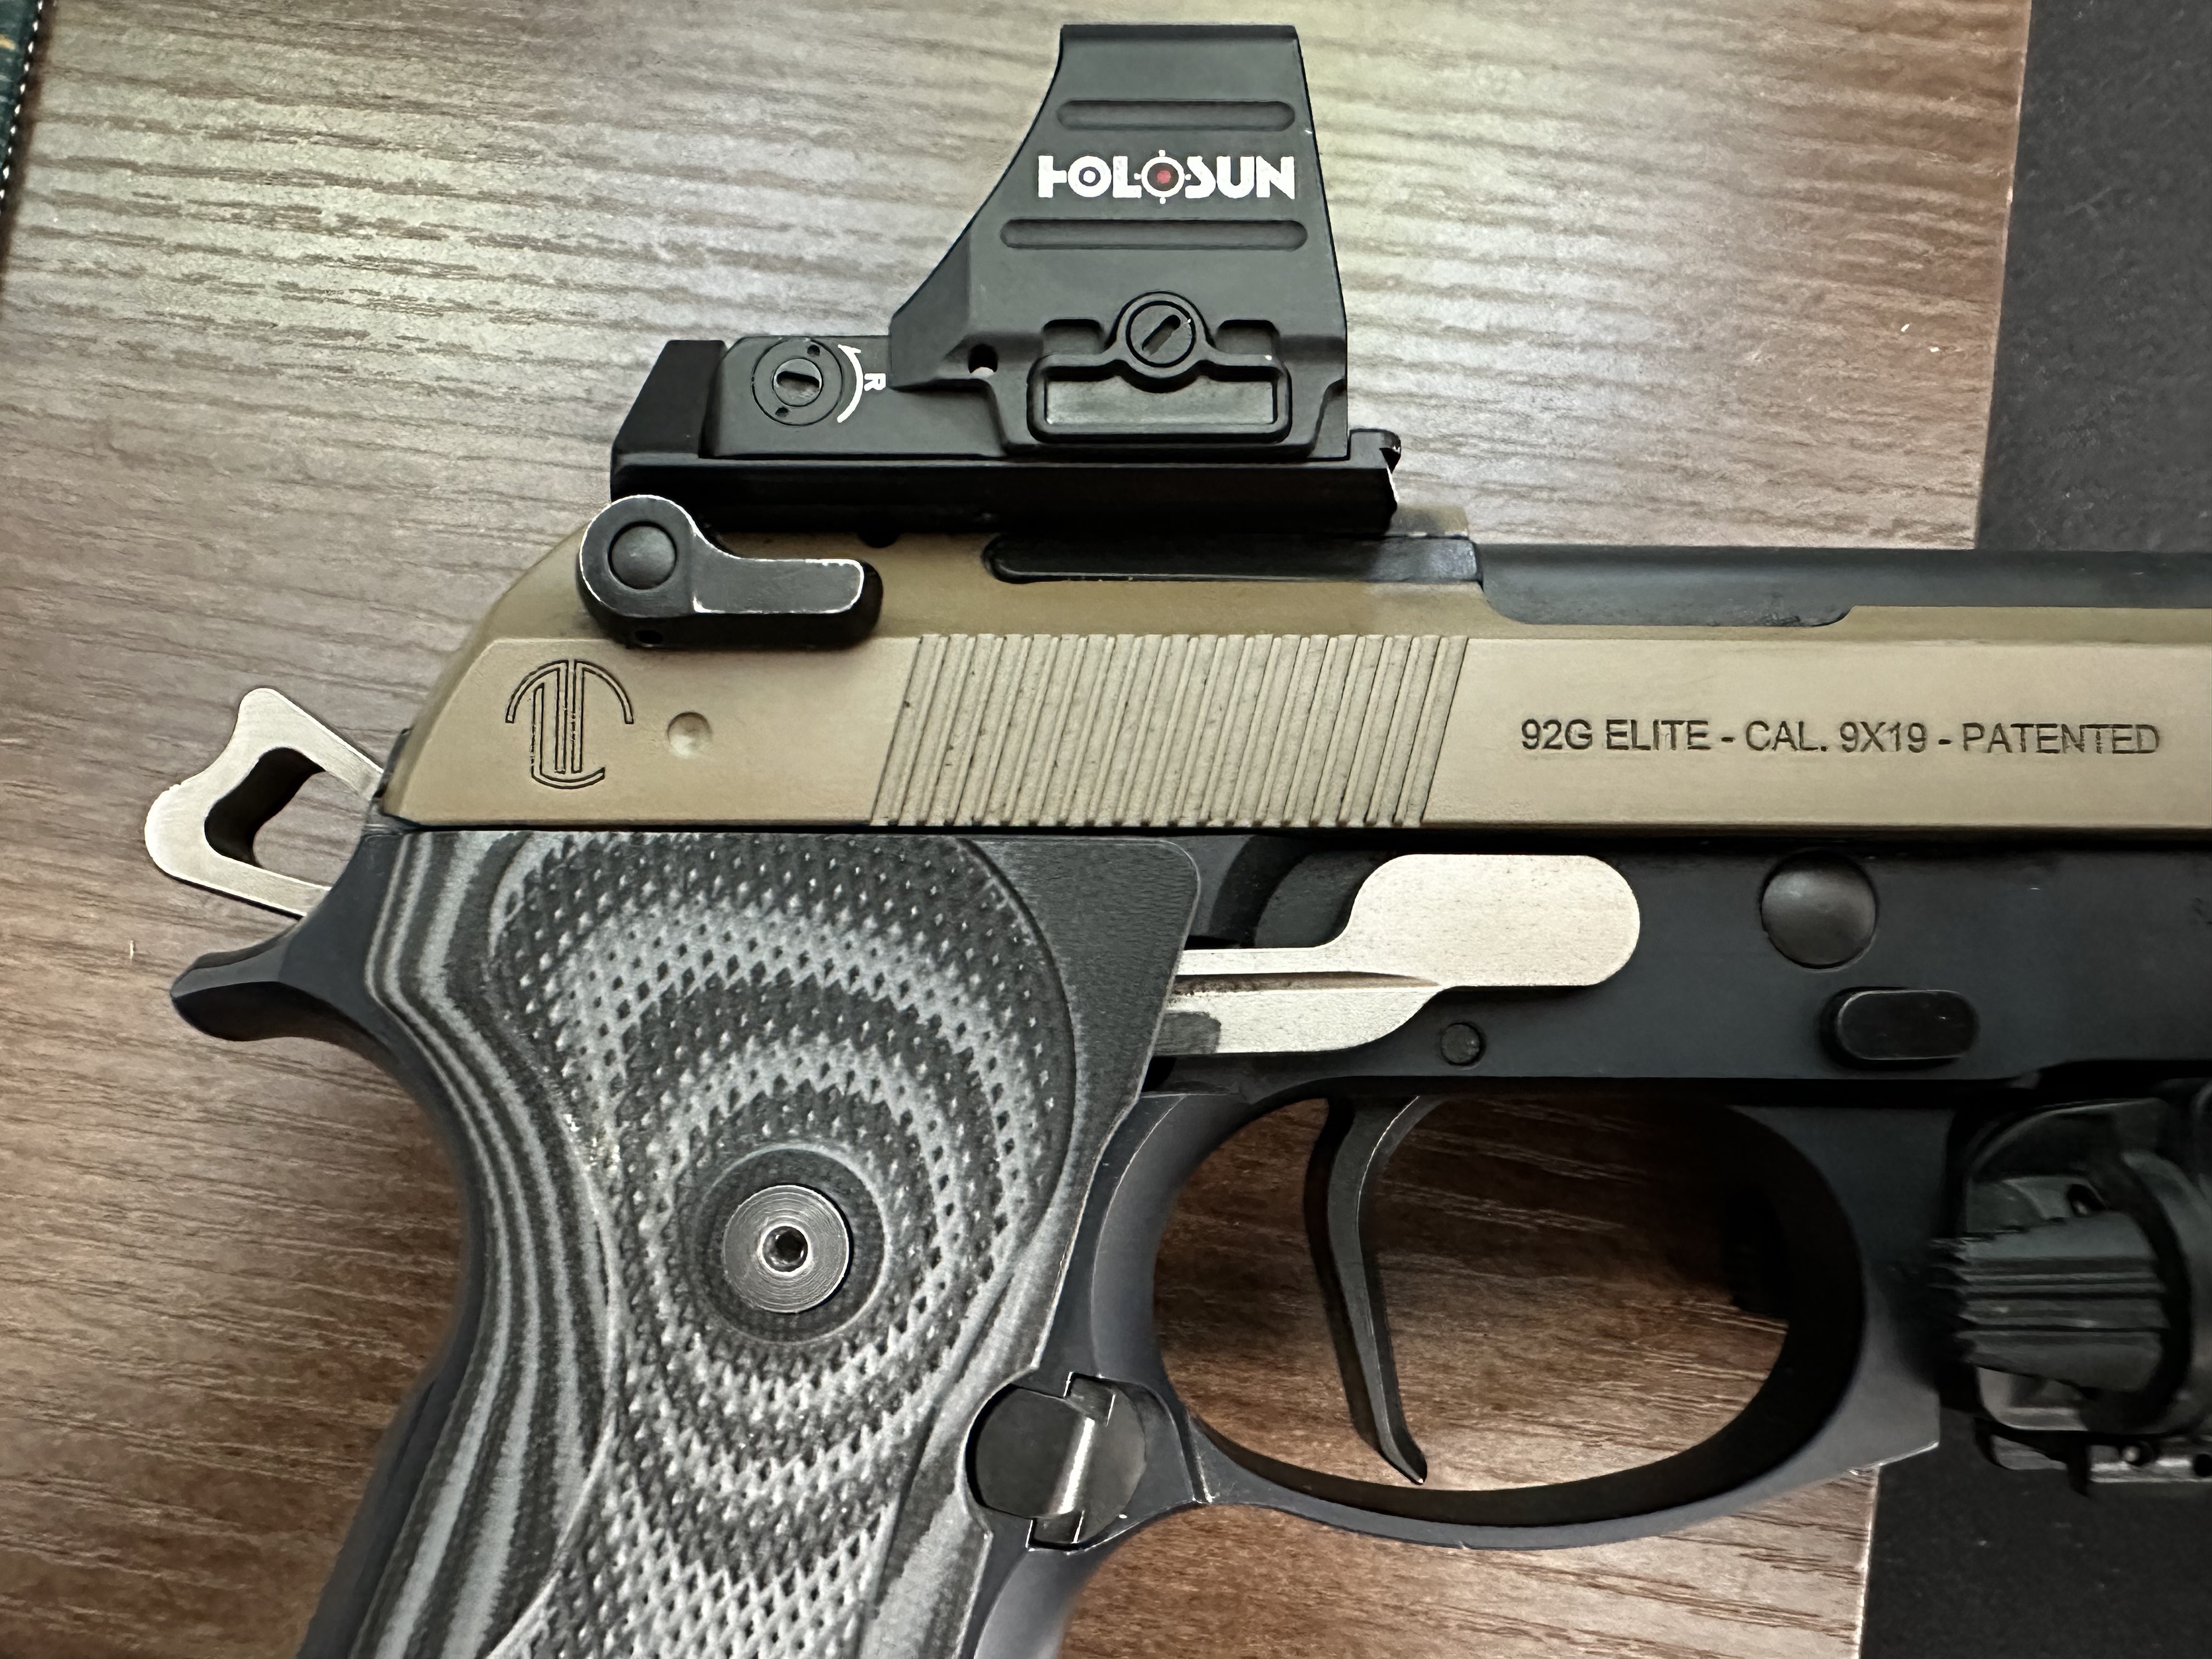
Sights
USPSA stages often feature multiple targets at varying distances and lighting conditions, making it essential to have clear and visible sights. Upgrading to a Langdon Tactical’s 92 Elite Red Dot Ready Slide enhances target acquisition by allowing me the option to mount any red dot that I want, while keeping the optic as low as possible with their patented Optic cut on the M9 series. Currently I have the new Holosun 507COMP, which has been a pretty substantial improvement over the optics I’ve used recently. My initial thoughts on the 507COMP can be found HERE. One thing I will say that I had a big issue with the Beretta is the higher bore axis and the higher optic position on the slide compared to my G34. When I first started competing with my Beretta, I couldn’t find the dot on my draw due to the differences of optic heights between the two platforms. And again, since I have been getting more range time behind the Beretta the less it becomes an issue for me.
Carry Optics Stage Win
There are a lot of other companies that make great parts for the Beretta, but a big reason behind choosing these parts was that 90% of them could be found on one website, Langdon’s; I hate having to buy different parts from different stores, along with the shipping and tax for each one. These parts were also reasonably priced (Langdon also offers a Mil/LE discount) Other than the grips and the competition disassembly lever, everything was purchased from LTT.
The enhanced trigger system, improved ergonomics, and increased sight visibility have all contributed to a huge boost in my performance on the range. I have noticed that I am more confident taking longer shots at speed, and having faster split times up close with tighter hits then I did with my Glock 34. Upgrading my Beretta M9A1 has proven to be a wise choice.
With many clubs mainly focused on USPSA or IDPA, rifle-focused action shooting is few and far between in the Bay Area (shit, in most of California), and BARC was a great opportunity to run my “home defense” gun at match pace. This, along with the fact that BARC is an annual event, really made the whole thing feel special even though there wasn’t anything truly at stake for me; I was just there to shoot fast and have fun.
The Bay Area Rifle Championship, or BARC as it is affectionately known, is a rifles-only shooting match held annually at the Richmond Rod & Gun Club (RRGC). 2023 would be it’s 18th year running, with the inaugurual BARC being held in 2006. I’d heard about the match previously, before I started my competitive shooting journey, as some of my friends had participated in prior years (and walked away with some awards, too!). When I saw that the registration for this year’s event had opened up on Practiscore, I paid the $100 match fee and signed up as soon as I could – I consider myself pretty decently-skilled with an AR-15, and thought the match would be super fun to shoot. I spent the next few months eagerly awaiting match day to arrive.
Starting about two-and-a-half weeks before BARC, Match Director Joe Austria began to trickle out the necessary logistical info for match day. While he did post occasional small updates to the BARC Instagram and Facebook, I started getting Practiscore emails with starting bay assignments, estimated stage/round counts, and tentative timing for the event. These general details got narrowed down the closer we got to match day, and I felt well-informed and prepared when I stepped onto the range the morning of. The stage diagrams were posted a few days before the event – something I’m not used to happening at my club matches – so I was able to do some pre-match visualization and get some stage planning in. This was about the only preparation I did for BARC – I didn’t do any dryfire prior to the match.
BARC Begins
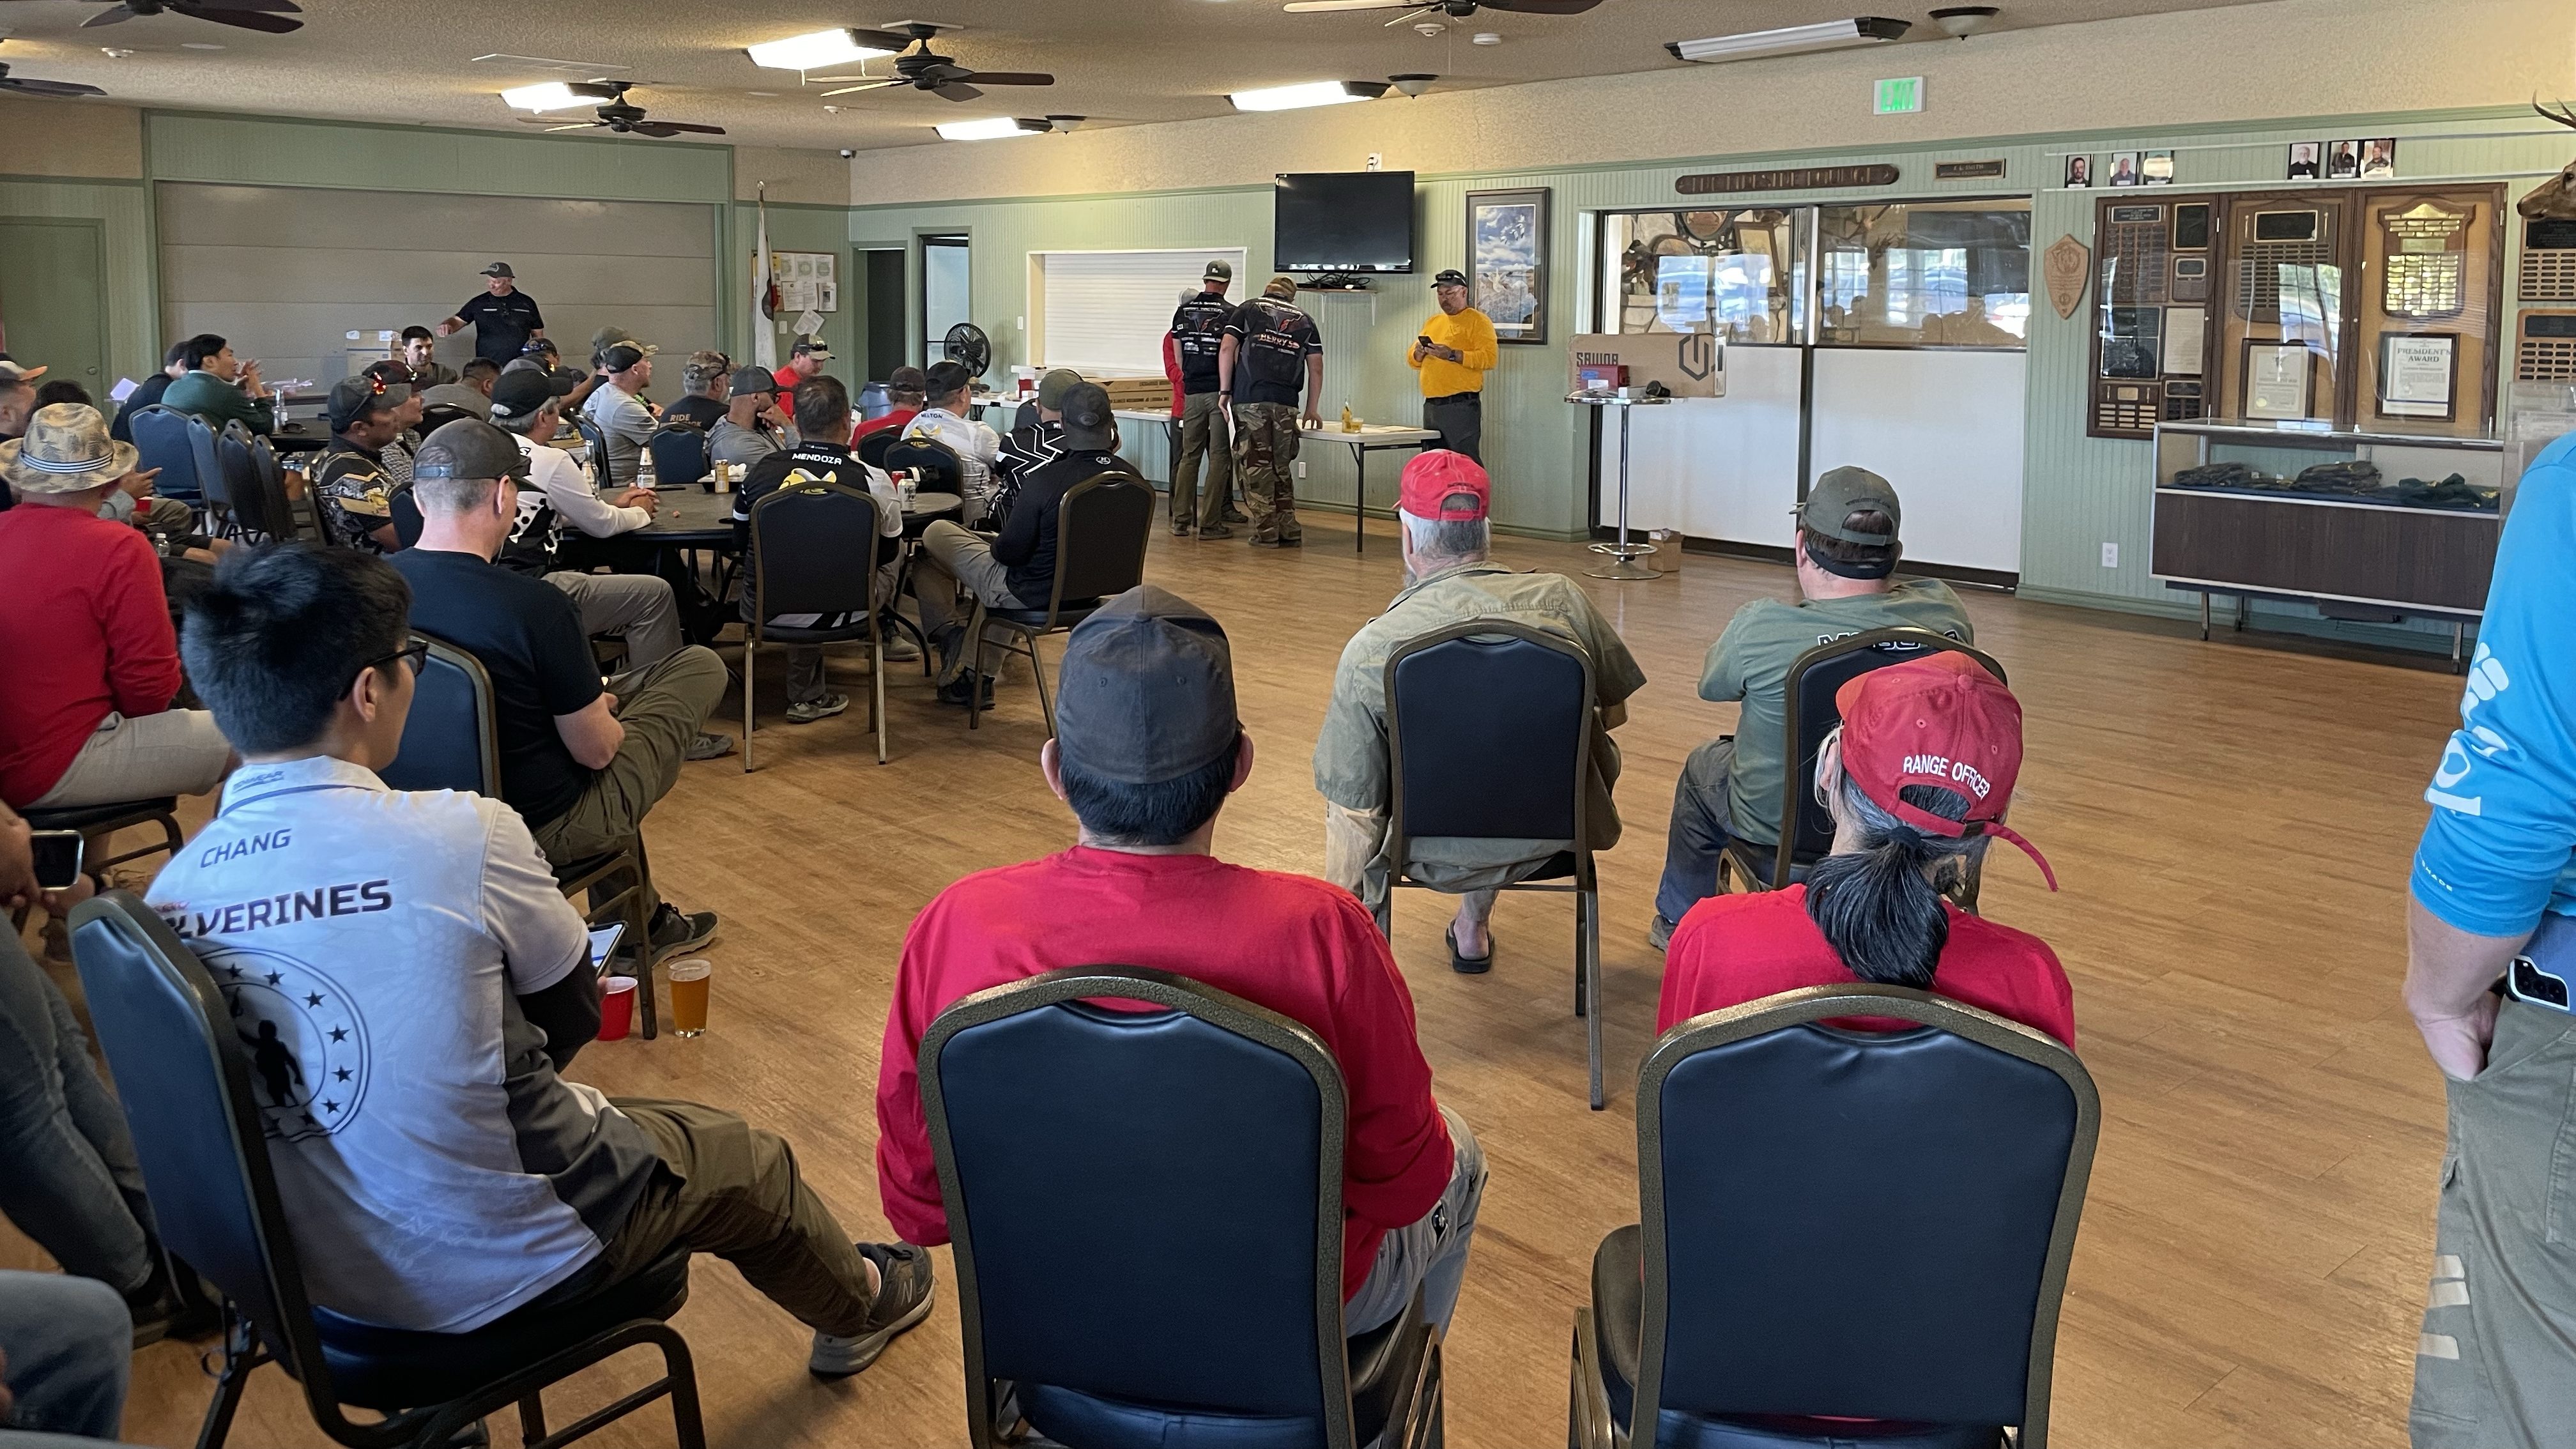
Shooter’s meeting!
I arrived at RRGC the morning of 30JULY with 15-20 minutes to spare. Check-in was a breeze; it took me all of three minutes to drop by the registration table, give them my name, and receive a BARC 2023 t-shirt. I also left a box of WGW goodies for the prize table at the end of the day. I checked out/walked through whatever stages I could on my way to Bay 3, which is the “meeting area” by the stat shack; as it turned out, things were running a little behind so I walked a couple more stages and had a few minutes to relax. The shooter’s meeting came shortly after; sponsors, and RO’s were announced and thanked, last minute changes were noted, and we were off! There were (7) 13-person squads for the main match, and it was awesome to see so many people participating.
I made my way to Bay 1 where my squad was starting; I was a little nervous at first as I was moved onto the match’s “Super Squad” a couple weeks prior, but that quickly faded away as I saw how friendly and helpful these dudes were. There were very talented shooters in our group and it helped to move things along quickly.
Mover? I Barely Even Knew Her!
Ed Espinoza shoots the bonus stage, Royal Flush
(Note: if you’re looking for a more in-depth stage/match breakdown, you can find it HERE)
This year’s BARC consisted of (7) main stages and (1) bonus “fun” stage, all shot under USSL/URL Time-Plus rules. For those unfamiliar, URL scoring calls for (1) A-zone hit or any (2) on paper, within the scoring areas. In other words: speed was slightly favored, while accuracy was still rewarded. Even with the generous scoring zones on the paper targets, Joe (who, on top of being the MD, designed all of the BARC stages) didn’t make things easy.
Brian Nelson engages mini-metrics from The Wobbler
One of the things I knew going into BARC was the liberal usage of stage props. This year, the competitors had to manage a a few different ones. These props induced both downrange target movement and shooter instability (if not managed correctly).
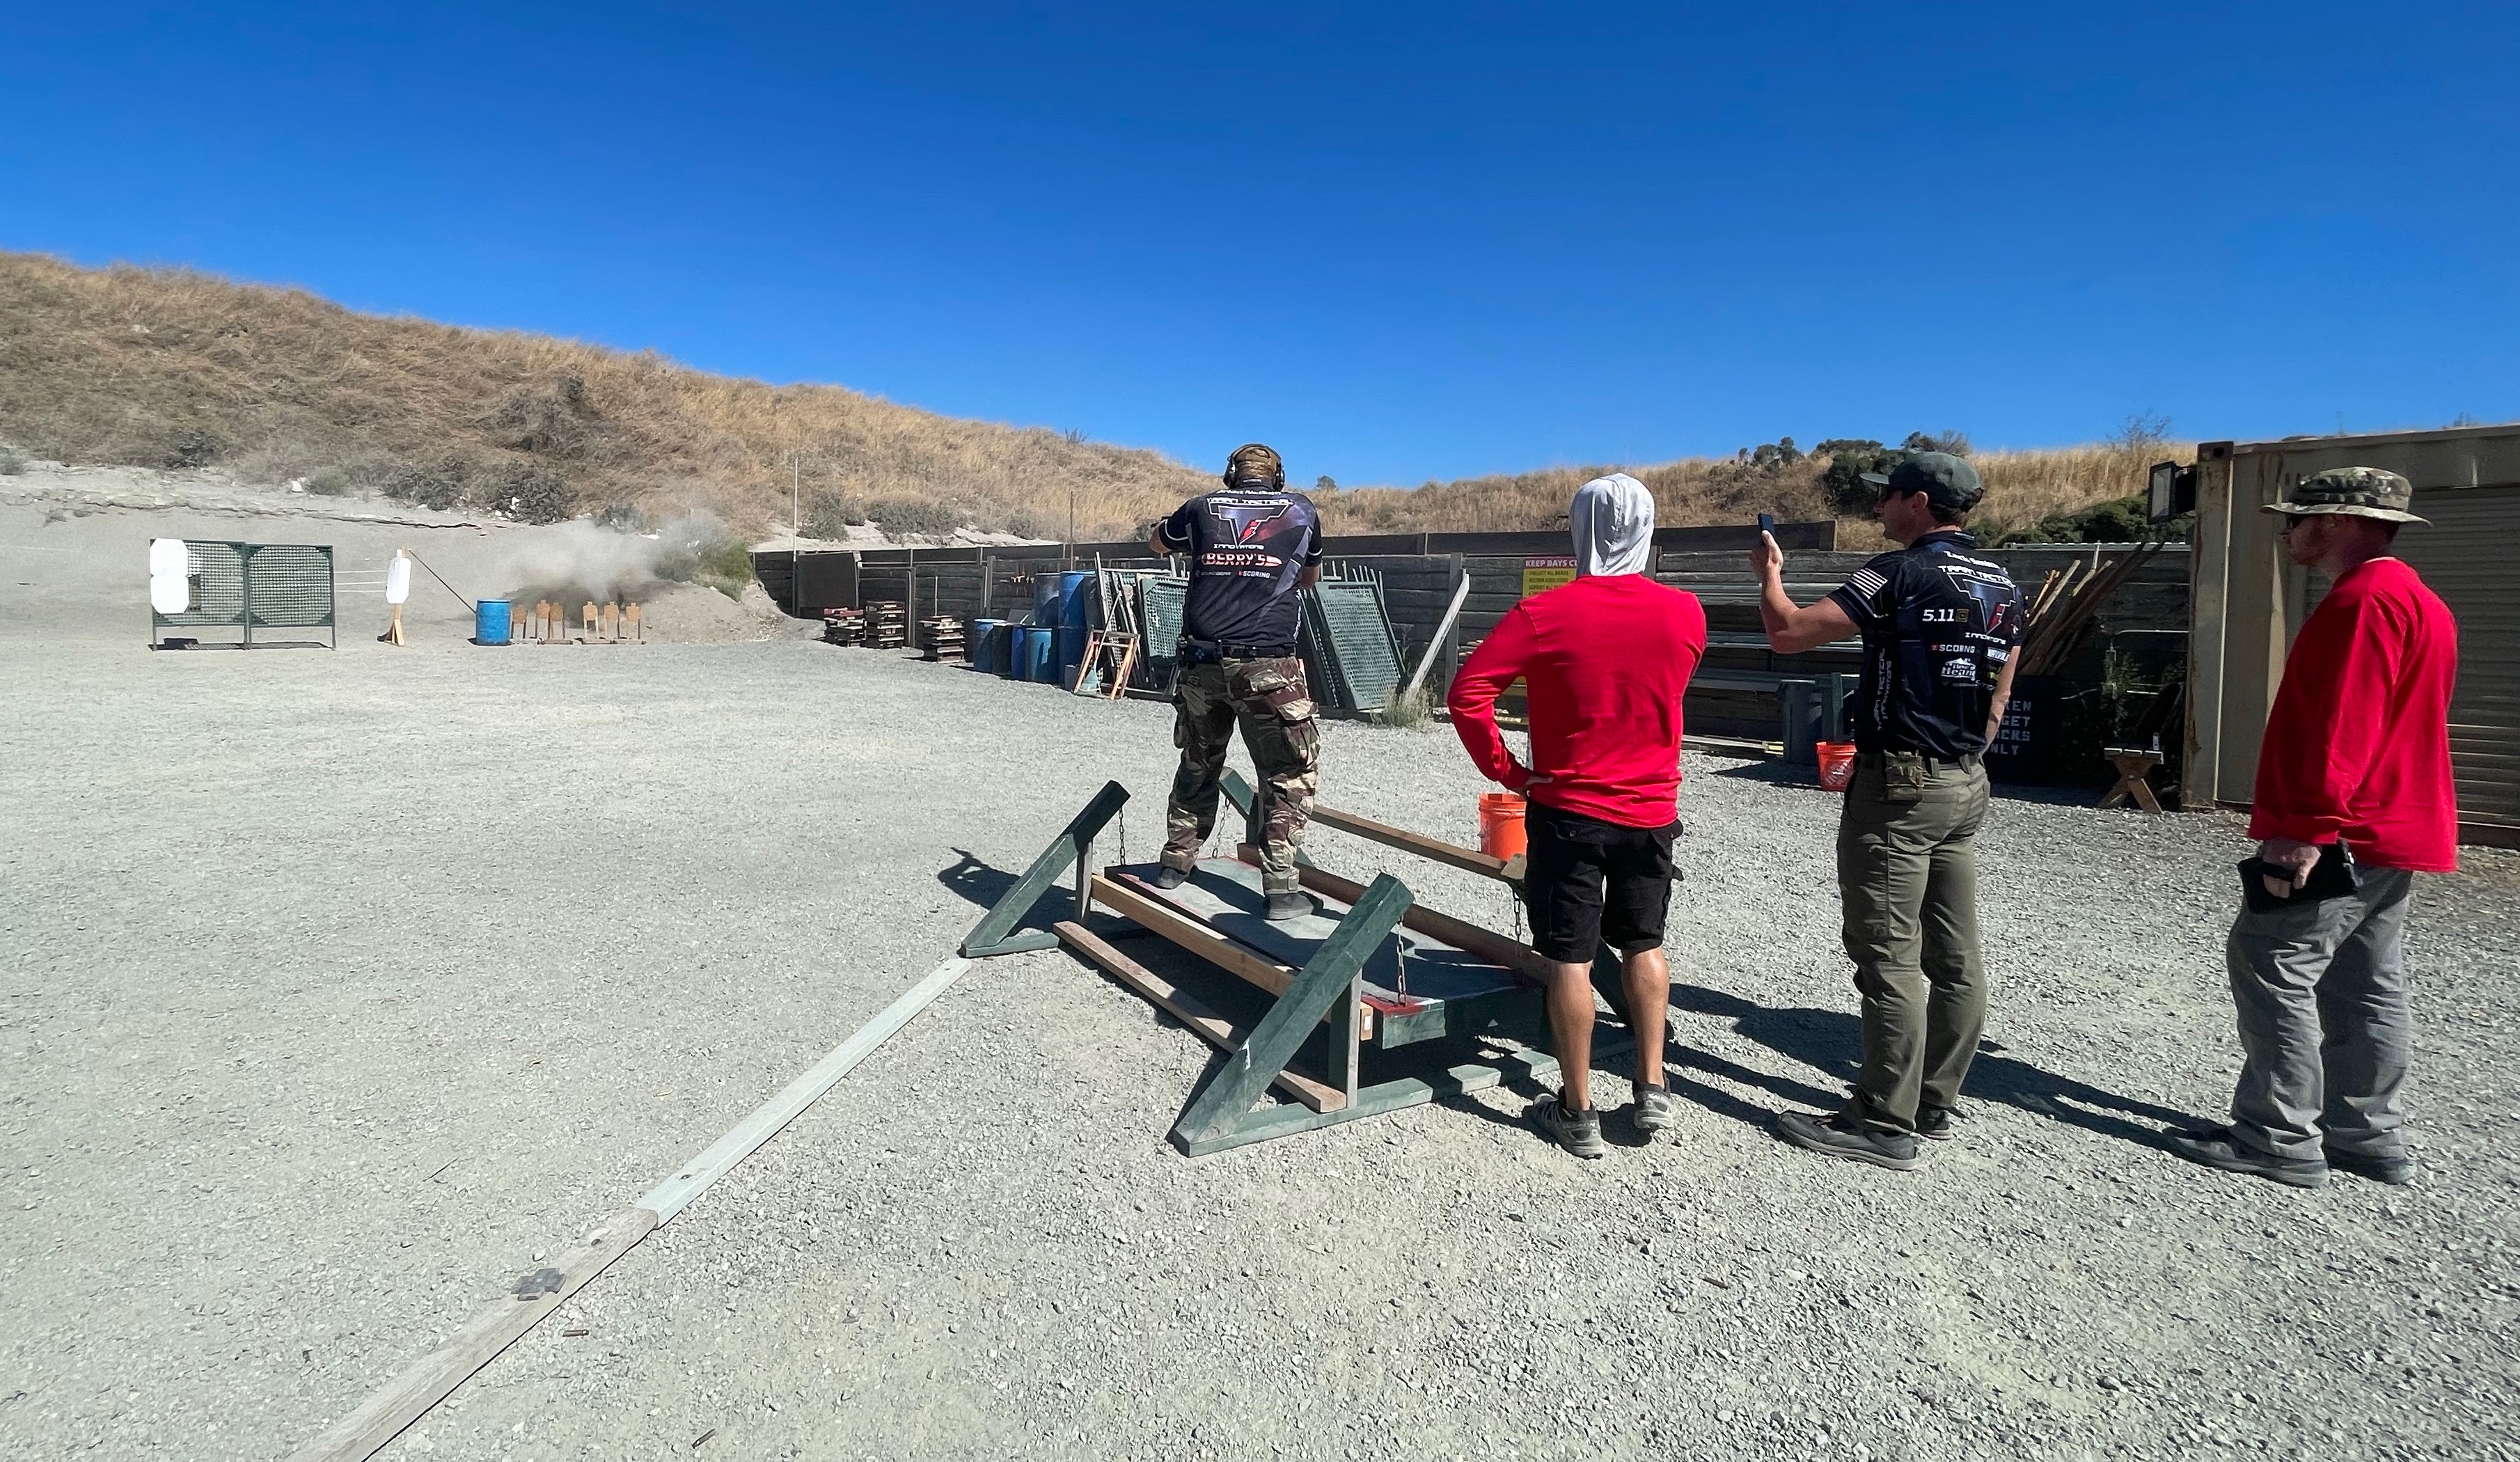
On Bay 3, we went straight from shooting off of a required barricade to engaging a lateral moving target, something I’ve personally never had to deal with before. The last array if targets on 3 was shot from what I like to call The Wobbler, a small platform suspended by chains that does exactly as described when shooters stepped onto it. Bay 5 had both a double swinger and a Maxtrap array, the latter of which was thankfully optional to activate; that didn’t necessarily translate to an easier shot, which leads me to the next thing I appreciated about Joe’s stage designs.
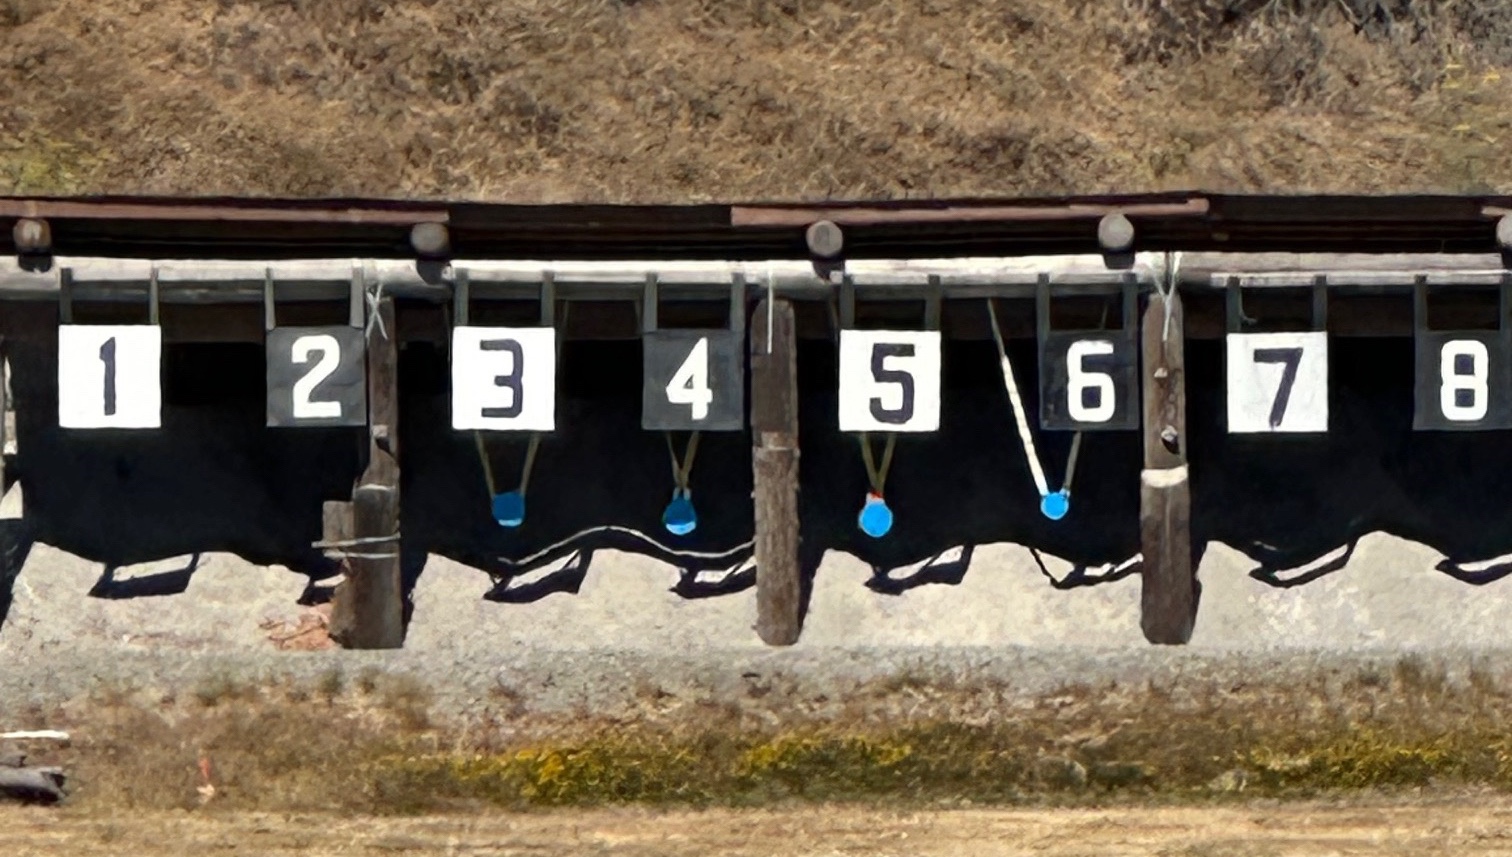
Count the partials. Not shown: Left side of the bay
Everybody loves a good hoser stage with a bunch of open targets, of which there were a couple fun ones at BARC. But nobody wants to shoot an easy match, and UML scoring is arguably much easier than the traditional USPSA Hit Factor style… so of course, make the targets harder. Nevermind the fact that shooters had to deal with kooky stage props: reduced targetry was just another challenge we had to face. Of the (7) main stages, (4) had partial or reduced targets – clay pigeons, mini-metrics, no-shoot hostage shots and 8-10in. steel on the 200yd bay. Making tighter shots was just as much of a requirement as shooting and moving aggressively.
Shooters had to manage these…… in order to shoot these. 8in targets on flanks, 10in. targets center
The combination of challenging props, reduced targetry and complex stage design really tested each shooter on how well they understood their rifle and applied their skills. One of the common issues that popped up over the course of the match was mechanical offset; it seemed that many shooters forgot, or simply did not know, to hold their point-of-aim higher on closer shots. This resulted in a fair amount of no-shoots getting clipped. The 200yd. stage was also a good skill and equipment check; bad zeroes, along with what I assume to be a general lack of experience shooting off of barricades and at intermediate distances, resulted in this stage being a “make or break” for many competitors. Some with 1-6x optics struggled to make their hits; others, like Team TTI’s Zack Smith, made short work of the 8 and 10in. plates with an unmagnified red dot. As always, the saying holds true: “It’s not the plane, it’s the pilot.”
“Must Be Present to Win!”
Closing Ceremony and Awards
Just as the rules for the random draw stated: you had to be there to get the prize, which, in this case was shooting a super fun match and getting some trigger time in – always a win. With many clubs mainly focused on USPSA or IDPA, rifle-focused action shooting is few and far between in the Bay Area (shit, in most of California), and BARC was a great opportunity to run my “home defense” gun at match pace. This, along with the fact that BARC is an annual event, really made the whole thing feel special even though there wasn’t anything truly at stake for me; I was just there to shoot fast and have fun, but there was definitely a different atmosphere than a typical weekend club match. It’s hard to describe other than “it was awesome.”
Being on the Super Squad, we finished up right around 1500 and had some time to spare after brass call and range breakdown – I was able to down a couple Coronas and a hot dog while we waited for the awards ceremony.
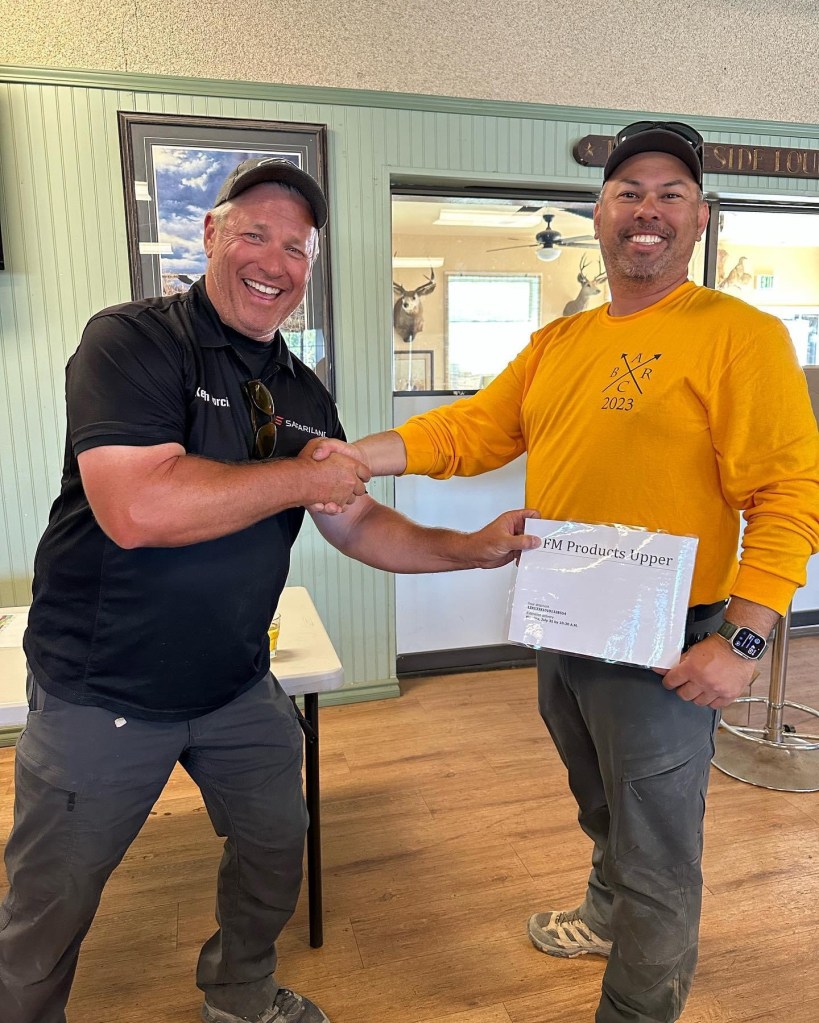
Joe with High OA and 1st Optic winner Zack Smith of Unrivaled Technologies/Team TTI
Division and OA winners were announced and awarded, and most competitors got to go home with something from the prize table via random draw- very straightforward closing activities, and everyone was just having a good time and celebrating each others’ successes. On the topic of the prize table I’d like to thank our fellow sponsors for supporting the match and giving everyone cool stuff to come home with! You can find their websites after the images below:
I don’t know what else there is to say about BARC other than I’ll definitely be back next year. A well-organized event with fun stages, great people, delicious food and the opportunity to win free stuff?Don’t miss out in 2024!
I’d like to give VERY special thank you to Osha Thai BBQ for catering the lunch at the match. All shooters and RO’s were provided with a personal meal on both days, and the consensus was that it was excellent – I agree 100%. The plate we got on Sunday was made up of egg fried rice, chicken, beef and a garden salad along with some special Osha sauce – some of the best Thai food I’ve ever had. If you’re in town please stop by and treat yourself!
In short, any of these listed rifles would cost you near if not more than a premium factory AR such as a KAC SR-15, Noveske Gen 4, or a Geissele Super Duty. It’s important to remember that the rifle we are about to build is inherently a rack-grade milspec M4, with the exception of the upper receiver profile. I just cannot find any way to justify these prices aside from “hype.” I’d hate to see people turned away from a fun, historic rifle like this due to hypebeast gatekeeping.
Quick disclaimer: I have literally no relationship with any of the companies or manufacturers I am going to mention in this article. Nobody knows who the fuck I am, I’m just a random shittalker on the computer.
The main reason I wanted to make this article is because in the past 5 years or so, the retro AR scene has exploded. Several notable influencers (you know the ones) in the online gun sphere have released content regarding rifles like this, which is awesome, but it also drives a certain not-so-cool element. I assembled my first “retro” in about 2016, while I was still a somewhat poor gun store employee and student. My rifle was based on the Model 727, but did not feature a mounted optic or weapon light. This rifle maybe cost me 5 or 600 dollars to make, if I recall correctly.
Recently I have noticed a trend of certain businesses marketing for retro AR parts or outright to-order builds. Let’s take a look at a couple listings.
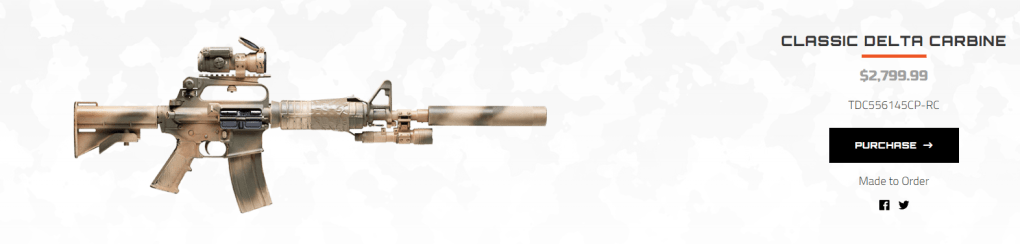
Type-A Rifles. This listing includes the Aimpoint PRO, but not the suppressor or WML.Of note is that this particular upper is a hybrid of an A2 and Noveske Gen 4 profile, which is unique, but wasted seeing as there is no NSR handguard to mate to it.
To make matters worse, the next screenshot is from a video about doing a CAR-15 home build.
I literally don’t know how you can make this build cost over $4k. Perhaps the Aimpoint 3000 was most of this cost.
In short, any of these listed rifles would cost younear if not more than a premium factory AR such as a KAC SR-15, Noveske Gen 4, or a Geissele Super Duty. It’s important to remember that the rifle we are about to build is inherently a rack-grade milspec M4, with the exception of the upper receiver profile. There is no reason you should think you need to pay this much for this build, and I hate the idea that these companies are making people think this is what they cost. I hold no ill will to anyone at these companies. I’m sure the dudes at Type-A make a great rifle. I have met several of the dudes at Noveske, I appreciate them greatly, and they also make a great rifle. I just cannot find any way to justify these prices aside from “hype.” I’d hate to see people turned away from a fun, historic rifle like this due to hypebeast gatekeeping.
Let’s go over my particular impression build, and I’ll break down the costs and include sources for components as best as I can. I’ll include some substitutions as applicable. Don’t forget – have fun with your build!
Not Clone Correct Bro!
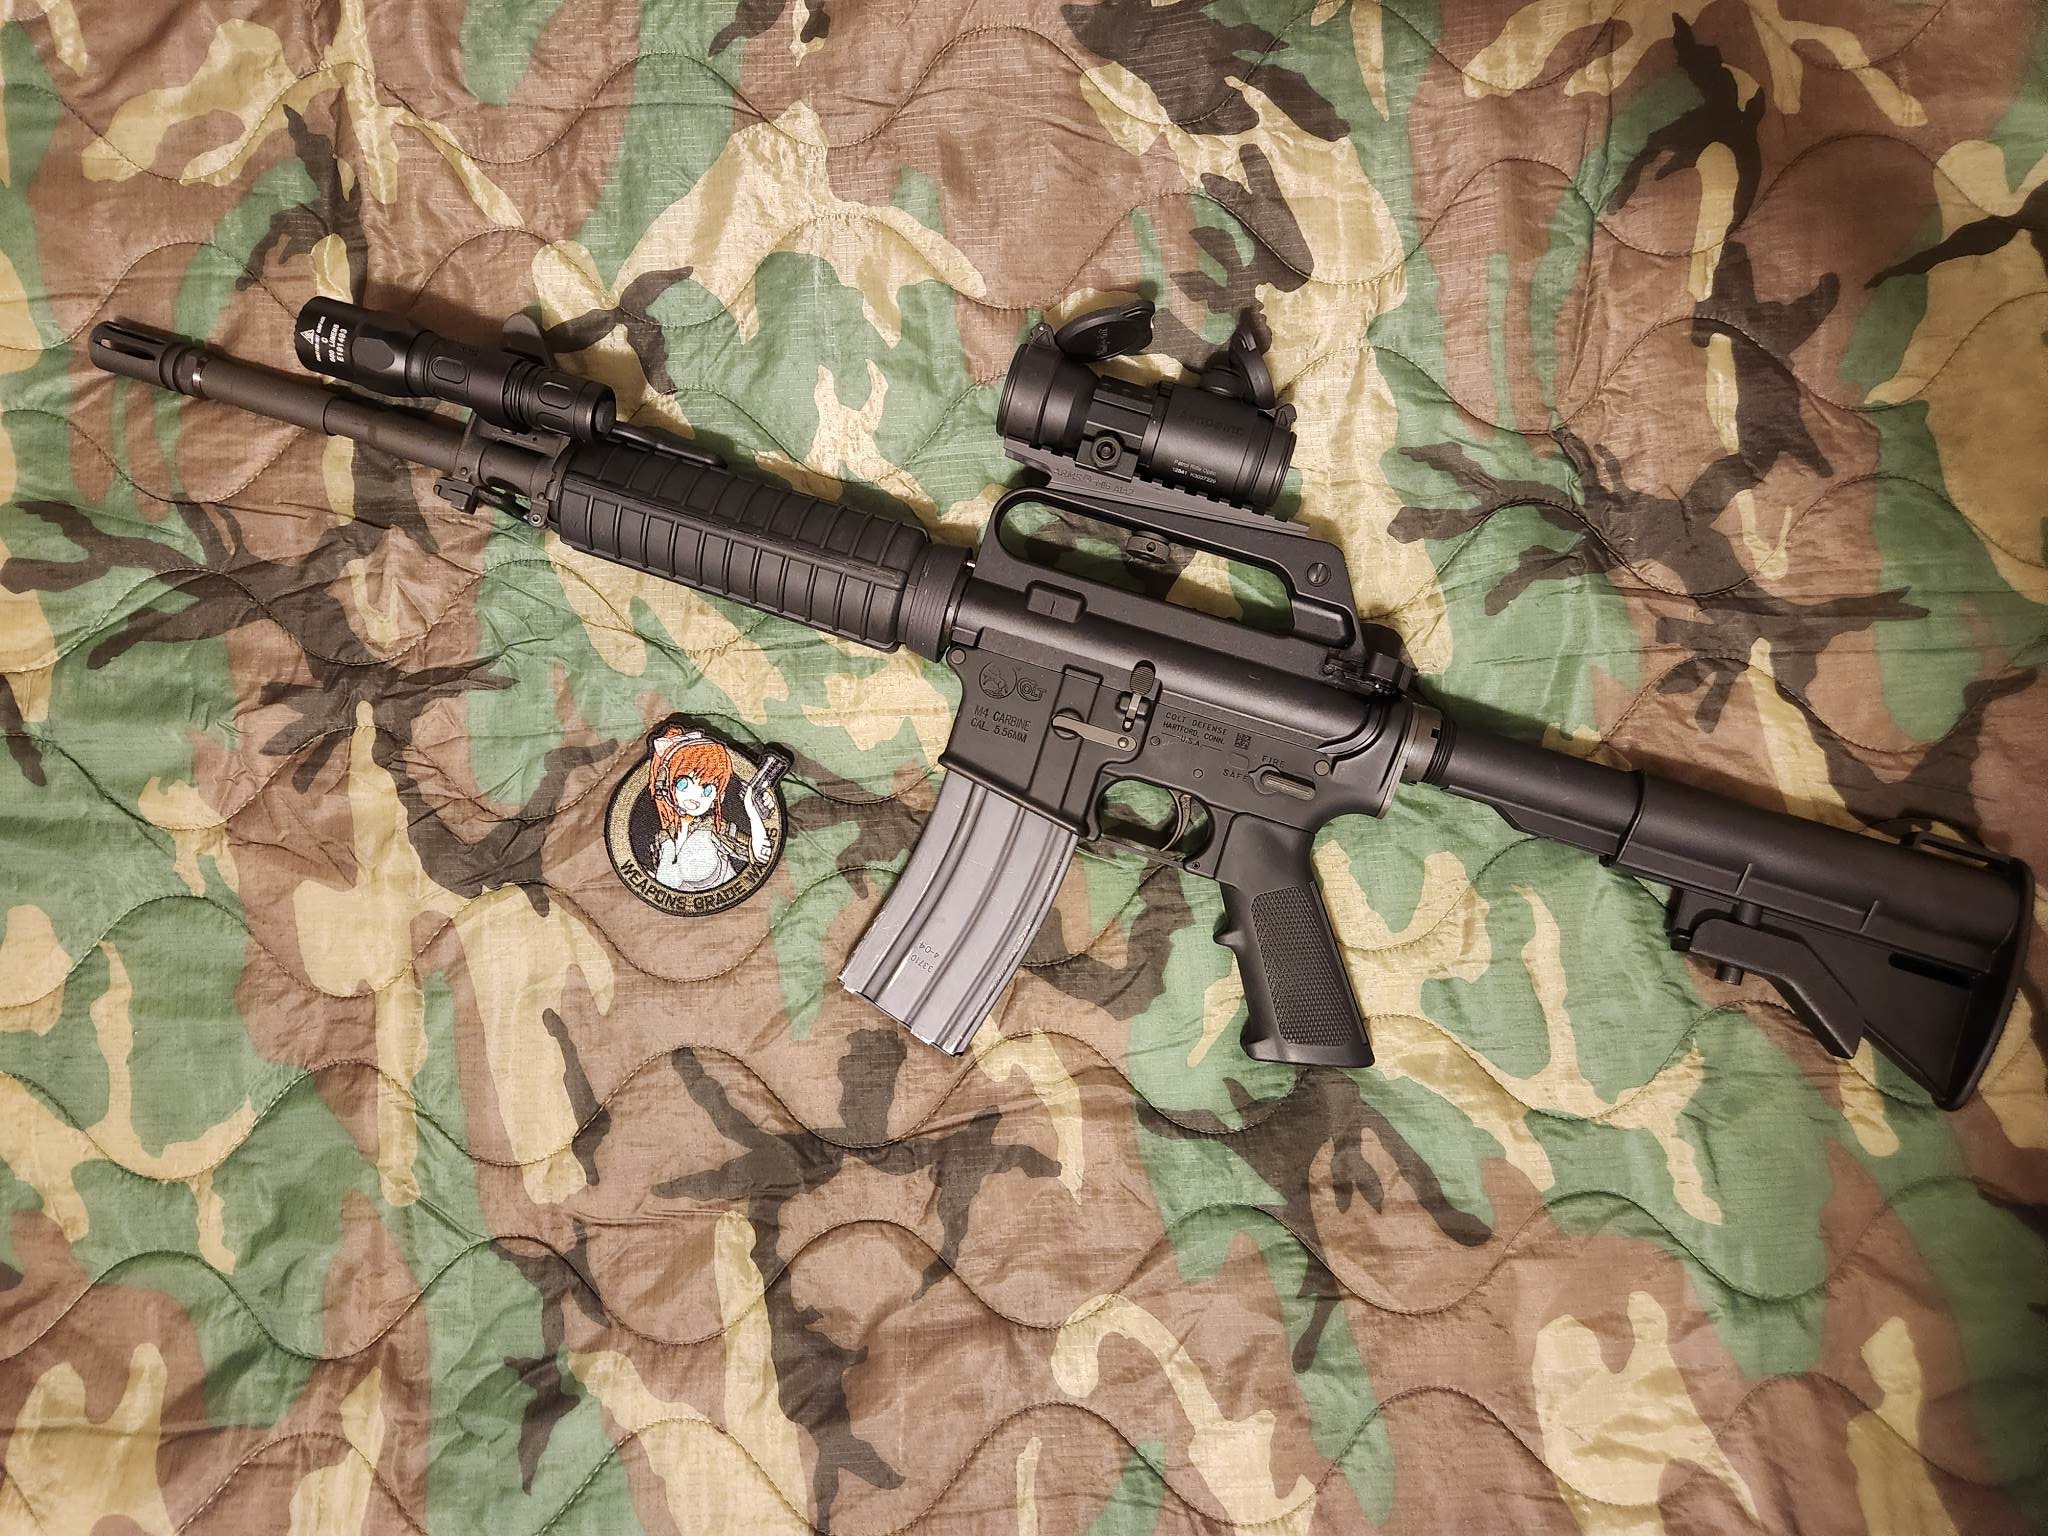
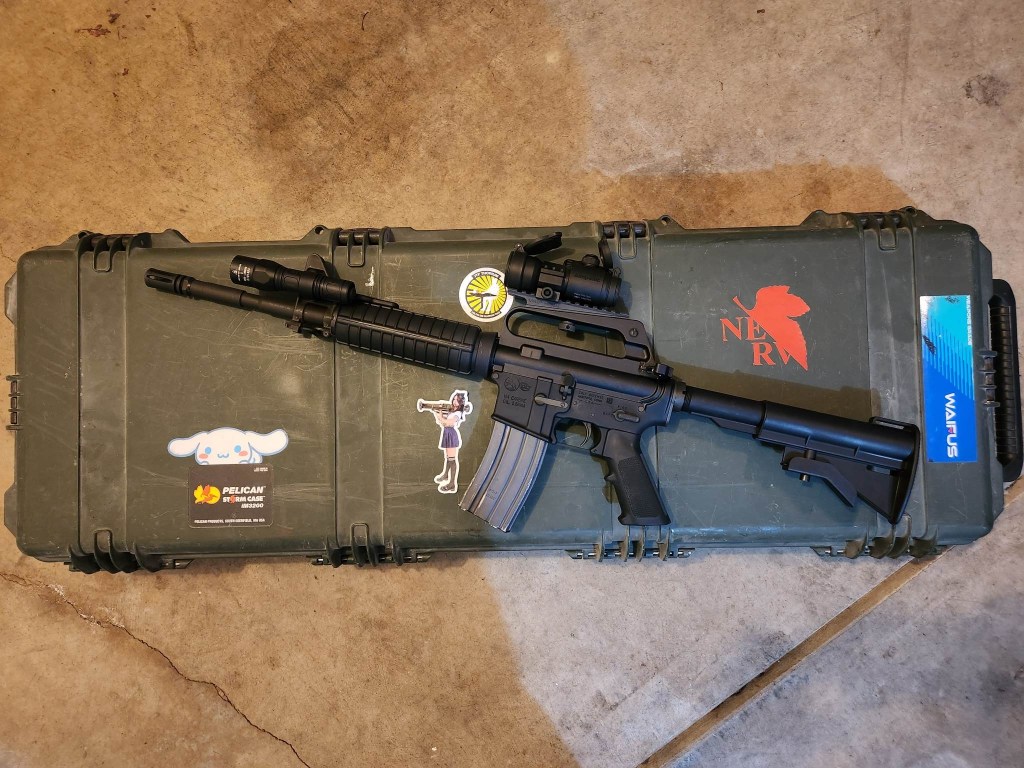
CAR-15 a la Duke
My particular CAR-15 build is based mostly on the rifle as seen in the Black Hawk Down film, with some exceptions. This is because fitting optics such as the Aimpoint Comp M2, PRO and ACO are widely available and are not too expensive. I’d rather leave true vintage optics to people who will care for them appropriately. I will also be using an alternate WML solution since I hate duct tape and janky tape switches. I feel that this setup still captures the “soul” and look of the real McCoy, while keeping it mostly in line with modern standards. Also, fuck it, it looked sweet in the movie – Call it a cope, I don’t care.
UPPER My upper receiver was purchased assembled with no barrel from Tony’s Customs a little over a year ago. My barrel is a BCM 14.5″ 1:7 SOCOM profile that I cannibalized from a SOPMOD build. Mine features an “F” marked FSB, the most accurate one is the Non-“F” marked one. The main difference is the height of the front sight housing. This could potentially cause issues with zeroing for elevation if you can’t get the front sight on the “F” marked item low enough. If this is an issue, for you, you can replace it with a shorter front sight blade. This barrel has a pinned and welded BCM A2X flash hider to reach non-NFA length. Any 14.5″ Gov profile barrel will have the right look, with a phosphate finish being the most authentic. You could also go for the skinny profile variant if you want.
Handguards are the “skinny” plastic carbine handguards, not the more common “fat” M4 handguards. My BCG is a Noveske-marked Rubber City Armory black nitride BCG. I just like black nitride BCGs, I use them in all my rifles. Use whatever good-quality BCG you prefer here. Again, phosphate finish is the most authentic. A standard charging handle is most appropriate, use something else if you like. A PRI or VLTOR would probably look pretty dope. I’m currently using a BCM Gunfighter. Mounted in the carry handle is an A.R.M.S. # 2 carry handle mount. On that mount is an Aimpoint PRO in a Vortex Tactical 30mm Low Mount. The WML solution is an Impact Weapons Components TMC Scout Light Mount with ring for 1″ lights, bearing a SureFire G2x 600 lumen LED light. For my purposes, this is better in every way than a janky duct tape and barrel band setup for a 60 lumen light, but you may disagree. With the optic and WML mounts, go ahead and get some blue Loctite on all that shit.
LOWER The lower is extremely simple. Any milspec lower will fit the bill, the only slightly odd part is the Colt FiberLite stock. My build features a reproduction version produced by B5, I promise nobody will notice the difference. Keep the stock A2 pistol grip. Trigger is fair game, I know people get very particular about them. I tend to use enhanced milspec triggers, such as the ALG QMS. My particular lower is from a Colt LE6920 and has the “M4 CARBINE” rollmarks. It’s not accurate, but it says “Colt” on it. For fun, you could use one of the PSA M16A2 marked lowers.
LIST FORM + APPROXIMATE COST Some of these options may be hard to find our out of stock at the date of publish. We all know how the supply chain for AR parts has been for the past few years. I’ve subbed out some of my specific components for some more convenient ones that achieve the same result. These options are for the least amount of fiddling around with individual small parts.
(Be sure to select “F” Marked FSB, Handguard Cap, and Delta Ring. There’s contention about the “F” marked FSB vs the unmarked one, long stories short, the “F” will work just fine in most cases, and if there are truly issues zeroing for elevation, you can purchase a shorter sight post. If you want to avoid this altogether, purchase a non-“F” marked FSB. If you want the whole thing to look a bit more authentic, go for a phosphated barrel such as from BCM or a Noveske CHF if you’re really boujee. )
Tony’s Customs C7 Upper Receiver – $190 (This will likely be the hardest part to get. This is a very small business, but they are responsive to communication. Send them an email if you have questions concerning availability.)
Aero Precision M4 “Clone” Complete Lower Receiver – $255 (This lower omits the Aero logo on the right side of the magwell, and has faux Government Property markings. It says “M4 Carbine” on the left side.)
You could do this cheaper if you really needed to, I only listed parts I have experience with. If you’re comfortable sourcing all your stuff from PSA, go ahead.
If you’re averse to assembling your own rifle, or simply would rather trust it to a manufacturer, PSA now offers a 723 style carbine through their H&R line, fully assembled, for $1100. This one does feature a pencil-profile barrel.
“Hey, who’s hungry?”
Everybody knows the jambo
Alright, now that all the technical bullshit is done, and you have a CAR-15 of your own, it’s about time we talk about shooting the fucking thing! Come back soon, in part 3 Mark and I will give you some insight on how this certified hood classic worked out at LMS Defense’s Practical Carbine course, where we took the good ol’ CAR-15 from muzzle shots out to 600yds and everywhere in between.
When I heard about Holosun’s new optic built specifically for competitive shooting, I was super interested since I was just starting to get back into USPSA – and not only am I a cheap motherfucker, I also happen to be a sucker for Holosun optics! Originally, I was going to shell out $500 for a Trijicon SRO, but decided against it and waited many months until I was able to put an order in for a 507COMP.
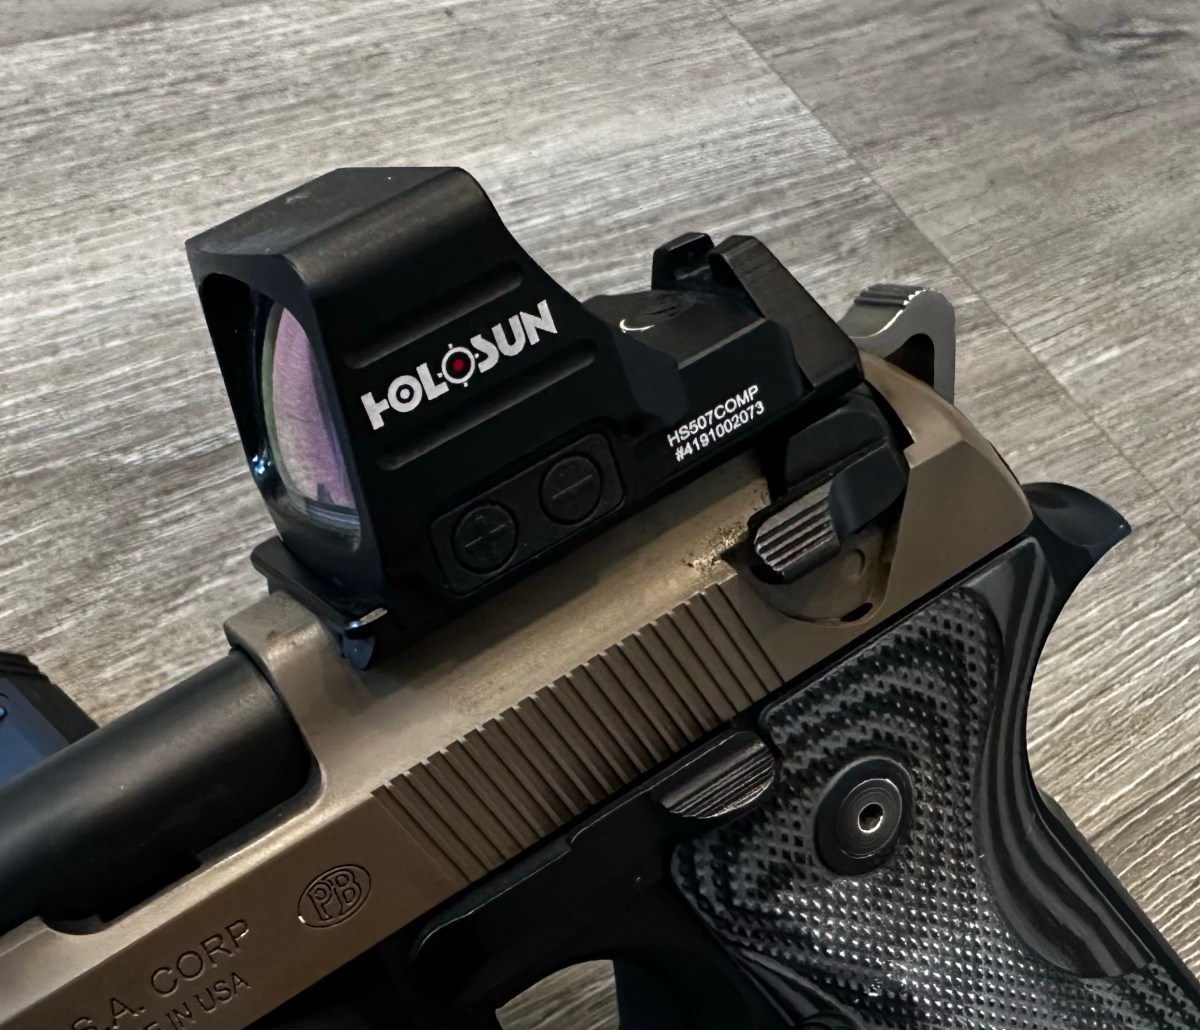
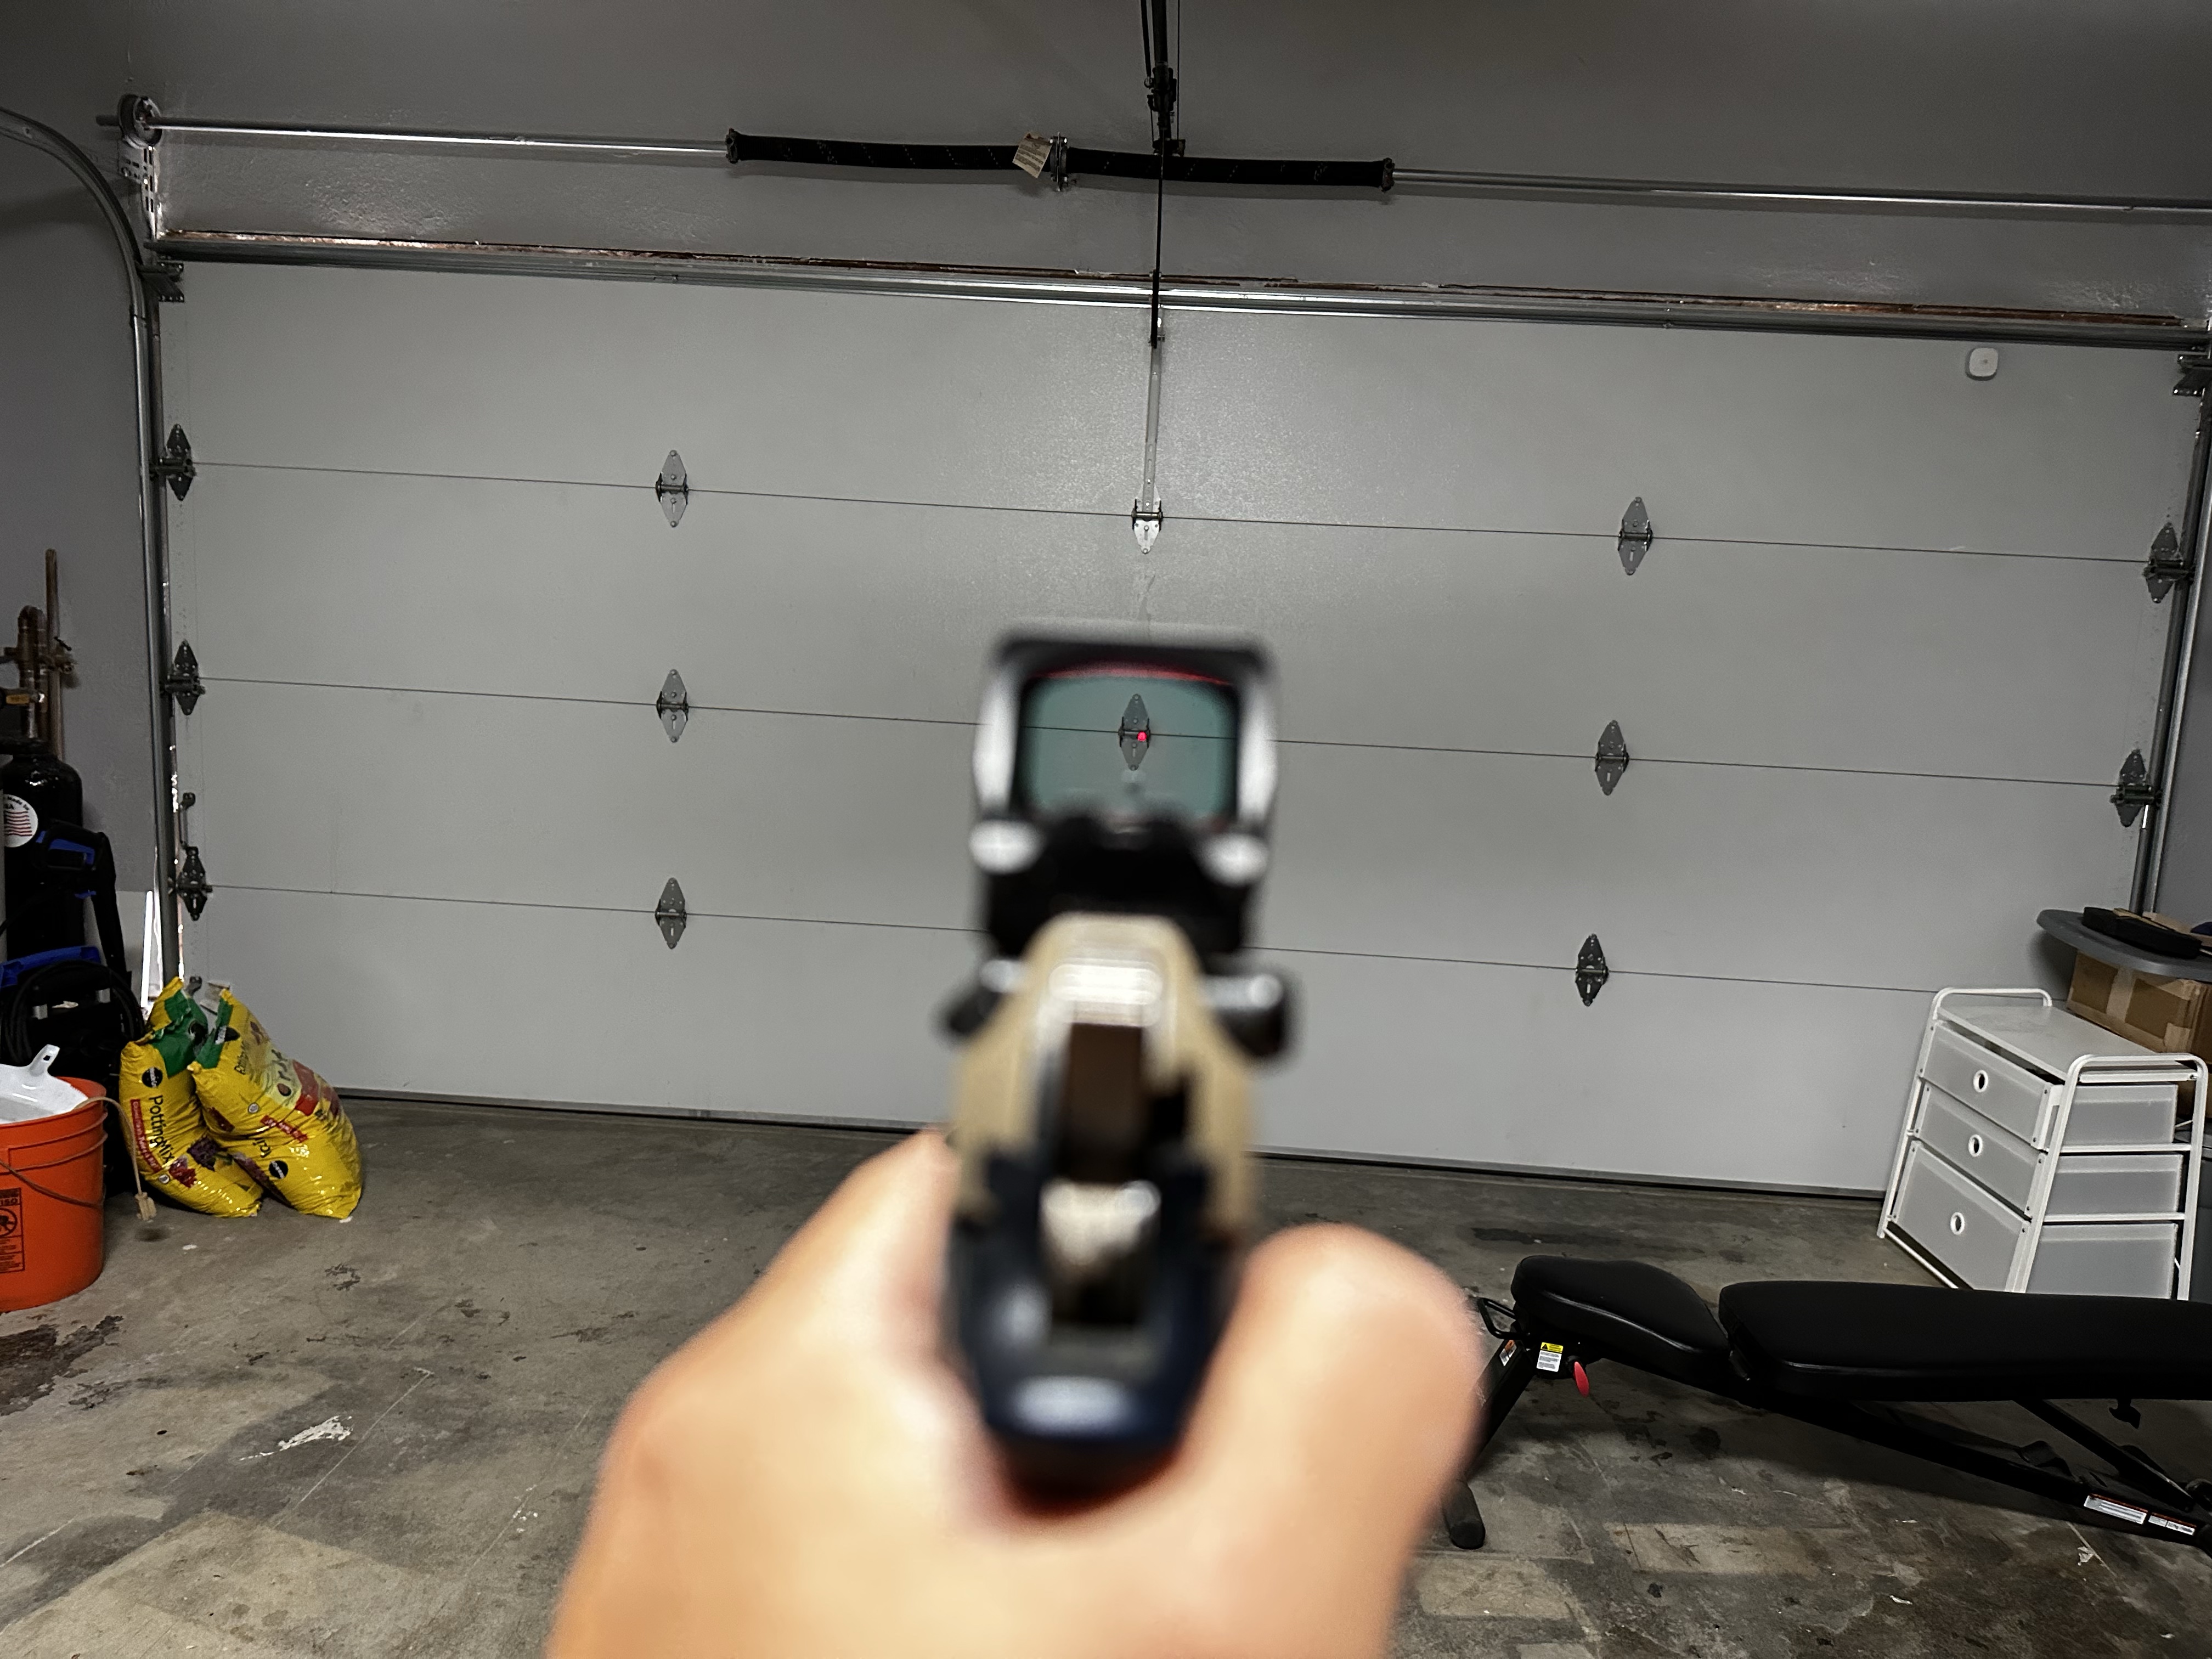
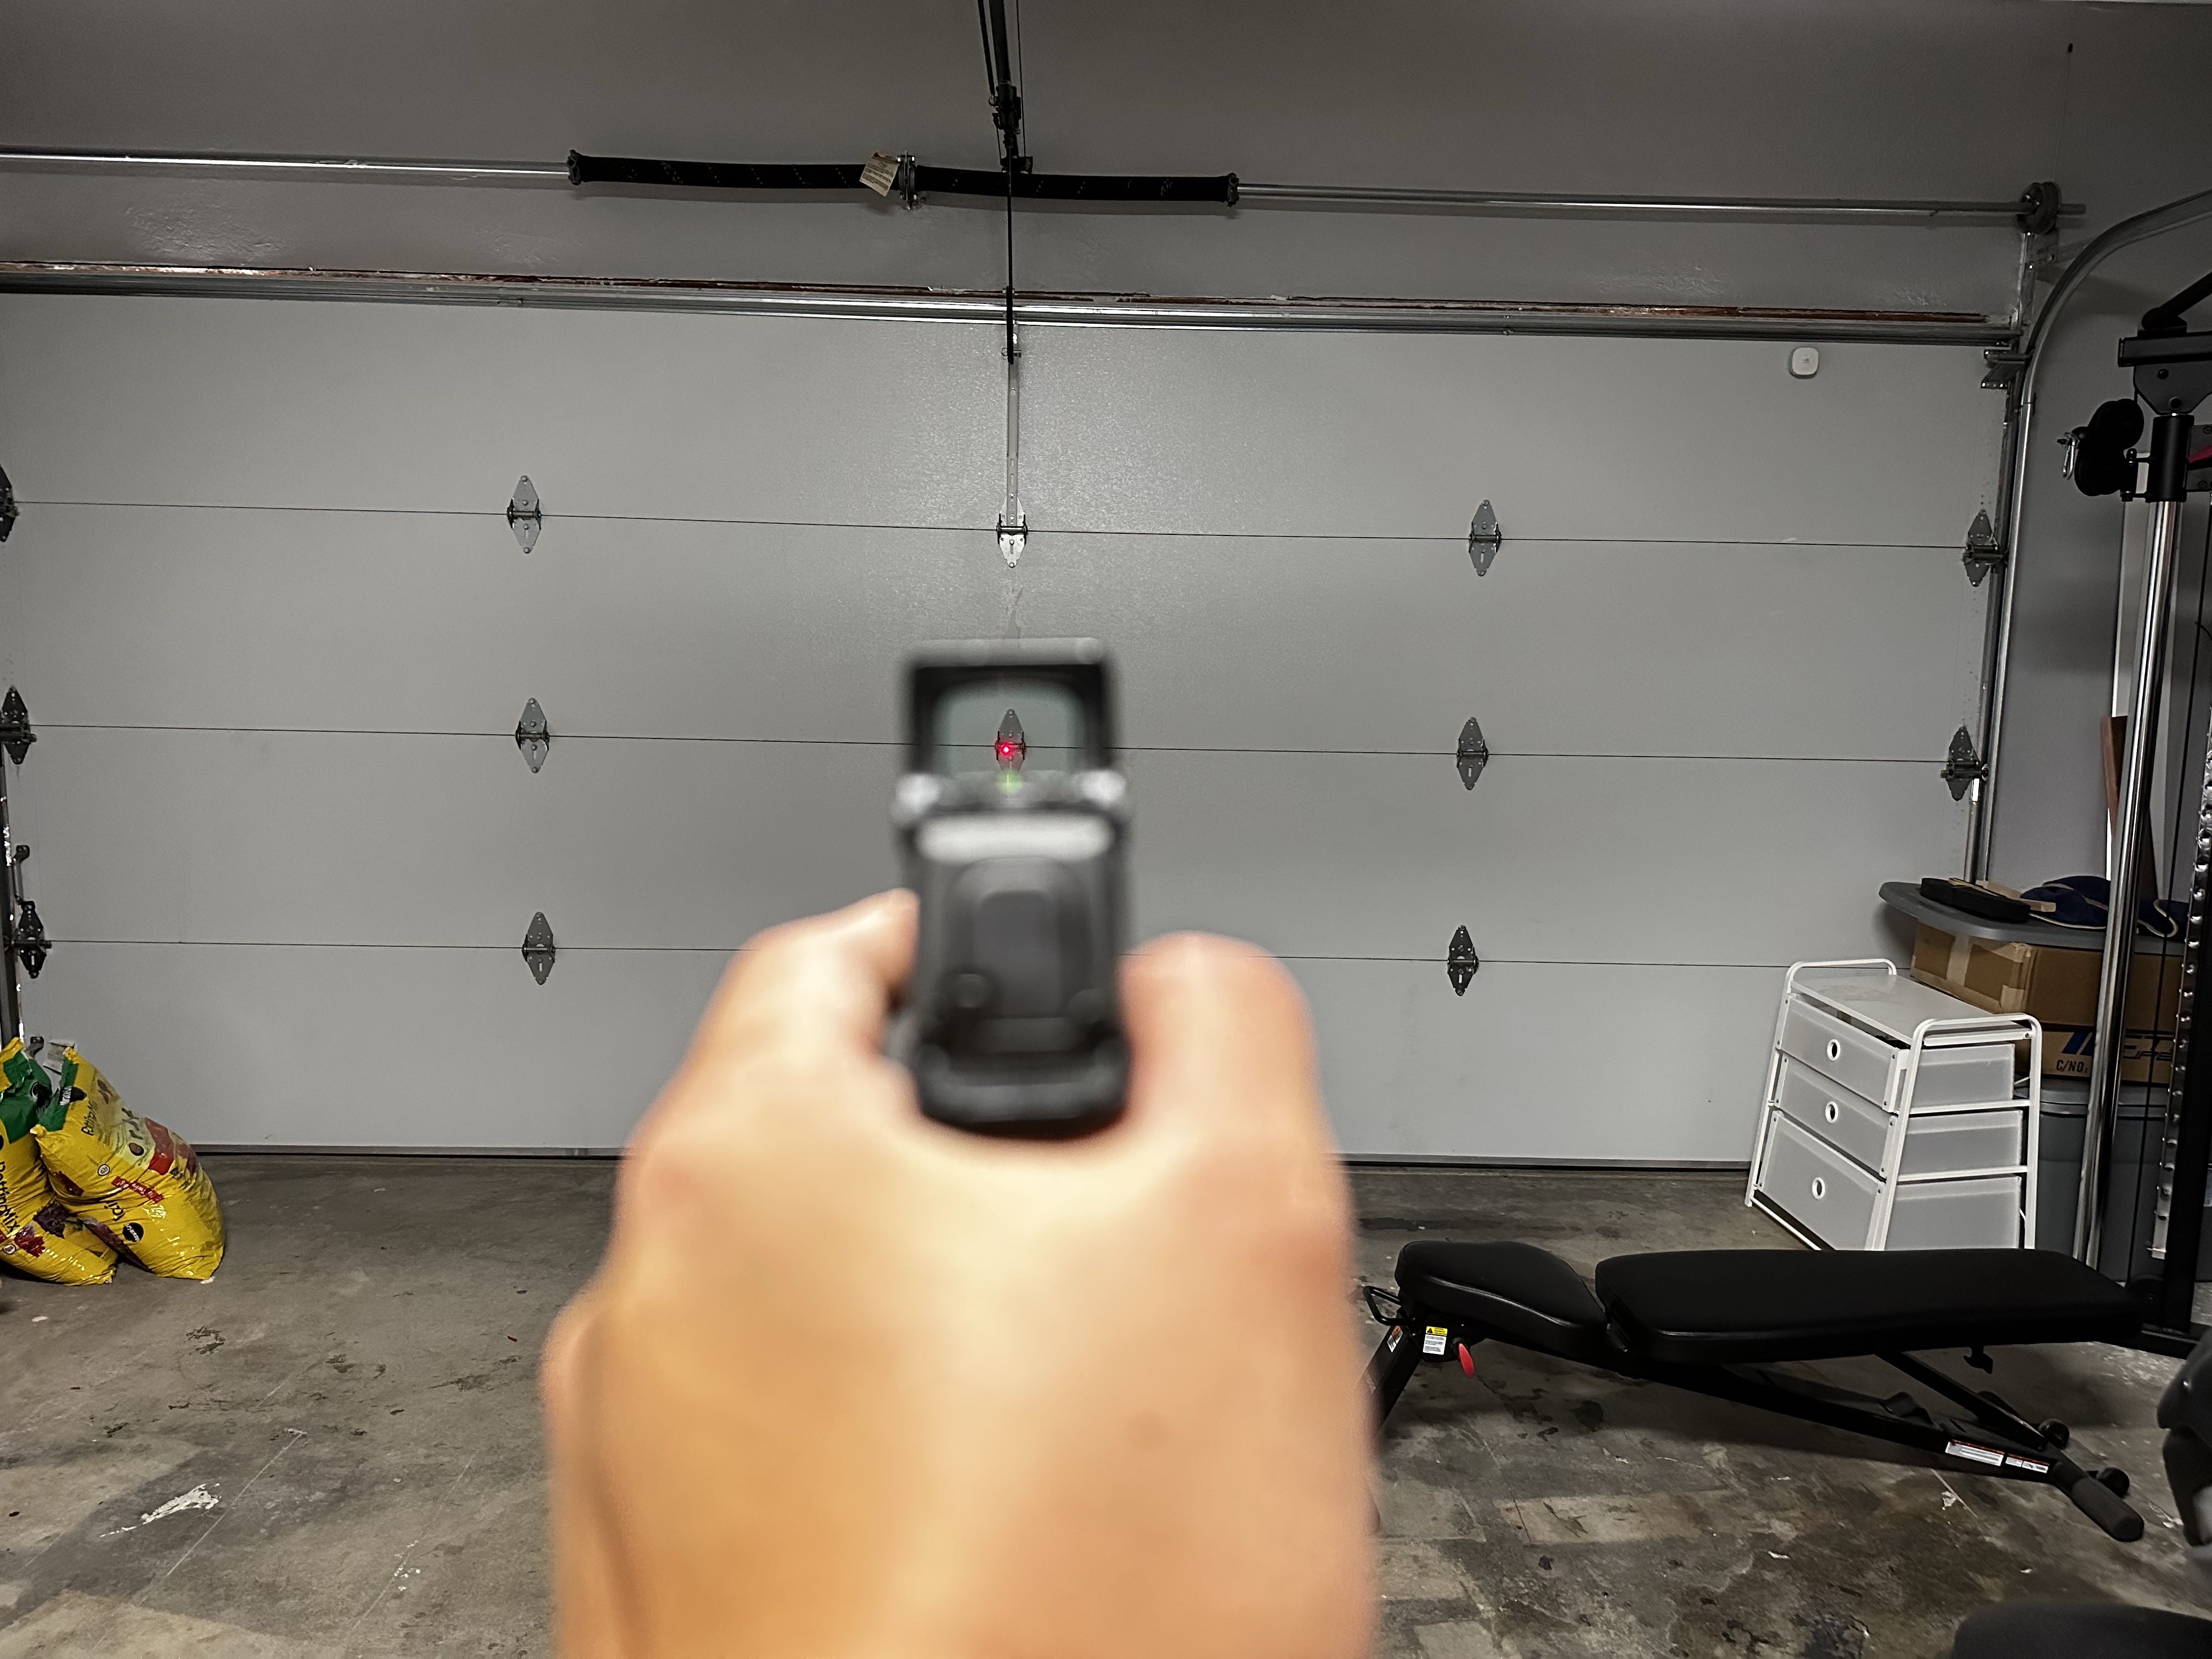
Upon receiving the optic and mounting it on my Langdon Beretta, my first impression was how massive the window is compared to the SRO. Having used a standard 507C optic a bunch, the COMP model was even better for the activities I was planning to use it for.
I have about 1,000 rounds through this optic so far, to include 3 USPSA matches. After playing around with the different reticles that the 507COMP comes standard with, I’m now a big fan of the 2MOA dot with the 8MOA circle. I noticed was how easy it is to track the reticle during rapid firing. The window is so big that the dot never leaves the window, especially with one-handed shooting. The large window also makes it much easier to find the dot on the draw, and helps to keep it on-screen when doing quick transitions between targets.
Brand New Holosun 507COMP with a 2 MOA dot and a 8 MOA circle. Other pistol-mounted RDS are shown below for comparisonFirst gen 507c with a 2 MOA dotSteiner MPS with a 3.3 MOA dot Holosun EPS Carry with a 2 MOA dot
So far I haven’t noticed anything I don’t like yet. There is a tiny bit of that “false dot” sight picture when the sun is shining directly at the optic, but because I use the 2MOA dot with the 8MOA circle it is very easy for me to differentiate between the false dot and the actual dot. The 507COMP has held its zero since I’ve started using it, which isn’t a surprise to me since I’ve always had reliable performance from Holosun products.
Holosun 507c Competition in action at JCSA Action Pistol. The features of the optic were helpful in taking the Overall stage win on this bay
I’m looking forward to future matches with the 507COMP, and I feel that this optic will become a serious contender in the pistol-mounted red dot world – especially for competitors like myself. The price, size of the window, and options for fine tuning the reticle make the 507COMP perfectly at home on any pistol.
I bought my 507COMP direct from Holosun for $340 shipped via a MIL/LEO discount. They can be found from most places that sell optics in the $360-$400 range.
Ah, summer: that season where everyone gets to go outside and live their best lives – sweltering heat and bugs aside. This timeframe is also considered an on-season for many USPSA competitors as a lot of Level 2 and Level 3 major matches tend to be scheduled around now. As we start to shoot more during the summer months, these are just a few things I’ve seen some of the local shooters do that can improve your quality of life significantly.
Ah, summer: that season where everyone gets to go outside and live their best lives – sweltering heat and bugs aside. This timeframe is also considered an on-season for many USPSA competitors as a lot of Level 2 and Level 3 major matches tend to be scheduled around now. For those unaware, Level 2 matches tend to be a club’s bigger match (>6 stages, sometimes multi-day events), while Level 3s can be summarized by Area (USPSA interstate groups) matches and Nationals.
Most recently, I had the opportunity to shoot the Area 4 Championship match at Mission 160, my home range. Shooters have the option to opt to shoot all of the stages in one day, or split it up over two according to their preference. Regardless, everyone was sweltering as the Texas summer had begun. This weather entailed little to no cloud cover along with strong mid-90s heat (35C for our overseas readers) on average.
Pictured: Average Area 4 competitor moving on to their next stage (2023, Colorized)
An incident occurred on my second day of shooting where the ambulance had to be called, as one of the competitors suffered from heat exhaustion. Contingencies were in place and they were moved to the range’s air-conditioned building, where the competitor was cooled down and made to drink water. As we start to shoot more during the summer months, these are just a few things I’ve seen some of the local shooters do that can improve your quality of life significantly.
Hydration for the homies
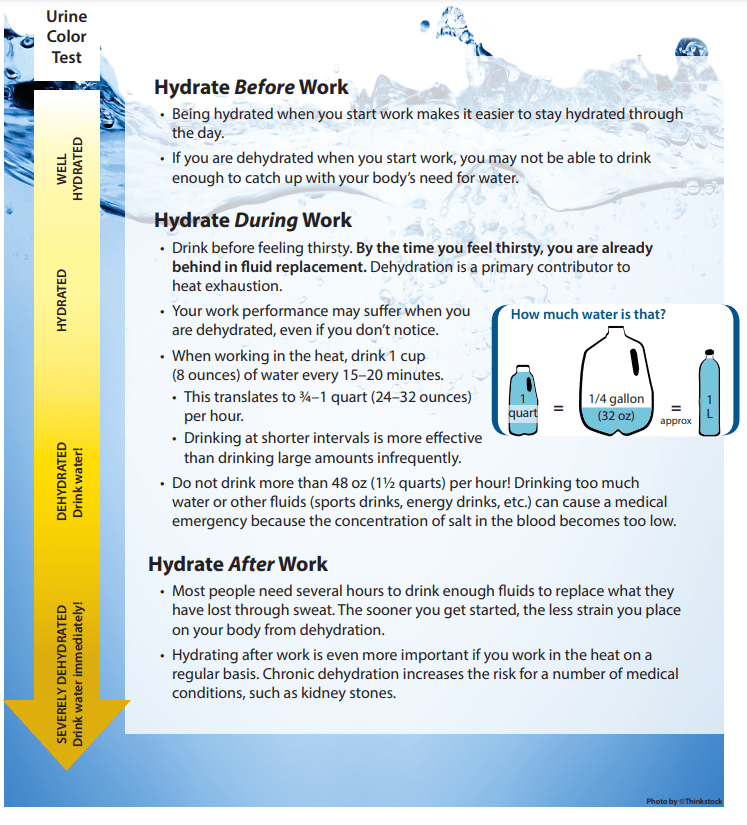
Staying hydrated is usually the initial thought of many when it comes to the summer heat. The CDC recommends about 1 quart (1 liter approximately) of water per hour in the heat. Personally, I end up just packing a whole gallon jug and top off my water bottle as the day goes on. It is much better to have too much water than not having enough.
Source: Center for Disease Control
However, if you know match day(s) will be very hot, it is required that you drink water the day before is starts, as well. I have learned this lesson the hard way many times, where I didn’t drink enough water and ended up taking in some sort of caffeine early in the morning only to find myself developing migraines that were only exacerbated by the heat.
Electrolyte drinks/mixes and similar products (i.e. Liquid IVs) are also a good addition to have on the day of as well. Despite stages being “short” in terms of time spent, you are still shooting and moving in an athletic manner where you are outputting a lot of energy. That, along with taping and resetting stages all day under the sun, means you will be sweating a lot, losing both water and the salt that would allow your body to retain said water.
Finally, as a personal rule, I would stop consuming caffeine at hammer down. Caffeine is known to dehydrate you, and I have come to learn I am very susceptible to this. In the event that you find yourself overcaffeinated, stop consuming immediately and start consuming water. It might take a stage or two to get your nerves back, and you might pick up a migraine, but its better than having it with you the entire day.
Staying Cool includes Feeling Cool
This never really occurred to me until Area 4, where after the heat casualty incident, the range officers (ROs) and match staff were going around making sure everyone had water and were not on the verge of passing out. The ROs, being shooters themselves, had canopies and portable jobsite fans that kept them cool and were gracious enough to let us use thrm as well.
When I sat down on my ammo can, I could feel the air start to bake my skin. Subsequently, I also took note of my sweat and how heavy my breathing was getting, which are generally signs of not having a good time. I immediately looked for a portable fan to stand in front off while fanning myself and downing another bottle of water. Unfortunately, I didn’t have a towel or equivalent to help cool me off.
While keeping up water intake is good, keeping your skin cool is also something that is commonly overlooked. Usually, most people (myself included) would just apply sunscreen and call it good. However, the skin is an organ itself and anything adverse happening to it is something that cannot be ignored. It takes a bit for some people to start sweating and allow their bodies to cool off. If that is not possible, due to humidity/weather or otherwise, I’d recommend having pre-soaked cooling/ice towels stashed somewhere accessible. They’re generally more budget friendly and packable than a portable fan. Amazon has a pack of four for about 12 dollars, but you can pick them up from almost any sporting goods or department store. These are also good to have in the event of heat related emergencies.
Beat the heat!
Hopefully, the tips I have shared will keep you cool in this year’s upcoming season. If you have any tips for staying cool, please feel free to leave them down in the comments below. I am sure I have glanced over a few helpful tidbits, and Texas heat is most certainly different than heat in other parts of the globe. Good luck especially to those of you shooting Level 2 majors, area matches, or even Nationals. Stay cool, make ready!
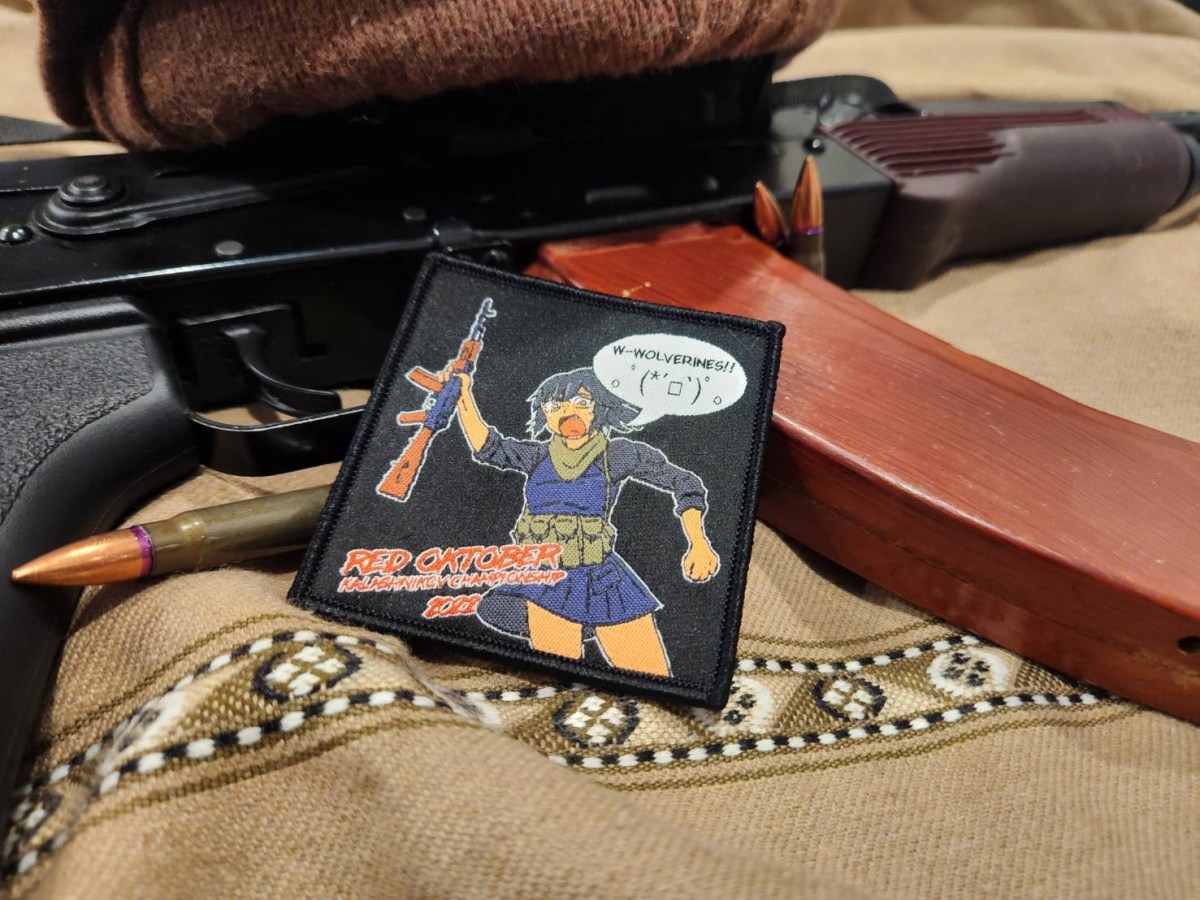
Disclaimer: WGW was an official sponsor for Red Oktober 2022. This AAR is only a reflectance from my point of view as a competitor. WGW’s status as a sponsor does not affect Duke’s or my own perception of the competition; conversely, the opinions reflected in my article are Duke’s and my own respectively when noted, not to be taken as word on behalf of the company or its associates.
The Red Oktober Kalashnikov Championship (ROKC) got its start in St. George, Utah back in 2016. Its inception came about at a time where popularity of the AK platform was something not as widely acknowledged in the general gun culture at the time. The rifle/carbine/multigun competition scene here in the States generally swerved away from the AK platform for one reason or another. Thus, Red Oktober was born as a “celebration” of the AK platform. Nowadays, it is widely regarded as one of, if not the most, well-known AK-centric events in the country.
Given the amount of shooters that attended the match, creative measures were in place in order to ensure a smooth event for all competitors. Range staff and Range Safety Officers (RSOs) shot on Thursday and Friday in order to manage the event on Saturday and Sunday, when the other competitors would be split up into “squad blocks” for the weekend.
Duke and I were participants on the competition side of this event. His input in the article will be italicized.
WGW’s Team ShanghaiNoon. Duke on the left, Chau on the right
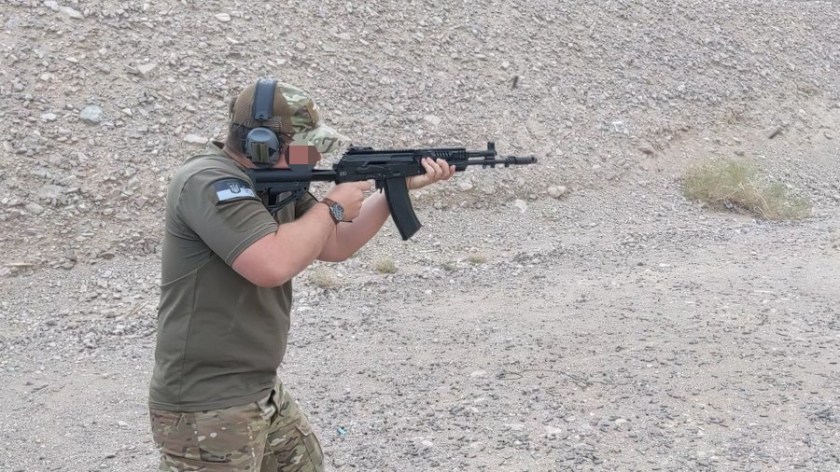
I was registered in the “Light Open” division with my Arsenal SLR106 with an Aimpoint T-2. Light Open dictated any rifle that shot lighter than 7.62(usually 5.45 or 5.56) while being “open” to the kind of attachments and optics the user can run. Because I also opted for the “trooper” category, I was required to wear additional gear such as a helmet, plates, knife, spare magazines and water.
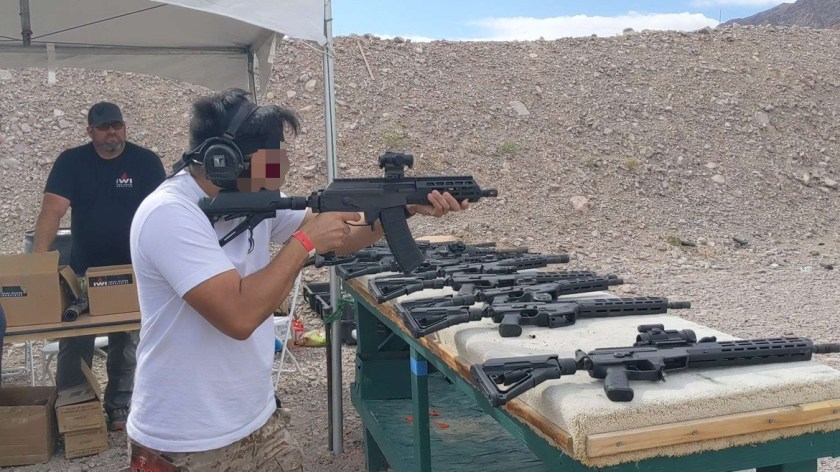
Duke was registered in the “Peashooter” division with his Kalashnikov USA KP9 SBR. The “Peashooter” division entails all pistol caliber carbines. There is no limitation as to what kind of attachments the carbine can have. In his case, his KP9 was equipped with a Sig Romeo 5 and SiCo Omega45K, and shot Freedom Munitions HUSH 9×19 147grn subsonics for the event.
Match Breakdown
Originally there were ten stages total, but two were omitted from final scoring due to weather (Stage 8) and at the discretion of the match director/range masters (Stage 10) respectively on the final day of the event. In the end, the match was scored based on eight stages.
Stage 1 “A Better Gun?”
The stage began with (5) rounds shot from the designated stage gun (a prototype FM Mike-47) into a downrange B8 (Time Bonus awarded but hits are not required). Competitors then dragged a sled (approx. 100-150lbs) to the second position, where they picked up their personal firearm and shot (5) rounds into the second B8 target (hits also not required) before making it into the final shooting area. Here, they were to hit the rest of the targets as they saw them. Steel popper plates only required one hit to be knocked down and neutralized.
Stage 2 “Take Down”
From the crouched seat of the stage Crown Vic, the shooter had to get out of the vehicle, load their rifle, and engage targets as they saw them. The HVT “Rojas” (red steel target) had to be knocked down (not just shot). Steel required three hits to neutralize.
Stage 3 “Desert Tranquility”
From the start position, each shooter had to score two hits on two pieces of steel down range. Upon neutralizing them, the shooter then had to throw a kettlebell to the next firing position and engage the steel targets in the same manner. This was repeated until reaching and firing at the steel from the final shooting position.
Stage 4 “Attack On VTAC”
This stage was comprised of two half-VTAC barricades on the left and right sides of the bay. Shooters could choose to start from either side – they would engage the two steel downrange from one barricade, then engage additional targets (as seen) as they moved to their final position. Shooters ended at this final position by engaging steel.
Stage 5 “Party Like Its 1895”
The stage began from a tank trap, with the shooter holding the stage prop (a simulated Maxim gun). From here, they could either run and “mount” the prop to its stand at the end of the stage before returning to retrieve their rifle, or take the prop with them as they engaged targets. It was required that the prop be mounted before the last shot could be fired to end the stage.
Stage 6 “Raise The Banner”
From a start position of their choosing, the shooter had to engage the steel target on that side with two hits. After neutralizing it, they then had to pick up the “flagpole” and move it to the next position before repeating the same engagement process. The shooter then had to move the flagpole to the final staging point and engage the remaining targets as they saw them.
Stage 7 “Close Quarters”
At the start buzzer, shooters had to fire one round from the stage gun (a snub nose revolver) at the present target. The shooter then had to retrieve their personal weapon and engage the rest of the targets in the stage as they saw them.
Stage 9 “Break Your Money Maker”
From the side of their choosing, the shooter had to engage a steel target with one round in the chamber. Regardless of hit or miss, they had to then carry the prop dummy “Lt. Dan” (approx. 70ish lbs) to the opposite side of the stage. If they missed the first shot, shooters had to re-engage the steel from this position; if they missed again, they had to continue on with the stage.
Bonus Stage
With the stage gun (an IWI Jericho 941), shooters had to engage two targets in the “Mozambique” pattern (2 chest, 1 head) as fast as possible from low ready, with the manual safety engaged.
The Good
This event, at its core, is most certainly true to its AK/Com-Bloc theme. Competitors were encouraged to use all manner of Com-Bloc or Com-Bloc adjacent weaponry. While it was possible to run the match with any other type of rifle, that score wouldn’t be tallied and officially recorded for standings. That being said, just about every variant or sub-variant of 7.62×39, 5.45, 5.56 and 9mm AK platform were on display. Some of the more eccentric rifles on display included everything from DP-28s to SKSs, which were a joy to see in use.
Stage Design
The stages were varied in layout, skills used, obstacles, and engagement ranges. Scoring was essentially “any two will do” with headshots and armor zones coming into play in some stages. Self-healing Infinity Targets were used as opposed to cardboard, meaning resetting for a new stage was a quick run of spray paint. Each stage also had suitably funny briefings, including engagements against 30-50 wild boars, and defending your honor against a pack of crazed rapists. I enjoyed each stage that I shot, as they all had different levels of pre-planning, and tested a mix of applicable skills and disciplines. Going from “long” distance shots to clearing targets at indoor-distances was a common theme, and kept the runs from being tedious.
Each stage definitely had its charms and challenges, highlighting strengths and weaknesses in our shooting. Learning points in stage planning, vision, and fundamental marksmanship were highlighted.
Open Squadding
Open squadding was the primary method for cycling competitors in and out of stages. The way it worked was that specific groups would shoot a certain set of stages at differing times of the day. For example, Duke and I registered in a “squad block” that shot stages 1-5 Saturday morning and had the rest of the day off to check out vendors and the such. We would then pick up stages 6-10 Sunday afternoon. We had “shooter cards” with our names written on it that we would hang on a line of nylon cord when we reached a stage. This helped ROs determine the shooting order without having to wait on certain people or remember who was in which squad. Upon completion, we would collect our equipment and cards and repeat the process on the next stage of our choosing, which was usually whichever one had the shortest line.
In short, the system did well for such a large attendance-competition(with approximately 300+ competitors). Open squadding and stage blocks made sure that not one stage was overpacked with shooters and kept the flow of the event going, while allowing competitors to see the other parts of the event outside of stages. However, this system also came with its flaws.
The Bad
While the event itself ran smoothly, there were still negative factors. However I must preface that a large amount of these cons were no direct fault of the match directors or range masters themselves, but rather it was a product of the match environment, both literally and figuratively.
Weather
On Day 1, the venue experienced strong winds that persisted throughout the day. By noon, winds reached up to 30 miles per hour with gusts as strong as 50 miles per hour. The overpowering winds moreso had an effect on vendor tents and the stages. Through the night, these winds were strong enough to knock down stage 8. Despite the best efforts of the range staff, the stage was unable to be restored.
Open Squadding
Some cons that came with the nature of open squadding is usually between people cutting in line or delays in queue due to a shooter not being present when their name is called. At worst, this resulted in delays that came close to up to half a. hour just to reinstate someone that showed up late into the shooting order, figuring out reasonable reshoots, or arguments determining who was originally where in the queue. RSOs between stages handled this matter at different levels on a case-by-case basis. Duke and I circumvented this by just moving ourselves to stages with less activity that we haven’t shot yet.
Vendors, Demos, and the rest of the event
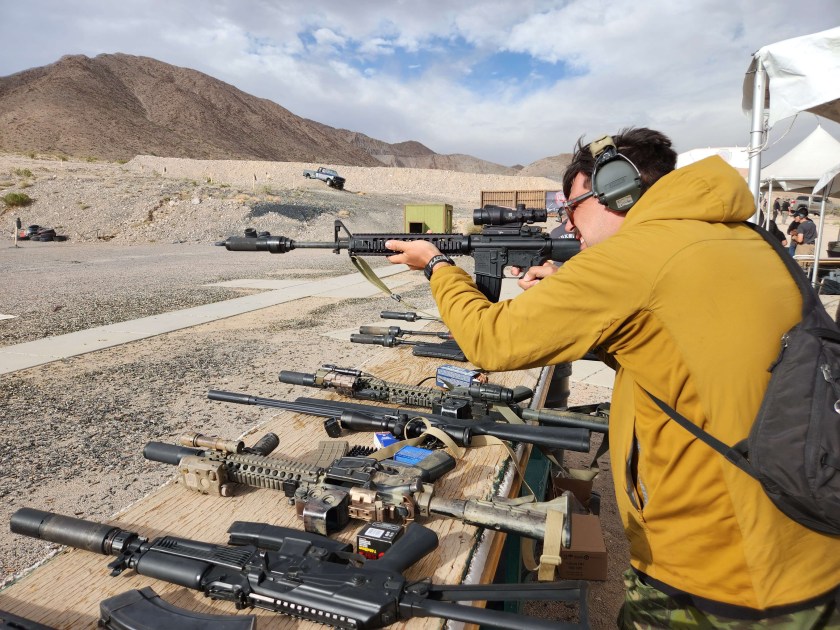
The other half of ROKC is essentially a celebration or small festival centered around the Kalashnikov rifle. There were several vendors present, such as Century Arms, IWI, HuxWrx, Dead Air, BlueForce Gear, and several others. M13 Industries had a host of select-fire gats to unload for a nominal fee, such as the M4, AKM, M1A1 Thompson, M3 Grease Gun, and AK-12. I personally shot the AK-12, which shot as nicely as any 5.45 does, with a bit of extra swag. We can get into it’s inherent flaws some other time, it was still super fun.
The suppressor manufacturers were offering demos on their products. The guys with HuxWrx and Dead Air were super friendly, and let us rattle off a few rounds with multiple suppressors and platforms. IWI let us shoot some full auto Galil ACEs in various calibers (I went with 5.45) and Century had a POF Mp5K with suppressor that we popped a few through.
Several booths were giving out little swag pieces commemorating the event. I also ended up buying a BlueForce Gear shirt with ROKC theme, and managed to badger the rep into giving me a handful of the famous BFG Lip Balm. I’m pretty sure I saw Beez Combat Systems giving away helmet scrims, but I didn’t manage to nab one. There were also a few food vendors, BBQ and Mexican food, to keep you going through the day.
Conclusion/Special Thanks
To wrap this up, Red Oktober was definitely an event that we enjoyed. No matter if you were a competitor or spectator (who had free admission to the event), there was always something to do.
If you are thinking of applying to shoot the competition side of this event, I would highly recommend it if possible. Admission to compete is steep compared to a local club match, but given the size of the event its not surprising. From what I noticed, what prevents a sizeable amount of interested competitors is the possibly intimidating match atmosphere. Between Duke and myself, we did not sense that at all during our time there. Instead, a majority of people we shot with had a welcoming attitude and the RSOs were clear in communication. Overall, it is a fun match to participate in at least once, and maybe the catalyst for some to compete on their free time afterwards.
Special thanks to Rifle Dynamics and Pro Gun Vegas for running such a large event, despite the factors that were within and out of their control. Both of us are most definitely looking forward to the next year.
Of course, this goes without saying, but special thanks to the Weapons Grade Waifus family for instigating this trip idea in the first place. Events like these may be fun, but are that much more memorable with a group of friends.
The WGW crew present at the event. It is believed that roughly 89.2% of all Spotify plays for “I Really Wanna Stay at Your House” occurred during ROKC weekend
The LMS Defense Benchmark Drill has been described by Lead Instructor Josh Jackson as the result of “locking all of our instructors at the time in a room for a day, and not letting them out until they figured out a course of fire that would: address core shooting skills, be accomplished with minimal round count, and provide data points that could be tracked for future improvement.”
The Benchmark Drill is comprised of three courses of fire using a total of (10) rounds, which can be shot either with a handgun (at 7 yards) or rifle (at 15 yards).
It is meant to provide a shooter with the following: – (3) presentation/draw reps – (1) emergency reload – (3) target transitions – (3) controlled pairs – (2) headshots
Each course of fire also gives data points that can be recorded and tracked for improvement: Three first round split times from the holster or the low ready (carbine), one emergency reload split time and one multiple-target engagement overall time.
Targets: 2 x USPSA target with chest A-zone divided in two (upper half is scoring zone), 1yd lateral spacing
Distance: 7 yards (handgun) / 15 yards (carbine)
Round Count: (1) round in chamber (1) round in starter magazine (8) rounds in spare magazine TOTAL: (10) rounds
Course of Fire
String 1: Single Shot Presentation
The first course of fire is a single-shot draw, from the holster, to the upper chest scoring zone. This gives a first-round split data point.
String 2: 1-Reload-2
The second course of fire begins with another single-shot draw, followed by emergency reload, then an additional (2) rounds to followup – all to the upper chest scoring zone.
String 3: Box Drill
The third course of fire consists of a box drill. From the draw, the shooter begins with (2) rounds in the upper chest scoring zone on target #1, transitions to the upper chest scoring zone target #2 for an additional (2) rounds, then transition to a head shot on target #2 followed by a head shot on target #1. Heads shots being to the credit card sized head box.
According to Josh,
“All three courses of fire provide a first round split time; the second, the reload split time and a follow-up shot, with the third round for consistency of follow through; and the final course of fire, multiple target engagement and target-to-target transitions.
Rapid, accurate first-round hits, keeping the gun up and running (reloads) and multiple target engagements are key aspects of weapons handling and this drill addresses all of them. The data points provide a benchmark for your performance, hence, ‘The Benchmark Drill.’”
This simple shooting test fills a few roles – first and foremost, as Josh mentions, it serves as a “blank slate” metric that shooters can use to track their performance over time. As such, there are no designated par times for this drill. It can also work as a warmup prior to range sessions, as it provides reps for fundamental gunhandling and marksmanship. Lastly, I use the LMS Benchmark when shooting with people for the first time – this allows me to see what the group’s skill level is at, and tailor the content/goals of the range session accordingly.
Give the LMS Benchmark Drill a shot the next time you’re on the line and let us know how it works out for you. Don’t forget to record your time and misses per each string – be sure to tag us and let us know how you did on Instagram at @wgw_blog and down below in the comments!
WGW Blog Staff Times/Misses
Here are the last recorded Benchmark Drill scores of some of our staff members:
Mark Single Shot Presentation: 1.73 clean 1-Reload-2: 5.56 clean Box Drill: 4.89, (2) misses Total: 12.18 overall, (2) misses
Chau Single Shot Presentation: 2.53 clean 1-Reload-2: 6.15, (1) miss Box Drill: 5.28, (1) misses Total: 13.96, (2) misses
Duke Single Shot Presentation: 2.02, (1) miss 1-Reload-2: 6.52 clean Box Drill: 7.11, (2) misses Total: 15.65, (3) misses
For every instructor pushing good TTPs, there’s an asshat peddling snake oil to less-than-knowledgeable shooters.
So, as somebody who wants to invest more into their knowledge instead of their hardware, 𝘄𝗵𝗲𝗿𝗲’𝘀 𝘁𝗵𝗲 𝗯𝗲𝘀𝘁 𝗽𝗹𝗮𝗰𝗲 𝘁𝗼 𝘀𝘁𝗮𝗿𝘁?
There’s a huge amount of logistical consideration that goes into pursuing education on your own – especially when it comes to firearms training.
Since the breakout of the Floyd Wars and Chinese Virus in 2020, a lot of Americans who had never touched a gun in their lives quickly became firearms owners almost overnight. This had a direct effect on the training market – citizens wanted to learn how to use their new tools effectively and they sought instruction. A lot of dudes stepped in or stepped up to meet the demand but, as with all things in life, a big enough sample size will bring a ton of bullshit along with the good. For every instructor pushing good TTPs, there’s an asshat peddling snake oil to less-than-knowledgeable shooters.
So, as somebody who wants to invest more into their knowledge instead of their hardware, where’s the best place to start?
There’s a huge amount of consideration that goes into pursuing education on your own – especially when it comes to firearms training. There’s a time commitment, as most open enrollment classes are at least 1-2 days in length; a travel commitment, especially if the class venue is not in your immediate area; and finally, a financial commitment, as ammunition, food, transport and lodging all add up. For the most part, these logistical factors can be planned around and prepared for.
The first part of this series will help to answer the question that must be addressed before any other planning even begins to happen: who do you even train with in the first place?
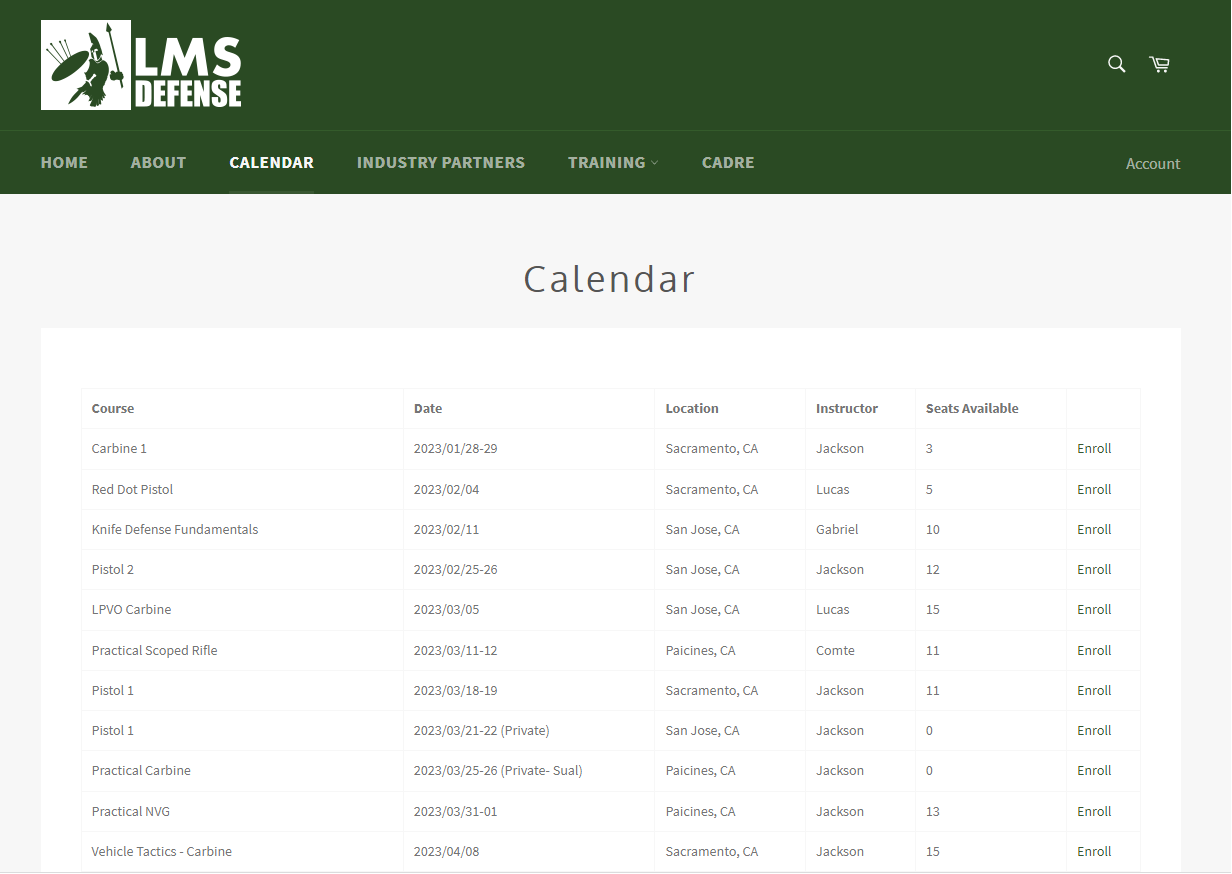
What Do You Want To Learn? The first step in picking an instructor is to determine what subject matter you want to learn. There are tons of instructors out there – some good, and some VERY shitty – teaching everything from basic handgun to urban E&E, and all points in between.
Some training schools offers a wide spectrum of coursework. A sampling of LMS Defense’s class calendar for Q1/Q2 of 2022
Most importantly: you gotta be realistic about your expectations. If you’ve had little to no formal instruction, you really shouldn’t be concerned with coursework in Practical Night Vision Employment or Precision Rifle – you would be better served by a 1-day Fundamental Handgun to get a feel for where your skills are, and to see how you should progress when it comes to future training. On the other hand, if you can pass the 700-Point Agg or are scoring well at your local USPSA matches, it’s safe to say that you can dial back a bit on the weapons marksmanship/manipulation piece and start looking for courses that don’t necessarily involve shooting. These will help support and give meaning to your solid fundamentals: medical, vehicles, CQB, or intermediate distance shooting are great places to continue your education.
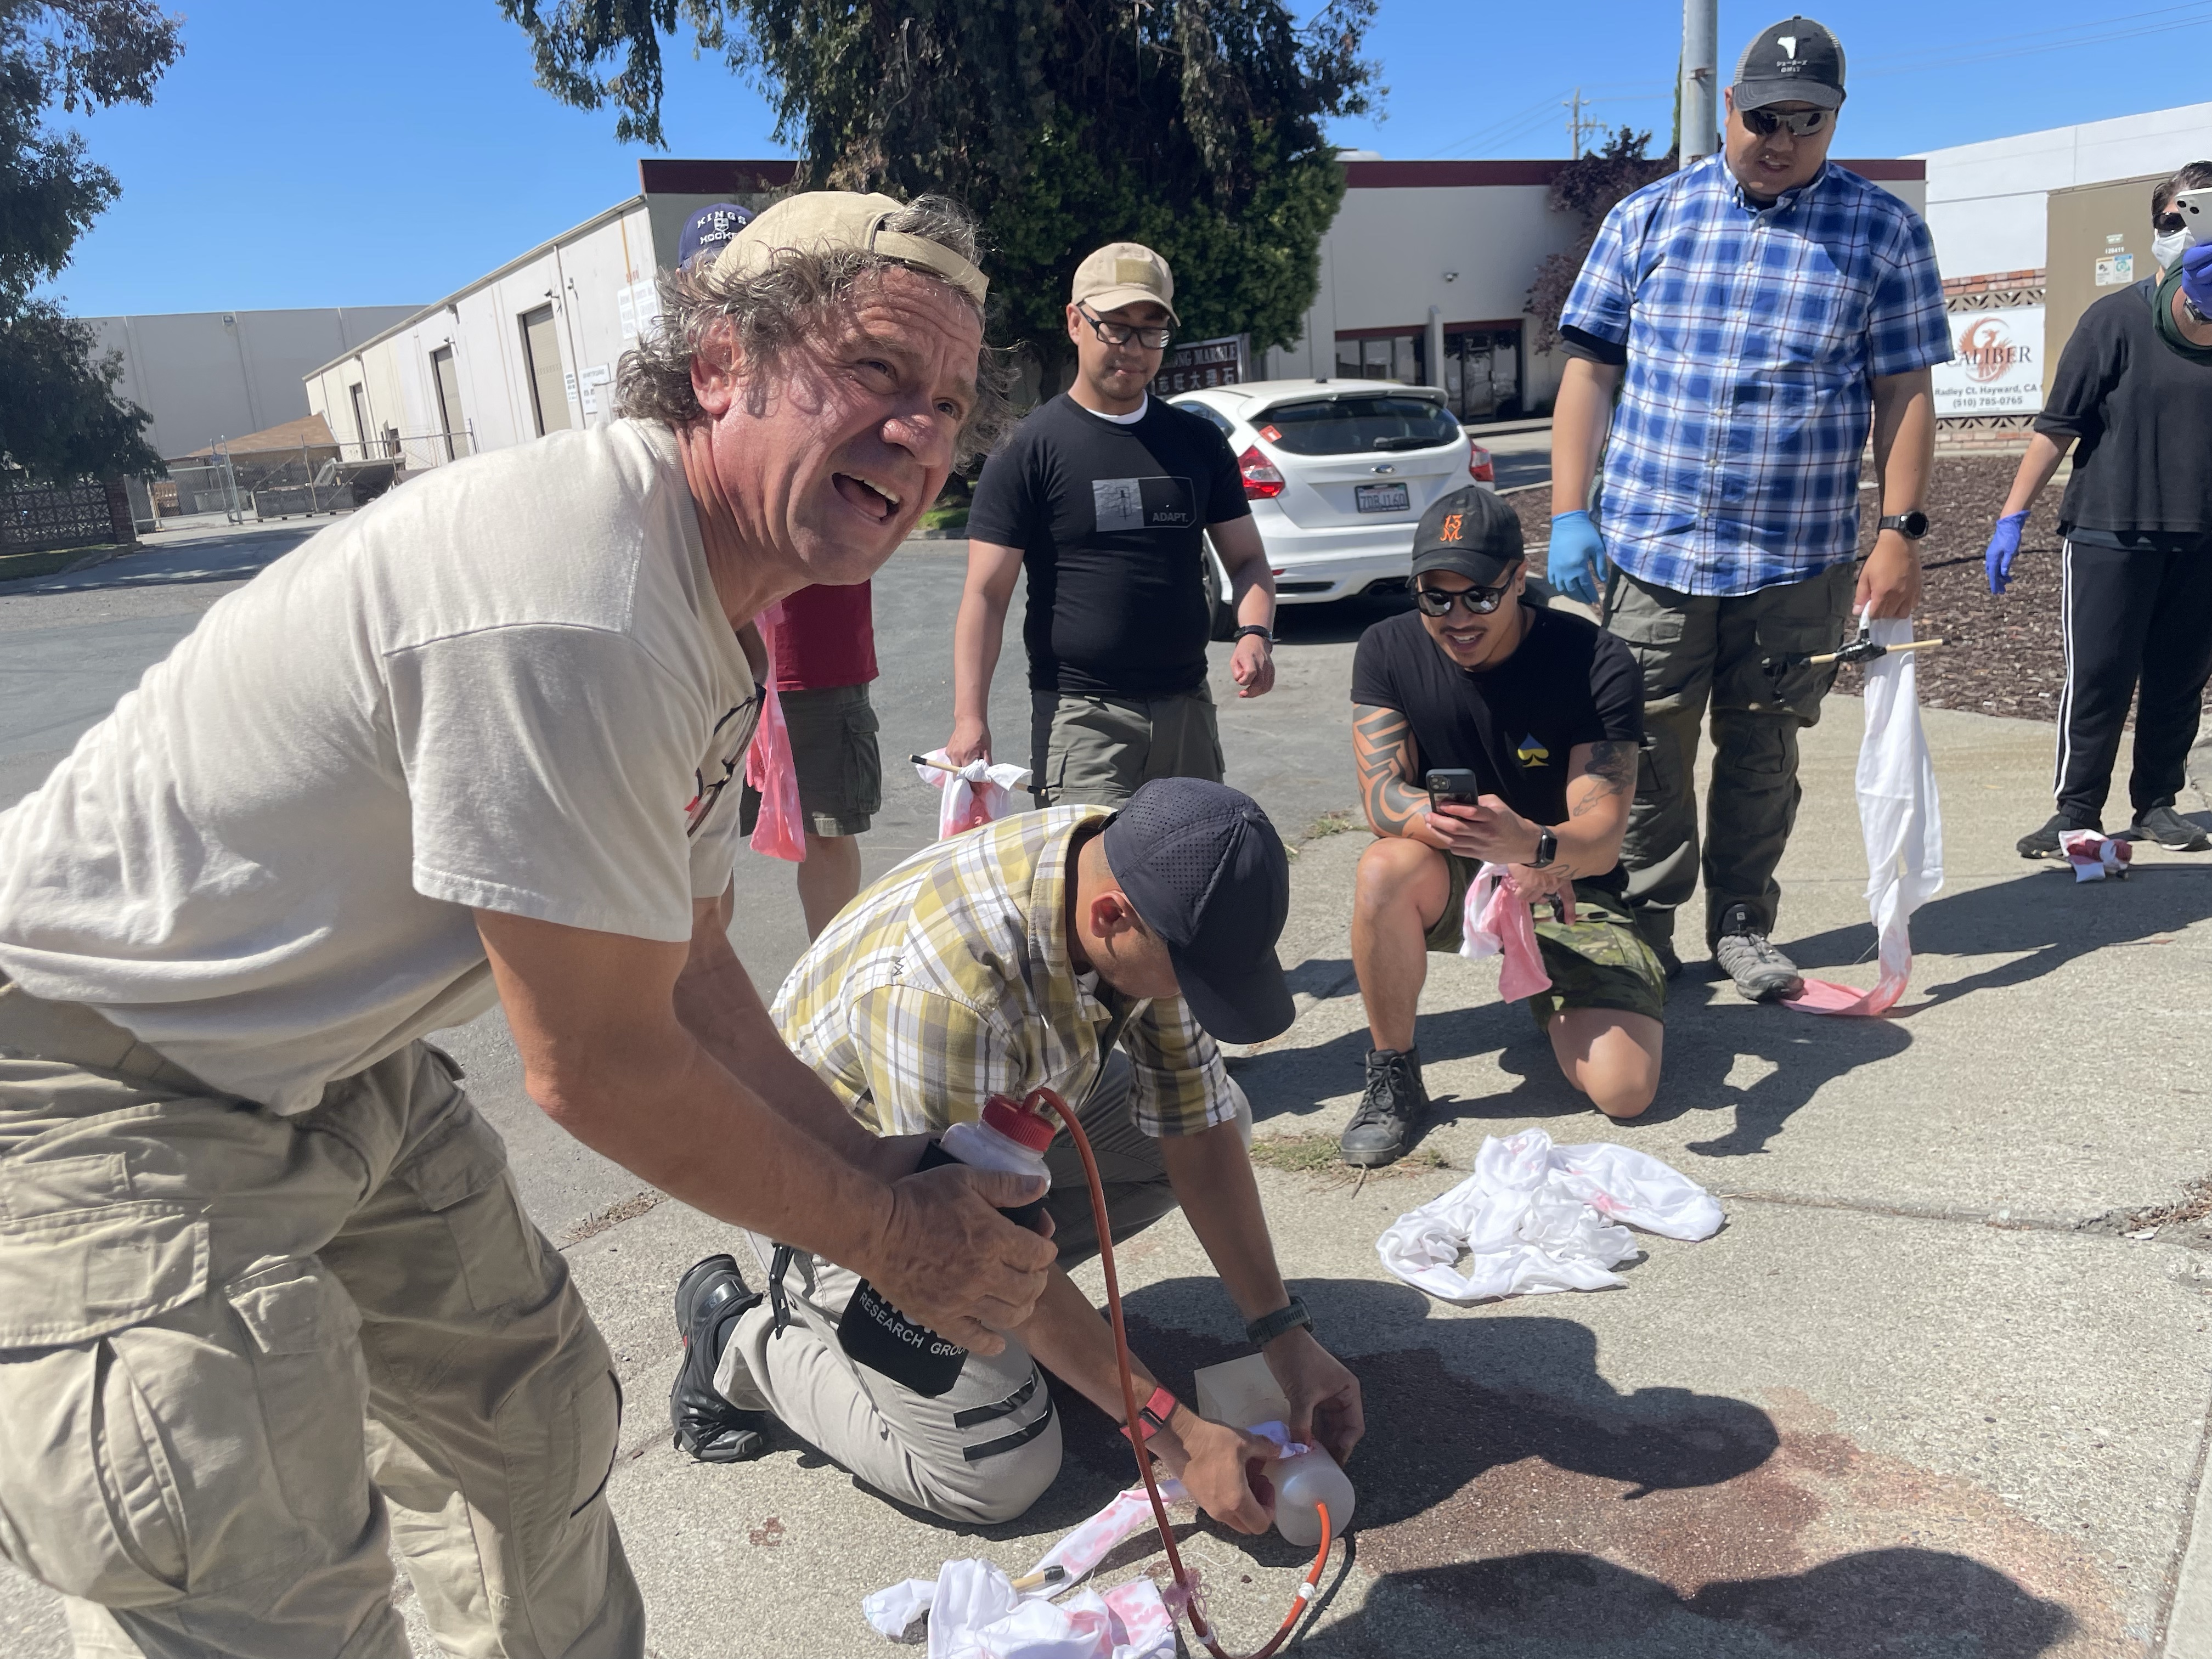
LMS Defense instructor Brian teaching wound packing at TECC class
Also consider that while all skills are perishable, some degrade faster than others. I take as many handgun courses as my time and money will allow, but try to only take “basic” rifle courses once every twelve months as long guns are easier (for me) to pick up on after some time cold. “Ballistic Masturbation” is a term I was introduced to early in my shooting days, and one that is still very relevant – it refers to dudes who pull the trigger a shitload but don’t really get anything meaningful out of it. If you can clean the Redback One Operator Readiness standards and you’re absolutely skating through your third Carbine 1 of the year, guess what? All you’re doing is jackin’ it, except now every stroke is costing .45 cents to a dollar, depending on what caliber you shoot.
Who Do You Want To Learn It From? Once you’ve figured out the curriculum you want, it’s time to narrow the search for an instructor. As mentioned previously – there are a ton of instructors on the market with varying levels of experience and relevance. Usually, you can separate them into one of three categories: Military, Law Enforcement and Competitive/Civilian. In some cases, an instructor will have experience in two or all three of these fields – and will be able to parse what material works for each lane, and what doesn’t. The specifics of what you want to learn will influence which background you’d be seeking in instructors, as each field brings its own unique experiences and TTPs.
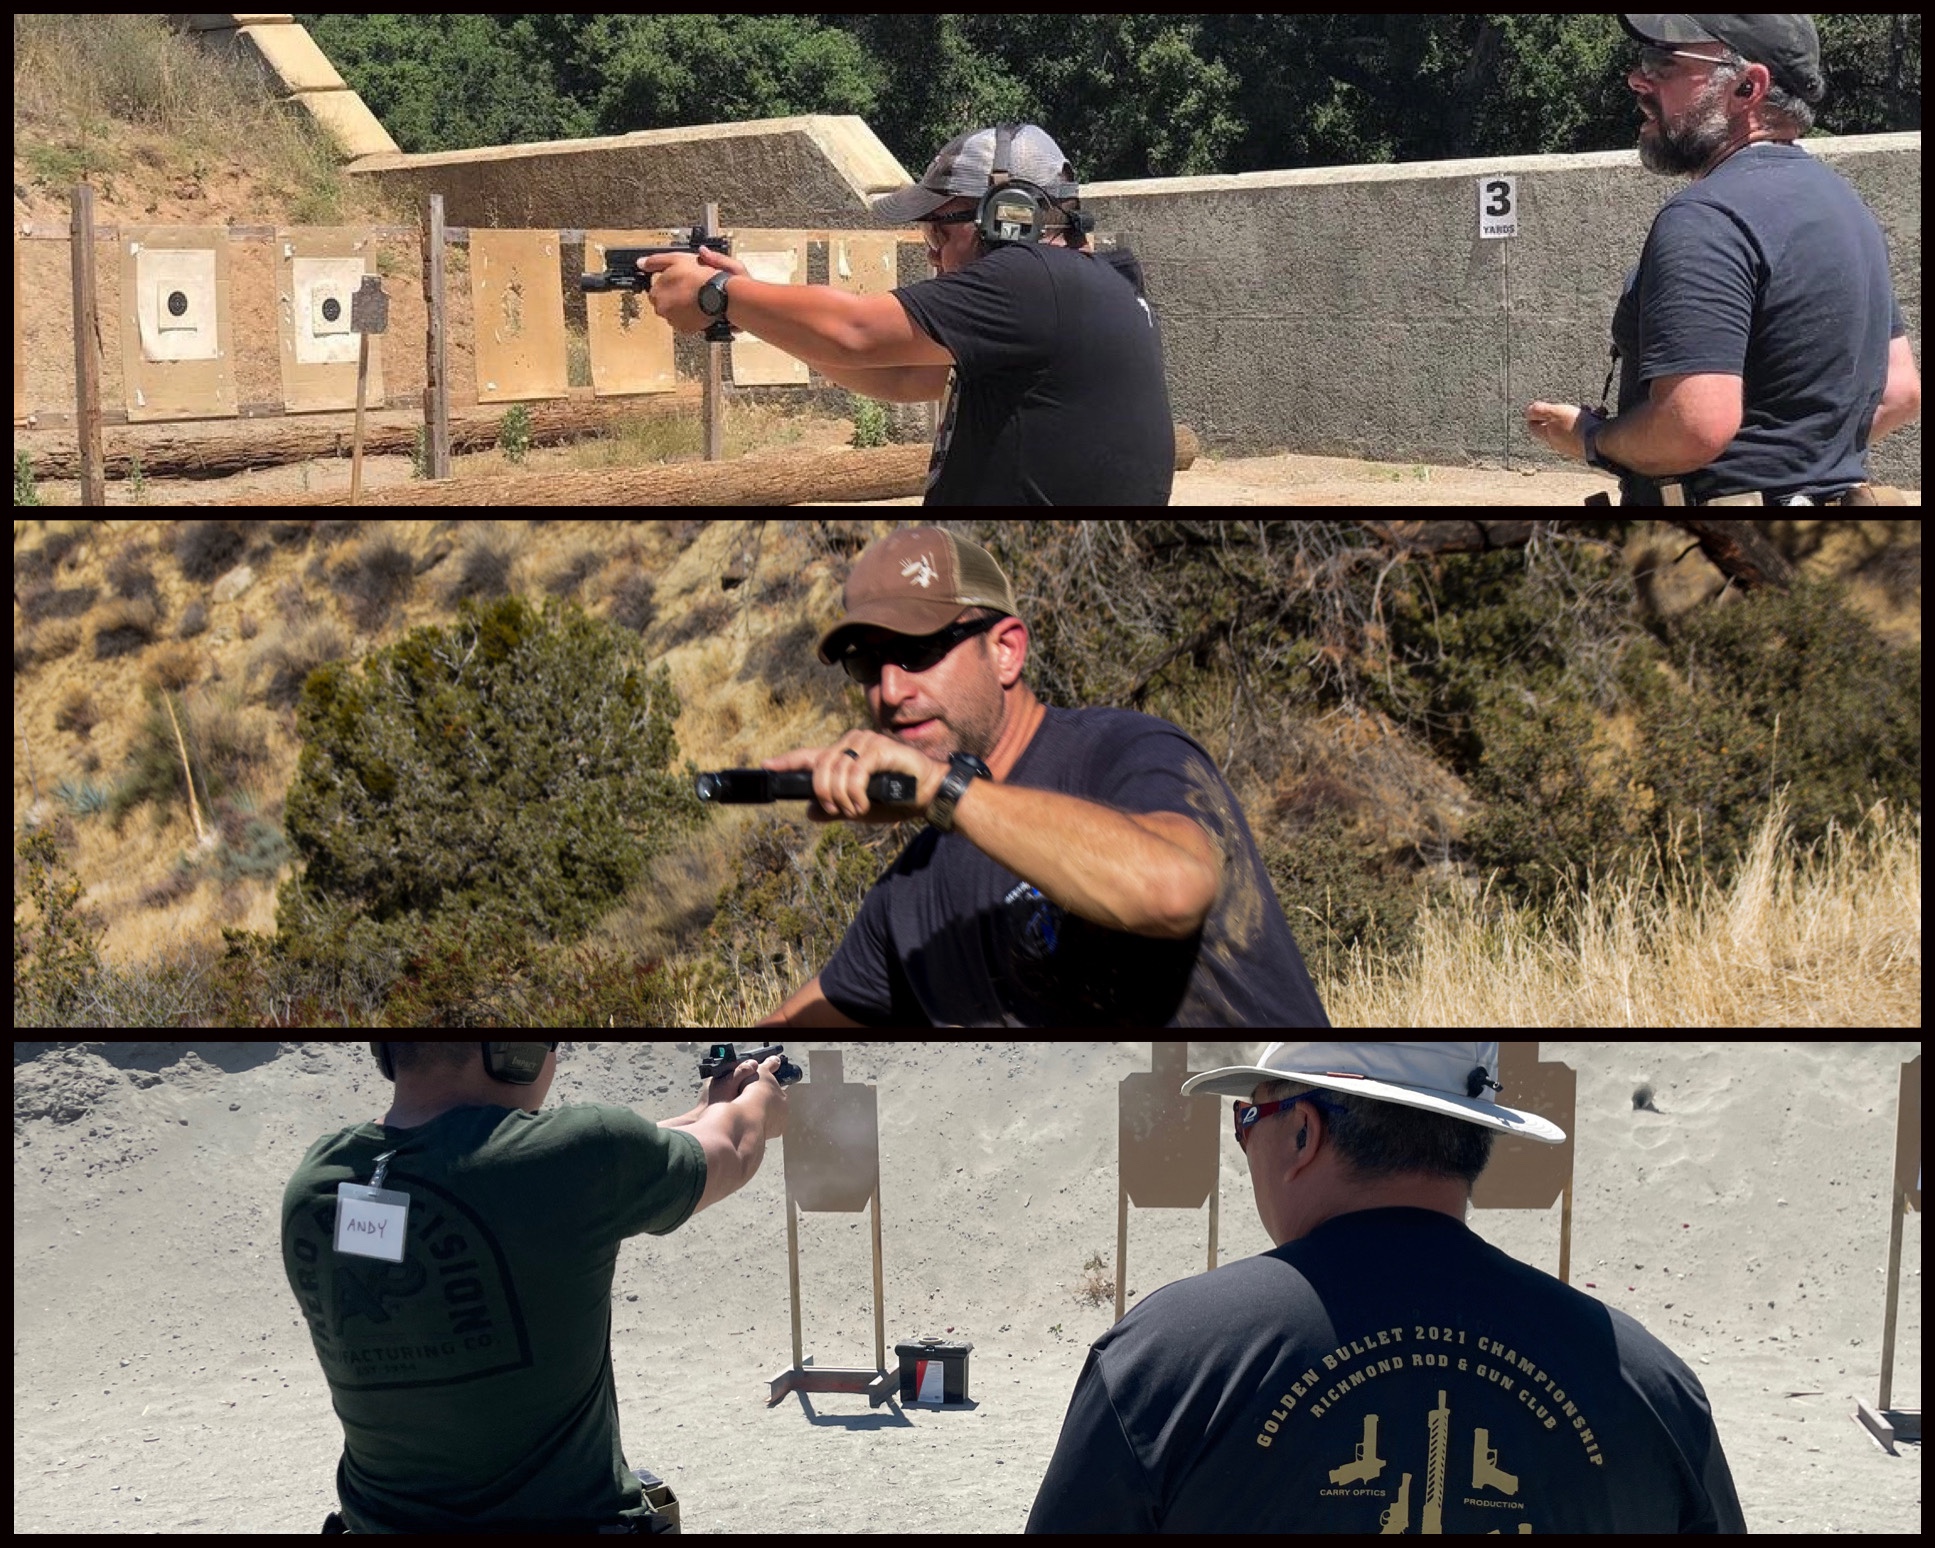
Top to bottom: Chuck from Presscheck Consulting, Josh from LMS Defense, and James from T3 Pros – all excellent instructors with varying backgrounds (middle photo c/o Strayed Concepts)
As an example, consider the different aspects of pistol shooting: You might learn laser-focused accuracy on B8 bullseyes at 25 yards from a former GS dude, concealed carry and retention/ground fighting techniques from an LEO guy, or how to go really, really fast without letting the wheels fall off from the Carry Optics Master at your local range. All of these are essential knowledge for anybody that owns or carries pistol, so shop around, take classes, and pull what you need from each different instructor that you train under.
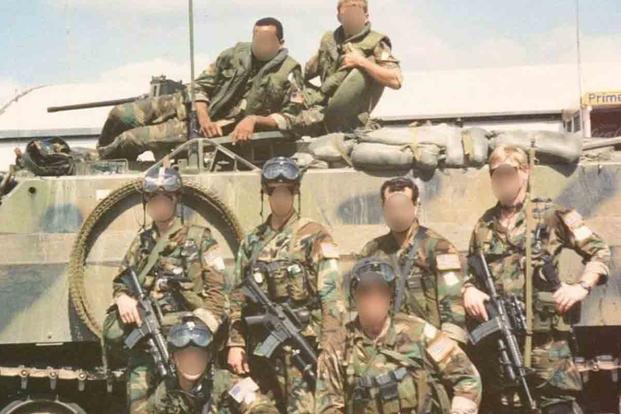
Northern Red cadre. Their military career paths make them more suited to teaching handgun shooting than any other MOS.
Furthermore: be absolutely sure the instructor you end up choosing has relevant experience within their background as well – for example, it’s better to take handgun curriculum from a former SMU guy than from the next “just ETS’d!” 11B/0311 who decides to start his own shooting school after getting out of the military. The former definitely has hundreds of thousands of pistol reps and high-level performance training tied directly to their resumè; depending on what unit they came from, the latter may or may not have that same level of experience.
Experienced and vetted civilian shooting instructors are gaining traction across the US; that being said, like the “McDojo” craze of the 1980’s martial arts world, an extra layer of caution is needed when parsing through these instructors. In the absence of professional experience or certifications, look for things like competition rankings and proof of continuing education through vetted schools; all good instructors should be putting this information on display, regardless of background. All good instructors will also be happy to point you in the right direction of other trainers they recommend; this kind of referral is super valuable.
How Much Are You Willing to Pay? And now for the topic that is probably troubling many of you: course tuition. Paying out several hundred dollars for a training session is the factor that steers most people away from attending, but there are certain elements you can game out to ensure that your training cost stays within your budget. In most cases, the course tuition will be influenced by three factors that affect instructors:
1.)Length of the class. Most open enrollment classes are 1-2 days in length; some schools will offer a mix of these to cater to a wider variety of student availability. Obviously, shorter classes will cost less than longer ones. Remember – besides the instructor’s knowledge, you are paying for their time. Even just eight hours with a stellar instructor will have a great return-on-investment.
2.) Geographic range of instructor– are they local or traveling? Instructors that teach at different venues away from their “home” facility will have to recoup their own transport/lodging/range fees, and the prices will reflect that. In most cases, classes taught by local instructors at area facilities will be among the cheapest, but be careful – it’s easy to find bullshit salesmen at this level. Choose wisely; if the cost is too good to be true, it probably is. My first training class ever was $90 and it was an absolute shitshow, but there are some gems floating around there in the $75-$150 range.
3.)Pedigree of the instructor. Depending on where their professional experience took them, some instructors might feel it appropriate to charge more or less for tuition. Definitely keep the instructor’s background in mind if cost is a concern to you. A lot of these instructors have paid their dues, attending thousands of hours of specialized schools or earning their curriculum on the street or in combat; in most cases, the increased cost is worth it for the knowledge they bring to the table. Be wary, however, of instructors who use the prestige of their former workplaces as marketing tools – more often than not the juice isn’t worth the squeeze, and many of them offer more of “train with a SOF guy!” experience than any meaningful skill development. The loudest, most publicized ones are typically the worst offenders, while so-called “quiet professionals” are usually just that.
Carefully analyzing these factors will allow you to pick and choose the right timing and instructor for both your training goals and your budget.
Once you’ve locked down what you want to learn and who you want to teach it to you, hit that registration button and make it happen; the (mentally) hardest part is out of the way! In the next installment in this series, I’ll cover the steps I take for preparation in the timeframe leading up to a class – hope you can join us!
So what’s the big deal? A 14.5″ with a red dot and a light? I have three of those in my safe right now, and a 13.7″, and a Recce Rifle with the latest peepeepoopoo LPVO. This rifle doesn’t even have an ambi controls or a BAD Lever!
PART ONE – A historical primer on the “CAR-15”
Hey gang.
Today, I want to talk to you guys about a particular military M16 variant with an understated, yet pivotal role in the development of the modern infantry carbine as we know it today, over 30 years later. Hitting the scene in the late 1980’s was the Colt Model 723, otherwise known simply as the CAR-15 by the men who wielded them.
The Colt Model 723 is known today by several names. Commando, 723, SCUD Hunter, Delta Carbine, the list goes on. For consistency in today’s conversation, and attention to various idiosyncrasies, I will be referring to the 723 and related rifles as the “CAR-15”. I’ll probably use “rifle” and “carbine” interchangeably because the distinction is pedantic at best, fuck you.
I’ll do my best to keep this informative and concise but please bear with me, as I am not Mr. McCollum, nor anywhere near his caliber in matters such as these.
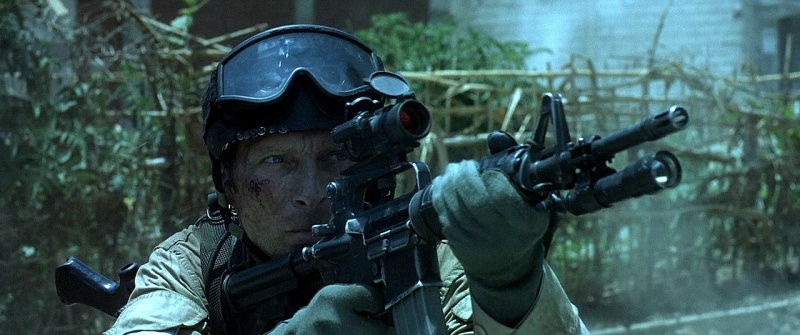
If you’re around my age or older, and you are reading this article, you’ve probably seen the films Black Hawk Down and Blood Diamond, or played Half Life, all of which introduced me to this particular family of carbines back in the day. This carbine can be mostly boiled down to three major features:
Fixed carry handle
Aimpoint optic
Weapon light
So what’s the big deal? A 14.5″ with a red dot and a light? I have three of those in my safe right now, and a 13.7″, and a Recce Rifle with the latest peepeepoopoo LPVO. This rifle doesn’t even have an ambi controls or a BAD Lever!
Yeah, I get it, just bear with me. The end result is incredibly similar to what we’d now consider a bog-standard M4, but that’s kinda the point.
Dr. Freeman fruitlessly blasting at a Gargantua with a Colt 727 he “re-approriated” from HECU.
Modelo Time
In the 1980’s, the most modern service rifle issued to the fighting men of the US military was the Colt and/or FN M16A2 rifle. This rifle featured a 20″ barrel, fixed carry handle rear with updated rear sight, featured semi and burst fire modes, and weighed a little over 8 lbs. The only accessory of note would be the basic two-point sling issued with the rifle.
In 1988, a 25-year old Larry Vickers checked in to the Operator Training Course, one of the newest members of 1st SFOD-D, or “Delta Force”. Vickers was issued a brand new Colt rifle, fresh in the cardboard box , with a cardboard dowel still in the barrel. It, too, had “M16A2″ rollmarked on the lower receiver, but it was… different. This model had a 14.5” barrel with an M203 cut, a two-position collapsing stock, and the old-style M16A1 carry handle. It also featured a safe-semi-auto selector, instead of the A2’s derided burst fire mode. The Colt catalogue referred to this configuration as the “Model 723”; the D-Boys called it “CAR-15”.
This compact M16 sibling was able to bring the majority of the M16’s firepower and accuracy into a smaller footprint, while still maintaining its reliability, something earlier M16-based carbines were not well-known for. The majority of US SOF at the time were using the H&K MP5 submachine gun for CQB/assaulter duties. While the MP5 has been a highly-effective and respected weapon since it was introduced, it is chambered in the 9×19 Parabellum handgun cartridge. This inherently limits its effective range and lethality in a modern conflict zone, where most of the bad guys are likely rolling with AKM variants, H&K G3s, FN FALs, and so on. The CAR-15 bridged the gap between the “musket” and the 9-mil subgun, and Delta was quick to embrace it.
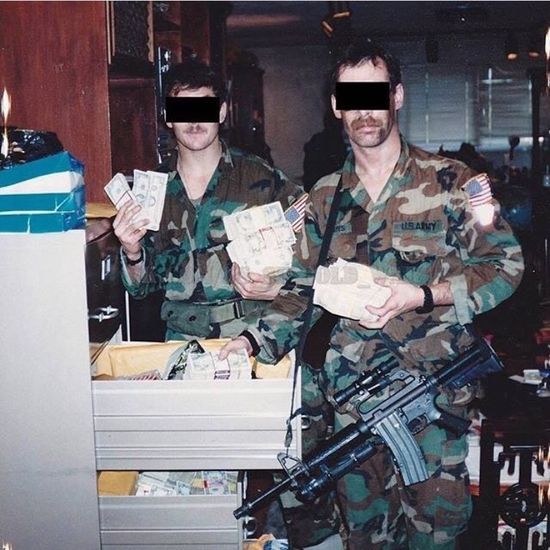
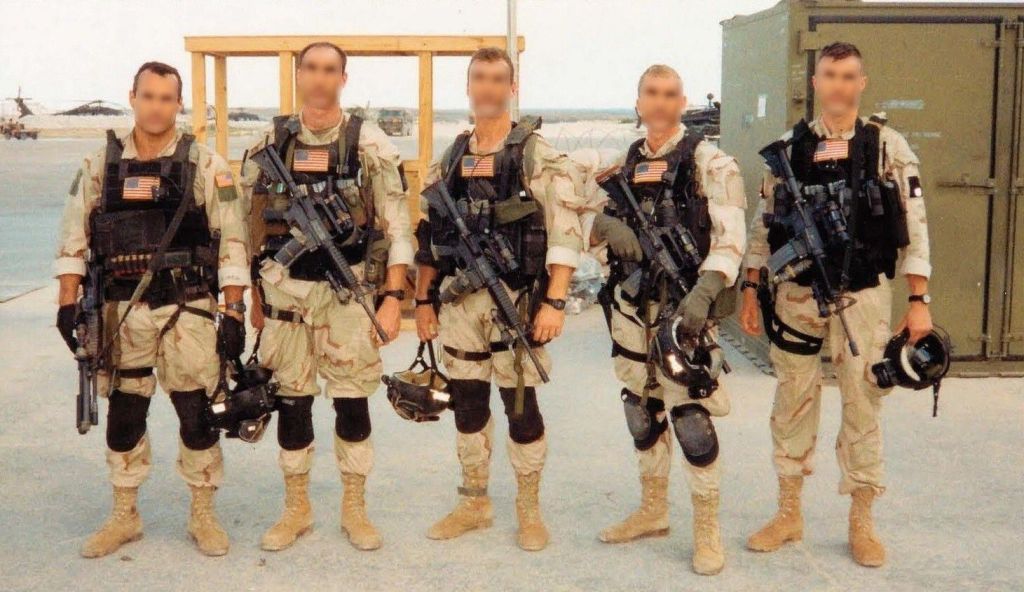
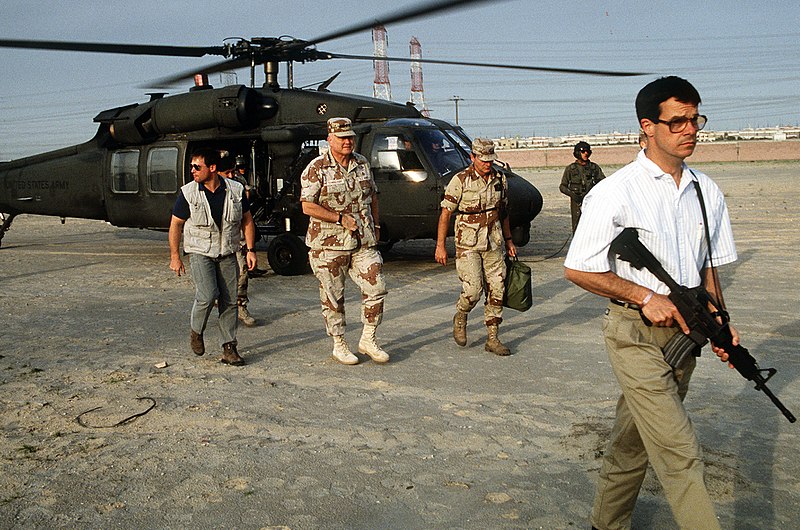
As far as I am aware, the earliest high-profile use of the CAR-15 by Delta Operators was in 1989 during Operation Acid Gambit, in Panama. This mission resulted in the rescue of American intelligence asset Kurt Muse from the Cárcel Modelo prison in Panama City. Shortly after this, in the Desert Shield/Storm days, Delta would find themselves hunting Iraqi SCUD missiles behind enemy lines while carrying these same carbines.
Oddly enough, however the most iconic portrayal of this rifle doesn’t come from the Gulf War, Iraq, WMD hunting or counter-terrorist action.
The Five-Yard Line
On October 3rd, 1993, a humanitarian mission in Somalia punctuated with low-intensity conflict between Coalition forces and local militia members erupted into what is now known as “The Battle Of Mogadishu” to westerners, and “The Day Of The Rangers” to others. As part of the still-ongoing Somali Civil War, this battle featured the most intense close-quarters fighting seen by US Forces since the Vietnam War. The main US troops involved in the fight were the men of the 75th Ranger Regiment, 1st SFOD-D, and the 160th SOAR.
A one-hour snatch and grab turned into an extremely bloody day-long gunfight in the streets of Mogadishu. By the end of the day, 100 Americans had been wounded, 16 were killed in action, and one was taken as a prisoner. The violent firefight and heroic deeds of of the Rangers, Delta, and UN personnel were later documented in the novel Black Hawk Down by journalist Mark Bowden, which was famously adapted into a film of the same name in 2001 by director Ridley Scott.
Reality vs Film
The CAR-15 in actual Delta service at this time was less of a set-in-stone spec, and more of a proof of concept that grew over time. Minor differences have been seen from one issued CAR-15 to another. A good example is the fact that many of them came with standard Government-Profile barrels (with M203 cut) and some came with “pencil” profile barrels. Either of these configurations could be considered to be the same catalogue item, the Model 723. The 723 was considered an “M16A2 Carbine”, but it featured a transitional upper receiver setup between the A1 and A2 we now colloquially refer to as the “C7” upper, first made by Diemaco/Colt Canada. It’s basically an A1 upper with a brass deflector and forward assist.
The optics at the time would usually be either the Aimpoint models 2000 and 3000 which were, at the time, mainly considered “sporting” optics with 1″ tubes and 4 MOA dots. You’ll see a few different weapon light setups from the time. Of most note would be the conversion of the Underwater Kinetics model QXL Scuba Flashlight. These would be modified in-house by Delta armorers and commo dudes to be painted black, covered in black inner tubing, set up with remote switches and affixed to the plastic handguard by hose clamps.
On the other hand, the film armorers used components that were easier to acquire at the time to assemble several screen-ready rifles, but still captured the idea of the CAR-15 authentically. There are, however, a few major differences of note. The film rifles feature A2 uppers, as opposed to the period-correct C7; technically, they would be considered the Colt Model 727. Attached to the upper’s were carry handle Weaver mounts (I’m not sure the make) with Aimpoint Comp M2s. These rifles also featured barrel clamp-mounted Surefire 6P or 660 flashlights, which was the preferred white light after the time of the Modelo-style QXL Scuba Flashlight.
You may have also noticed that the rifles seen on-camera were slightly tweaked and re-used for the film Blood Diamond starring Leonardo DiCaprio. A byproduct of both films sharing the same prop/armorer company, Bapty & Co, these rifles were wielded by the mercenaries seen in film, and for a brief scene at the films climax by Danny Archer. Does it ultimately make that much sense that a bunch of South African mercs in 1999 are rolling the same primary as literally Delta Force? Probably not, but it illustrates that they are well equipped and trained, and for characterization of the group, it fits well enough. It’s still a cool rifle, and it’s got a different paint scheme this time. It kinda makes me wish we got a rifle like this in Far Cry 2 instead of the fucked up not-quite-an-AR we did get.
Cyclical, Like The Terminator
On the initial glance, and even after some use, your impression of this rifle is probably going to be something like “it’s dated”, and “the red dot is really high up there” and you’d be right. However, consider the concepts that drive this build.
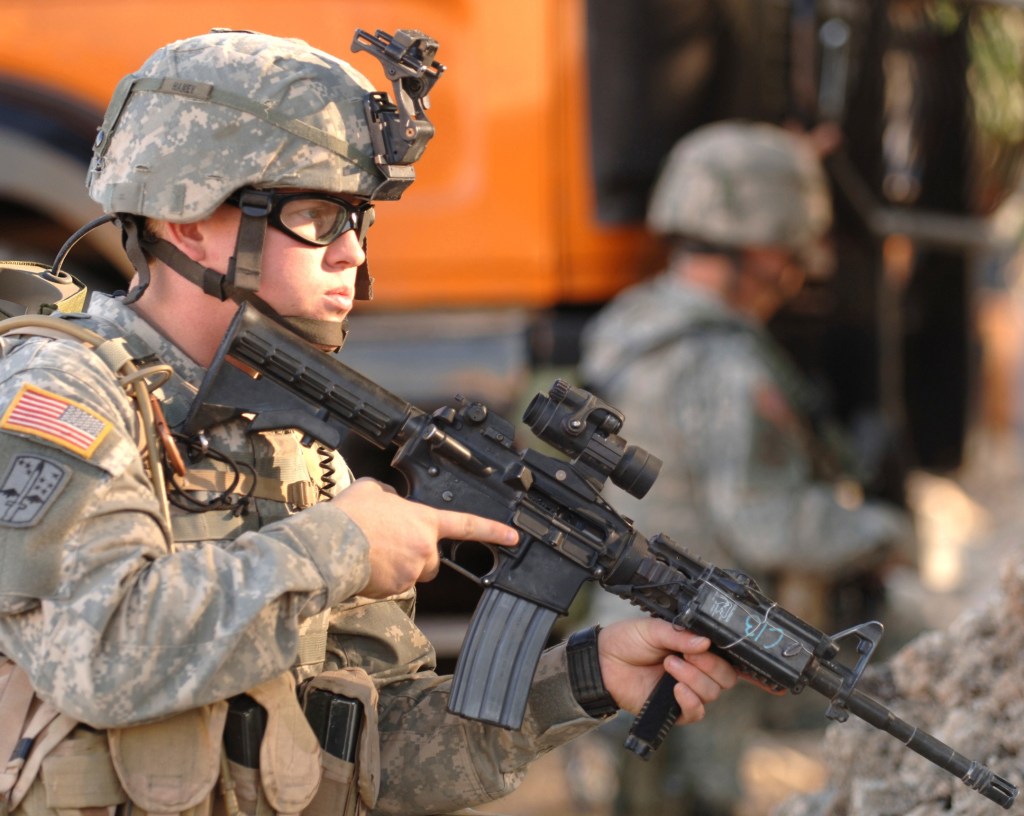
The M4 SOPMOD program in the 90’s and 2000’s was a direct evolution of this rifle due to its versatility and overall performance, but with a recognized need for more extensive accessory solutions. The most basic SOPMOD Block I rifles had flat top uppers with Aimpoints mounted lower to the gun to allow co-witnessing iron sights. They also featured the KAC RAS quad-railed handguard for easy accessory management for lights, lasers, and foregrips. The Block II rifles refined this package somewhat with updated optics, improved quad-rail, and other accessories, but the concept was still the same.
This M4 bears typical SOPMOD Block I accessories. Of note is the Aimpoint Comp M2.
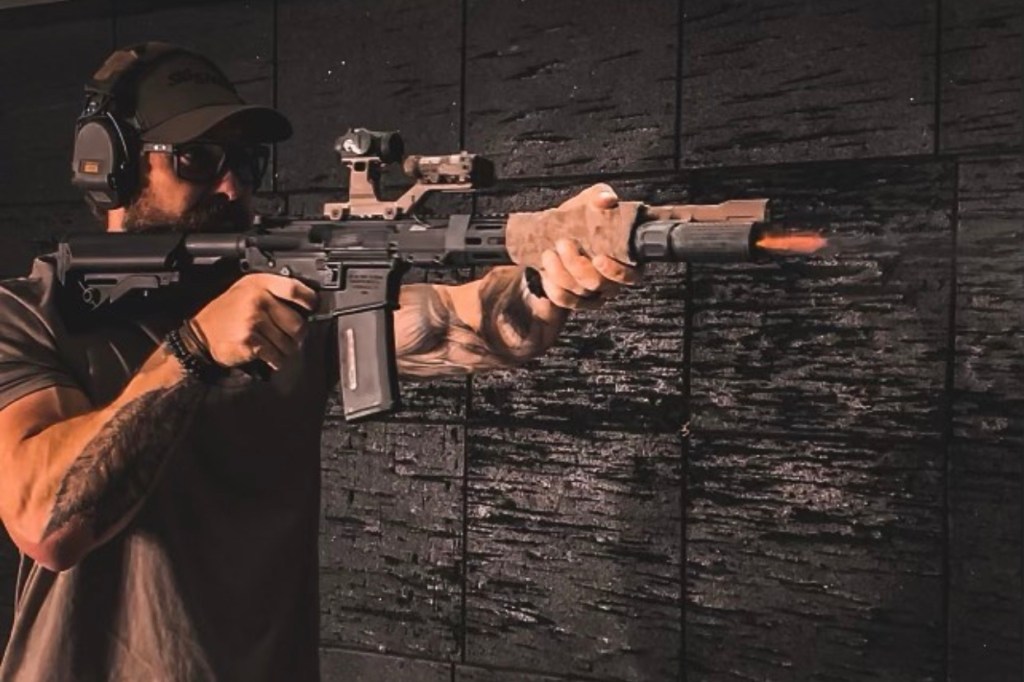
Fast forward to now. Micro red dots on 1.93″ mounts with MLOK handguards are among the most popular setups in CQB-oriented rifles. The high mounted red dot allows for a more “heads-up” shooting stance, improving situational awareness and comfort. The slick MLOK handguards replacing quad-rails cut unneeded weight on the front end.
Wait… tall red dot, slick front ends? Haven’t we done this before?
Really makes you think. Turns out we had it mostly figured out 30 years ago. Not to say improvements haven’t been made in the past few decades (this setup would not be quite so nice under NODs as modern solutions) but it is extremely interesting to see these old setups be completely justifiable in the modern age, after going through so many iterations. If I was told right now I had to give up my currently issued patrol rifle, I would not feel any worse off with my CAR-15. It is extremely rare for a “historic” design to also qualify as a practical one.
If you aren’t used to this “heads up” style, it’s gonna feel a little alien learning it on the CAR-15. The FiberLite style stock is very thin, so your cheek/chin weld is gonna have less engagement than say, an LMT SOPMOD stock. Rep it through a bit, and you’ll be back to blastin’ in no time. While you’re rolling this build, I think you’re gonna be surprised at the lightweight nature of this gun. Turns out the AR can be really fuckin’ light, we just need to stop throwing so much shit on them. Or do more pushups, whatever.
To be clear, I’m not advocating that you drop whatever your current primary is and commit to the bit of the CAR-15. I simply suggest that you might be surprised how much a “dated” build like this can hold its own in the current year. At the end of the day, fun things are fun. LARP your heart out.
My CAR-15. Build guide coming very soon.
There are many reasons I decided to do this build, and eventually this article. It’s a cool rifle. It’s an effective and simple rifle. It’s a peek into “how dad did it”. With all that being said, it’s important to remember the men responsible for getting this wheel rolling to begin with.
In the words of Larry Vickers:
SOF in general has been a catalyst for improving and reinventing things that were set in stone. SOF legend Major Richard Meadows, the man I consider to be the first Delta Operator, was involved with not only MACV SOG but was a team leader on the Son Tay Prison Raid, arguably one of the most influential SOF missions in history. Delta Force grew from that kind of outside-the-box thinking.
It was the Son Tay Raiders who first fielded a red dot sighted weapon system, and it was Delta who picked up the ball with Aimpoint sighted CAR-15s. Every Soldier, Sailor, Marine and Citizen who uses a tricked out M4 style carbine today owes a debt of gratitude to individuals like Major Meadows, the Son Tay raiders and the Operators of the Delta Force for pushing the limits of the AR style carbine into one the most successful fighting weapons in the history of the US Military.
Larry Vickers, 2013
The CAR-15 is ultimately a product of its time, driven and further developed by the men who wielded it, and the world they operated in. This rifle exemplifies the “get shit done” attitude of the guys who have been there and done that and wanted to do it even better. The knowledge today we take for granted when we build out any AR was gained only through experience, and often paid in blood.
Gothic Serpent was just one footnote on the military history of the United States, and the lessons learned in Somalia, Panama, and earlier in Grenada, Iran, and Vietnam, defined the dawn and growth of what’s now considered standard in special forces operations, and the use of the fighting rifle in general across the globe.
Take a moment to reflect on that knowledge, and know that at the end of the day, the ingenuity and experiences of a few hundred real people is what brought us here. I feel that this rifle is a fitting tribute to those men.
Delta Operator escorting General Norman Schwarzkopf as part of his PSD Team.
This article grew into something far larger than I initially intended, but it’s gonna be a good thing when it’s all shaken out. You can look forward to my build guide coming soon in Part 2.
Thank you all very much for reading, stay safe, and listen to Calliope Mori’s new album Sinderella on Spotify.